Download
1 / 14
0 likes | 16 Views
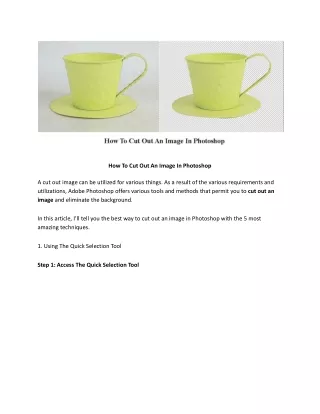
A cut out image can be utilized for various things. As a result of the various requirements and utilizations, Adobe Photoshop offers various tools and methods that permit you to cut out an image and eliminate the background.

E N D
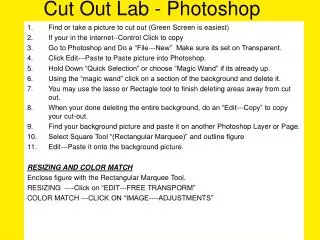
How To Cut Out An Image In Photoshop A cut out image can be utilized for various things. As a result of the various requirements and utilizations, Adobe Photoshop offers various tools and methods that permit you to cut out an image and eliminate the background. In this article, I’ll tell you the best way to cut out an image in Photoshop with the 5 most amazing techniques. 1. Using The Quick Selection Tool Step 1: Access The Quick Selection Tool
Quick Selection tool Access the Quick Selection apparatus by pressing W on your console. You can find that in the toolbar. Step 2: Ensure your Quick Selection toolbar settings are right Quick Selection tool Setting Whenever you’ve found the Quick Selection tool, a settings bar will show up at the highest point of your screen. This is the place where you can pick how the tool works.
Ensure the symbol with the plus sign is chosen so you can add another selection. Then, you have the choice to change the brush settings. What I observe works best is a half hardness and 1% dividing for the most dependable outcomes. The best brush size will rely upon the area you are attempting to choose. You can change the brush size whenever utilizing the section keys, [ or ]. Another choice is just utilizing the brush size slider in the upper toolbar. Step 3: Mark Your Selection Around Your Subject Subject Select With your Quick Selection tool settings altogether, it’s an ideal opportunity to paint your selection. Track with the edge you are needing to choose, taking into consideration not to cover the brush with your edge. Step 4: Refining Your Selection
Cut Out Image with Refining Your Selection Albeit the Quick Selection tool does very steady employment, it’s far-fetched the choice will be wonderful immediately. You might have to dispose of part of the choice, to more readily fit around your subject. To dispose of a selection made with your Quick Selection tool, just hold OPTION (MAC) or ALT (PC) to eradicate portions of a choice. You will notice how your brush tool symbol changes from a plus to a minus. If you try to avoid easy routes, you can likewise go to the instrument settings bar and click the symbol with the less image. Step 5: Apply Selection To A Layer Mask Selection To A Layer Mask When you are content with your selection, it’s an ideal opportunity to apply it to a layer mask. With your ideal layer selected and a selection active, click on the layer mask symbol. The option will consequently get moved onto this layer veil. If the outcome is something contrary to what you are needing, click on your layer mask and press COMMAND + I (MAC) or CONTROL + I (PC) to upset your layer cover. 2. Removing Images With The Object Selection Tool Step 1: Access The Object Selection Tool
Photoshop Object Selection Tool Access the Object Selection tool by pressing the W or tapping the Object Selection tool symbol in your toolbar. Step 2: Make Sure Object Selection Toolbar Settings Are Correct Whenever you have chosen the Object Selection instrument, a settings bar will show up at the highest point of your Photoshop window. This is the place where you can change the mode and choice strategy. To get your selection started, ensure the single square icon is chosen. This option permits you to make another selection. Step 3: Choose Your Selection Mode Then, select your desired mode. You have two choices: the square shape or the lasso mode. The square shape mode works a ton like the rectangular marquee tool. This selection allows you to draw a rectangular selection around your subject, and it will consequently snap to the edges. The lasso mode permits you to hand define a boundary to make a selection. Physically draw the lasso around your subject and wrap up by associating the two finishes. This selection will consequently snap to the edges of your subject.
I am inclined toward involving the square shape mode for its usability. Mess with the two modes to see which turns out best for you. Step 4: Create Your Selection Click and drag to make your choice. In this tutorial, I am making a square shape around my subject by clicking and dragging. When the entire subject is inside the square shape, I let go of the mouse and Photoshop naturally chooses the edges of my subject. It regularly works hard. Step 5: Refine Your Selection Like all programmed selections in Photoshop, they need a tad of refining. You can undoubtedly add to your choice by holding SHIFT (MAC and PC) or detract from a selection by holding OPTION (MAC) or ALT (PC). You can likewise go to the settings bar as opposed to utilizing a console alternate way. The strong twofold square addresses adding a selection, the single strong and single straightforward square addresses deducting your selection. Refine your selection by gravitating toward the edge of your dynamic choice. It will add or take away relying upon your toolbar settings. Proceed with this cycle until you’re content with the choice. Step 6: Include Selection To Layer A Mask With your selection active, select the ideal layer and add a layer cover. The selection will be consequently moved onto the layer veil and cut out your picture. If the outcome is something contrary to what you are needing, click on the layer mask and press COMMAND + I (MAC) or CONTROL + I (PC) to transform the layer cover. 3. Cutting Out Images With Channels Step 1: Access Your Channels Tab Access your channels tab by clicking on the directs tab in your layer board. If you don’t see this tab, go to WINDOW > CHANNELS.
Step 2: Select the Color Channel With The Most Contrast Click on each channel thumbnail to see which one has the most differentiation among high contrast. When you click on a channel thumbnail the picture will change from shading to highly contrasting. Relax, you did nothing off-base; this should occur. Step 3: Duplicate Selected Color Channel Select the layer channel with the most differentiation. Click and drag this shading channel down to the new layer symbol at the lower part of your channels window. You will currently have a copy of your shading channel. Step 4: Add More Contrast With Levels Adjustment Layer Click on your copied channel layer. With this layer chosen, press COMMAND + L (MAC) or CONTROL + L (PC) to raise your levels change layer. Increment your features and shadows range until your picture is high contrast with as minimal dark as could be expected. Guarantee the edges around the item are perfect and not fallen to pieces by an excessive amount of differentiation. Once content with levels changes, click OK. Step 5: Refine Black And White Areas With The Brush Tool Make sure to consider your picture a layer cover. Anything white will be apparent, whatever is dark will be straightforward. There are logical areas of white or dark where there shouldn’t be. It’s a simple fix to finishing this up, essentially get your brush tool by pressing B and setting your dynamic tone to white or dark. Paint over essential regions on a case by case basis, really trying to have the most un-dim extra as could be expected. Step 6: Make Your Channel Into A Selection Whenever you are done refining the ‘mask’ your channel duplicate has made, it’s an ideal opportunity to transform it into a selection. To actuate a selection, hold COMMAND (MAC) or CONTROL (PC) and click on your channel layer thumbnail.
Photoshop will make a selection of your channel layer because of the highly contrasting in your picture. With this active selection, click back to your layers tab. Step 7: Include Active Selection Onto A Layer Mask Now back in your layers tab, select the ideal layer you need to remove. With this layer chosen, click on the layer veil symbol to apply your selection onto a layer cover. You have effectively removed your picture! If something contrary to what you are needing shows up, select the layer mask and press COMMAND + I (MAC) or CONTROL + I (PC). This will transform your layer cover. If needed, you can additionally refine your selection by painting white or dark onto your layer cover with the brush tool. 4. Removing Images With The Pen Tool Step 1: Access The Pen Tool Access the Pen tool by tapping on the Pen tool icon or pressing P. There are a few adaptations of the Pen tool, however, we will be staying with the customary Pen Tool for this instructional exercise. Step 2: Make A Pen Path Around Your Subject To begin with, make sure your Pen tool is set to Path. Make a Pen path around your subject by clicking to add an anchor point. Move your cursor along the edge of the subject and add another anchor point. Proceed with this cycle as far as possible around the subject. Pen paths will consequently frame straight lines between two anchor focuses. That certainly won’t work for almost 100% of the pictures you attempt to remove. Not to stress, you can bend the pen path by clicking and dragging when you place another anchor point. At the point when you bend your pen path, you will see your anchor point has two control arms. These arms can be changed whenever to later refine the bend of your pen way.
You can hold COMMAND (MAC) or CONTROL (PC) and click on the control arm to adjust the two arms immediately. This will change the bend on the two sides of your anchor. Imagine a scenario in which you just need to influence one side. Hold OPTION (MAC) or ALT (PC) and snap on the edge of the control arm to change one side of the bend. Attempt to keep steady over making your pen path as precisely as could be expected. This way you won’t have to return later and refine anything. Step 3: Complete The Pen Path clipping path To finish a pen way, keep adding secures around your subject until you associate back to your starting anchor point. Step 4: Create A Selection Selection Path
With your pen path finished, you’ll have to transform it into a selection. Right-click within your pen path and select ‘Make Selection’. A selection discourse box will show up. Set your quill span to 0.5 and leave anti-aliased checked off. Then, ensure your activity is set to ‘New Selection’. Click OK. Step 5: Add New Selection Onto A Layer Mask transparent background With your selection dynamic, select the layer you need to remove. With the ideal layer chosen, press the layer cover symbol. Your dynamic choice will be consequently applied to your layer cover. So you have quite recently figured out how to remove a image in Photoshop utilizing the Pen Tool. 5. Cut Out An Image With The Magnetic Lasso Tool Step 1: Access The Magnetic Lasso Tool
Photoshop Magnetic Lasso Tool Access the tool by pressing ‘L’ or going up to the highest point of the toolbar and physically choosing the Magnetic Lasso Tool Icon. If you don’t see this tool, press SHIFT + L to push through the Lasso apparatus choices. Step 2: Make Sure Magnetic Lasso Tool Settings Are Correct Before you make a selection, you’ll need to dial in your settings. At the highest point of your window is the settings toolbar. Ensure you have the single strong square chosen to make another selection. Set your quill to one or the other 0 or 0.5 and keep anti-aliased checked. I like to keep my width at 10px, contrast at 10% and recurrence between 50-70. Go ahead and explore different avenues regarding these settings to see what turns out best for you. Step 3: Create Your Selection To make a selection with the Magnetic Lasso Tool, it’s straightforward. Click once along the edge of the article you need to remove. From that point, simply drag your cursor around the edge of your subject. Here’s the place where you’ll begin to comprehend the reason why it’s known as the Magnetic Lasso tool. As you drag the cursor, the rope device will naturally snap to the edges you are following along. If you try to avoid part of your choice, you can press erase on your console to return to the last anchor point. If you disdain the selection, press the escape key to dispose of the whole selection. Keep following around the edges of your subject until you return to the beginning stage. This will complete your selection. Step 4: Apply Active Selection Onto A Layer Mask
Selection To A Layer Mask With your selection complete, we should add it to a layer mask. Select the ideal layer you need to remove and tap on the layer veil symbol. Your active selection will be moved onto this layer mask. FAQs How do I cut out part of a picture? In Windows, you can utilize the Paint application to remove a part of a picture. You can erase or delete superfluous pieces of the picture. You can likewise fill the erased region with a fitting tone. ● Open the Paint application: Select the Windows Start menu, enter Paint in the Search box, then, select the Paint application. ● In Paint, use File > Open to open the picture document you saved in the past procedure. ● On the Home tab of the toolbar strip, Select, and afterwards, pick Free-structure selection. ● Click and drag on the picture to follow the layout of the area that you need to remove or cover. ● Press the Delete key. How do I remove part of an image in Photoshop? You can use the eraser tool to remove part of an image in Photoshop. ● Select the Eraser tool.
● Set the background colour you need to apply if you are eradicating behind the scenes or a layer with locked straightforwardness. ● In the options bar, pick a Mode setting. Brush and Pencil set the eraser to carry on like those tools. Block is a hard-edged, fixed-sized square without any choices for changing the mistiness or stream. ● A mistiness of 100% eradicates pixels. A lower mistiness eradicates pixels to some extent. ● To eradicate to a saved state or depiction of the picture, click the left section of the state or preview in the History board, and afterwards select Erase To History in the options bar. ● Drag through the area you need to delete. How do you select part of an image in Photoshop? You can easily select part of an image in Photoshop in the following ways, ● Step 1. Open both of your pictures in Photoshop. ● Step 2. Click on the Quick Selection tool. If you see the Magic Wand tool simply click and hang on the Magic Wand symbol and a submenu should spring up. ● Step 3. Utilizing the Quick Selection device, click and drag over the region of the main picture that you need to move into the subsequent picture. ● Step 4. Now you will have to refine your selection to assist it with combining all the more easily with the other picture. From the menu bar, pick Select > Refine Edge… ● Step 5. Utilize the Refine Edge discourse box to change the edge of your selection. The settings you pick will rely upon the specific picture that you’re working with. When you’re content with your selection, click “ok”. ● Step 6. You are now prepared to move the subject into the new photograph. To duplicate the choice, pick Edit > Copy from the menu bar, or just hit “control-C” (Windows) or “order C” (Mac) on your console. ● Step 7. Now open your background picture and pick Edit > Paste from the menu bar, or hit “control-V” (Windows) or “order V” (Mac) on your console. This will make another layer from the selection. ● Step 8. From the menu bar, pick Edit > Free Transform, or hit “control-T” (Windows) or “order T” (Mac) on your console. ● Step 9. Move your selection around the material by clicking and delaying the focal point of the selection. Resize your selection by clicking and delaying one of the edges of the bounding box while holding down the “Shift” key on your console to
compel the components of your selection. Whenever you’re happy with the placement of your subject in the picture, click on the check at the transform menu bar. Final Words Figuring out how to cut out an image in Photoshop is hard. It’s impossible to get around it. There’s a great deal to recollect and everything feels extremely overpowering. My recommendation is to start basic and utilize automatic selection techniques like the Quick Selection and Object Selection Tools. Whenever you’ve acquired some certainty with the pattern interaction, venture into the further developed strategies like the Pen tool and Channels. Info: https://zenithclipping.com/cut-out-an-image-in-photoshop/