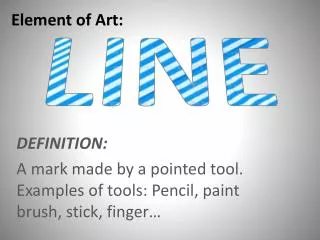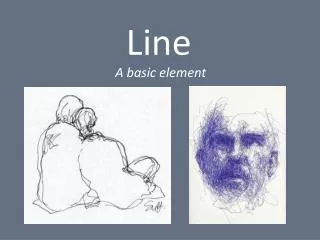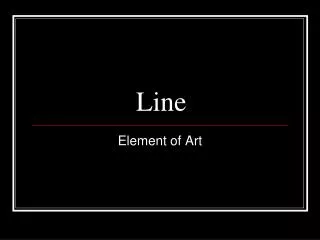
Exploring Lines & Shapes with Kandinsky
Dive into line & shape exploration with Kandinsky's non-objective art for Kindergarten students using dry materials and tempera cakes. Students will identify, create, and fill images with color in this 2-week project.

Exploring Lines & Shapes with Kandinsky
E N D
Presentation Transcript
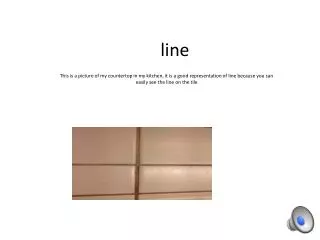
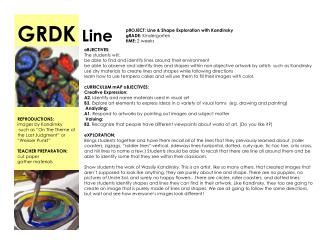
GRDK Line pROJECT: Line & Shape Exploration with Kandinsky gRADE: Kindergarten tIME: 2 weeks • oBJECTIVES: • The students will: • be able to find and identify lines around their environment • be able to observe and identify lines and shapes within non objective artwork by artists such as Kandinsky • use dry materials to create lines and shapes while following directions • learn how to use tempera cakes and will use them to fill their images with color. • cURRICULUMmAPoBJECTIVES: • Creative Expression: • A2. Identify and name materials used in visual art • B3. Explore art elements to express ideas in a variety of visual forms (eg. drawing and painting) • Analyzing: • A1. Respond to artworks by pointing out images and subject matter • Valuing: • B2. Recognize that people have different viewpoints about works of art. (Do you like it?) • eXPLORATION: • Brings students together and have them recall all of the lines that they previously learned about. (roller coasters, zigzags, “soldier lines”-vertical, sideways lines-horizontal, dotted, curly-que, tic-tac toe, criss cross, and hill lines to name a few.) Students should be able to recall that there are line all around them and be able to identify some that they see within their classroom. • Show students the work of Wassily Kandinsky. This is an artist, like so many others, that created images that aren’t supposed to look like anything, they are purely about line and shape. There are no puppies, no pictures of Uncle Sal, and surely no happy flowers…there are circles, roller coasters, and dotted lines. Have students identify shapes and lines they can find in their artwork. Like Kandinsky, they too are going to create an image that is purely made of lines and shapes. We are all going to follow the same directions, but wait and see how everyone’s images look different! REPRODUCTIONS: images by Kandinsky -such as “On The Theme of the Last Judgment” or “WeisserPunkt” TEACHER PREPARATION: cut paper gather materials
pROCESS: • dAYoNE: • Have student put name on the back of their 12 X 12 square of white paper. (Seriously do I need to add that in there?!) Then begin your paintings with many different drawing. Instruct the students to draw a large shape on their paper (or a huge hill line, or a large triangle, etc. this is the large shape on which the rest of the lesson will be based) using a pencil! • After they are done drawing this shape, have students put their pencils away. (Later we will trace this shape with black oil pastel.) Put a different bucket of dry materials at each table. Don’t worry there will be a “switching train” so that everyone will get to use each of the materials. • When they get the bucket, have them grab out a color and hold it in the air as they wait for their fellow classmates. • Continue instructing students to add lines to their work. For example: Inside the circle draw a tic tac toe line, or draw a roller coaster line from one side of the paper to the other, or draw 5 soldier lines anywhere on the paper that you like… After each line or shape creation have students put their materials away and wait for the switching train. • Move materials clock wise around the table. • When all of the materials have made it around the room, collect the buckets and pass out a black oil pastel to each table (or student if you have enough). Students are to trace their original big shape with nice dark black lines. • Before collecting the papers, have students look at each other’s papers. They will notice that though the followed the same direction, everyone’s is different! • Collect papers for the following week…when we get to paint! • dAYtWO: • Have students gather around image of Kandinsky’s work and notice that he used areas of solid colors amongst the crazy swirls of lines. • Day two is paint day. Chat about avoiding the temptation of just painting the entire paper black and simply fill the paintings with lines. Explain that it is ok to overlap what we drew in the last class. Because many of the kids will be getting the feel of painting for the first time, paint two line paintings. Get out tempera cakes and show students how they will use the paint that day, it is best when this step is led by students! Dip brush in the water (never tap it, but pet it like a puppy on the edge). vOCABULARY: lines (straight, sideways, zigzag, curly-que, rollercoaster, etc.) shapes (circle, square, rectangle, triangle, etc.) sUPPLIESaNDmATERIALS: 11 x 15” 90 lb white drawing paper (or really any size you want) 7 different dry materials (markers, colored pencils, crayons, glitter crayons, sharpie markers, thin markers, oil pastels, etc,) tempera cakes paint brushes water bowls paper towels paint shirts
Then pet the tempera cake like a puppy. There is now some beautiful paint on your brush! When you run out, repeat these steps. Be sure to clean out your brush really well in between colors…use that paper towel! • Another way to teach the correct use of a paintbrush is to tell the kids that their paint brush is like a ballerina, she is always dancing on her tippy toes. We should never see our Paint Brush Ballerina scooting across our paintings on her bottom (you know, when they scrub that paint brush into their painting, ruining the bristles and their work). I also show them how to give their paint brush a bath in the cup of water (where no splashing is allowed) and dry off on a paper towel before changing to another color. To avoid drip drops, the kids learn to wipe excess paint on the lip of the cup with this little rhyme: "if it starts to drip, wipe it on the lip...(pointing to our own lips) but not these lips!" • Send students to their seats and pass out their works from last week, as well as water bowls for each table; and a paint shirt, a paper towel, and a brush for each student. • Demonstrate to students how to use one color to fill in all the area outside of the large shape. This large area of color brings focus back to the image. Give the same color to each table and have them get started. When chatting about adding color to our paintings, I asked the kids if they would please add color to the white areas. The areas with black paint were already filled in, so no need to paint that. • Student should notice all of the ways that the different dry materials are affected by the wet paint. The crayon and oil pastel are too tough, but the marker gets weepy and blends in! As they finished up adding color, we moved on to adding patterns. This proved to be a great exercise in fine motor skills for the kids. They delicately worked that ballerina brush with stripes, dots and lines. • When they are done, collect the color of paint and have them clean out those brushes! • Work in the same manner as Day One with the dry materials. (Ex. fill in all the circles on your paper with red paint, or paint a dotted line across the paper.) This is a really organic process and is different with every class. Try to get through at least three colors in the time allotted. • Put those paintings on the drying rack and clean up that mess! • EVALUATION: Did the students …? • recall many different lines and shapes • identify lines around the room and in the work of Kandinsky • use the dry materials to create lines and shapes • use paint appropriately to add large areas of color to their work.
GRDK Lineextension • When you are done with the line paintings, this might be a fun extension activity. • First of all, talk about the difference between flat two-dimensional artwork and sculptures. After looking at some images of sculptures, talk about the ones we are familiar with (ole Lady Liberty almost always comes up) and discuss how a sculpture is something we can see (rotating body at waist for emphasis) all...the way...around. • Then tell them that we are going to create a sculpture with a bunch of straight lines (strips of paper cut 1" X 9" but sizes can vary). Ask them how to make a flat piece of paper pop out of their sculpture base(aka the bottom paper)to which they usually answer "glue!" It's at this point that I tell them that if they want their sculpture to stand, just like us, it must have feet. • I demonstrate creating a small fold at the ends of the strip of paper thus creating feet. It's there that glue is applied (to which the strip of paper always responds, "oohh, that tickles my feet! Ohhh, that glue is soo cold!" • Once the glue is applied, show the kids how to hold the paper in place on the base for about 10 seconds. • From there, demonstrate adding more paper strips to the sculpture base on top, below, behind or beside the first strip. Then turn the kids loose on their on sculptures. • The following art class, introduce more lines. Demonstrate folding a zigzag line, wrapping a strip of paper around a pencil to create a spiral and creating a loop de loop. • Also chat about how lines create shapes and demonstrate creating a circle by gluing one end of the strip to the other. With that circle, so many other shapes can be created with a pinch. Pinch the circle once and you have a teardrop! Pinch it again and you have an ellipse! One more time, it's a triangle! Anther pinch and you have a square. • From there, let the kids go nuts on their sculptures creating lines, shapes and whatever else they can dream up.