Download
1 / 10
100 likes | 109 Views
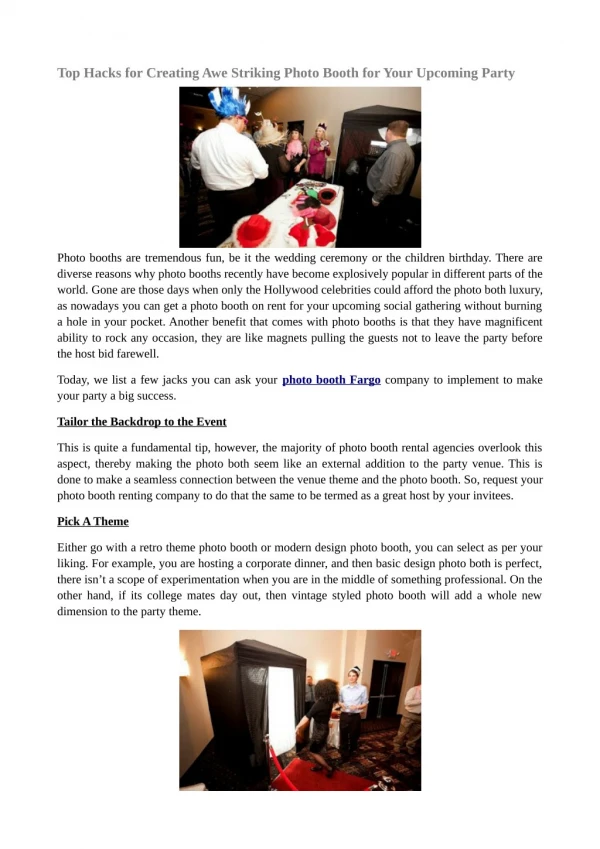
Learn how to build a Sonex-specific wing stand that provides a sturdy and convenient solution for storing wings. This DIY project is cost-effective and easy to construct.

E N D
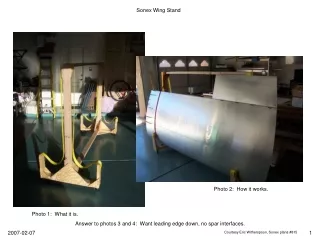
Sonex Wing Stand Photo 2: How it works. Photo 1: What it is. Answer to photos 3 and 4: Want leading edge down, no spar interfaces.
Wing Stand Concepts • This wing stand is a Sonex-specific version of a stand seen on a CH601 website. The CH601 builder claimed his was inspired by a kit sold by Aircraft Spruce. • In researching the wing stand, I also came across two other versions: • A Sonex-specific trailing-edge-down design. This does not work to store the wing with ailerons/flaps installed. • An RV-specific leading-edge-down design. This one supported the spar stub at one end, and the other end supported the leading edges. The spar end will interfere with storage with the aileron pushrod installed. Photo 3: Looks sturdy and durable, but where do the ailerons and flaps go? Photo 4: RV-specific. Looks good, where does the aileron pushrod go?
Materials list: Studs, 2x4 (1.5x3.5 actual) x 96, 5 full length or 4 plus 4 of 1 foot-long scraps. Box of 1-5/8” drywall screws. 12 of 2-½” drywall screws. 12 carriage bolts, ¼” by 2-½”. 6 regular hex bolts, ¼” by 2-½” 18 regular flat washers for ¼” bolts. 6 oversize “fender” washers for ¼” bolts. 18 stop nuts (nylock nuts, hardware-store grade) for these bolts. 2 2-½” casters, swiveling with locks. 2 2-½” casters, non-swiveling. Plywood, 2’ x 4’, 3/8” or thicker (½” shown in photos). 3333 pound capacity 27-foot ratcheting tow strap. (2” wide yellow webbing, 27 feet) Cost: About $16 for the casters, $15 for the strap, another $15-25 for the plywood, wood, and hardware, $50-60 total with tax. General notes: All construction is screws/bolts. Glue optional, if desired. All parts predrilled for screws on screw head side. No need to predrill the 2nd part if the parts are clamped together.
Cut out pieces: Plywood Pieces: c Extra a a 24” b b b b a a 48” 2 x 4 pieces: 2 x 83.5” 2 x 57” 2 x 33” Before installing the lower verticals, drill ¼” hole, 2” from the end, centered on the 3-½” width in 4 of these parts. 6 x 12”
Build “bottom end” first: 1. Install casters on 33” long cross pieces: Swivel casters, 4 carriage bolts each. Non-swivel casters, 2 fasteners each. 2 fastener holes on these hang off the part. For the most outboard carriage bolts, tighten down until head of bolt is flush with top of cross piece. Want swivel casters at one end for steering, non-swivel at the other to be able to guide the stand. 2. Install verticals on cross pieces: Vertical Part “C”, 6”x6” gusset, both sides. 16 1-5/8” screws per cross piece. 32 total. Casters already installed. Cross piece. 3. Install cross pieces to long bottom beam: turn both cross pieces over sitting on the verticals, clamp the long beam into place, install screws. 83.5” long beam, centered on top of cross pieces. Attach from below with 3 of 2-½” long drywall screws each end. End View
4. Add lower gussets “a”: Turn unit upside down. Install spacer blocks to center beam with 3 of 2-½” screws along the centerline. Install the gussets with 1-5/8” screws on either side of the centerline. Bottom end so far: 12” long spacer blocks View top looking down. Gusset A both ends. View bottom looking up.
83.5” length Gusset “c” Both ends Both sides 16 screws. 5. Construct upper “U”: 57” length 83.5” overall width 6. Add upper “U” to base: Helps to install B gussets to upper U first, hanging past end of upper U by 1.5” each. Also helps to have the gussets predrilled for screws, so upper U can then be slipped over the central lower beam with the unit on its side, and the fasteners driven in. Gusset B both ends both sides. Side view
7. Add gusset “a” to ends: Gusset A May need to trim these corners to fit between the other gussets. End view
8. Add webbing straps to assembly: Sand upper edges of “C” gussets at top of central “U” to give rounded edge for strap. Using utility knife, cut off webbing strap where it is doubled back for the hook. Then melt the cut end with a lighter to prevent unraveling. I pressed it under a piece of metal while it was still hot to give a flat end. Fold webbing strap in half. Mark this and cut the strap exactly in half, giving two segments approximately 13’ long. Melt the ends. Fold each one in half again and mark the center point. Cut about 3/8” long in the center of the strap to allow a bolt to pass through. Predrill bolt holes in the upper U, 2” in from each end. Install the fender washer on the bolts, bolts through the straps, then washer and lock nut to attach center of each strap to the upper U.
8. Add webbing straps to assembly continued: 9” of strap past this point. Doubled-over strap Bolt Fender washer Lower vertical End view Attaching the lower ends: Double the strap over for the last 9” (4-½” doubled thickness length) so it is double thickness along the vertical and horizontal faces of the lower vertical. Cut hole in 2 thicknesses of strap. Install fender washer through both thicknesses, then bolt through the lower vertical and add washer and lock nut. Wing should hang such that it does not touch any of the plywood. Straps should rest at wing rib locations, 80” apart. Straps can be added to the outside for security, though the wing will sit on its own - red strap in Photo 2.