Texture Maps
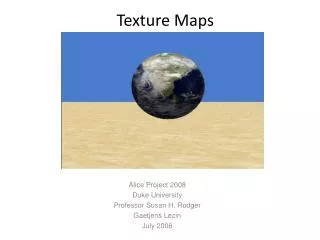
Texture Maps. Alice Project 2008 Duke University Professor Susan H. Rodger Gaetjens Lezin July 2008. Setup the scene. Open up a new Alice world with any template Click on add objects Double click on the shapes folder add 3 “sphereHighPoly” shapes into the Alice world.

Texture Maps
E N D
Presentation Transcript
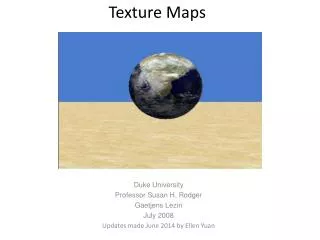
Texture Maps Alice Project 2008 Duke University Professor Susan H. Rodger Gaetjens Lezin July 2008
Setup the scene • Open up a new Alice world with any template • Click on add objects • Double click on the shapes folder • add 3 “sphereHighPoly” shapes into the Alice world Once you added the sphere use the up and down tool to move it up to get it in the air as seen here
Saving a Texture • A texture could be any picture. Alice accepts most of the common picture formats. These include JPEGS,PNG,BITMAP… • What we will do here is save a picture of the earth’s surface and use it as the texture map for an object in the Alice world • I used paint to crop the picture so that the picture doesn’t have any boarders. It is just a picture of a piece of the Earth’s surface Save the picture in a folder that you can find later when we need to import it into Alice
Import the Texture • Click on file, then import • Locate the folder where you saved your picture • Open it then click on your picture • Then click Import
Set the texture • Once we have the texture map imported into Alice the rest simple • Right click on SphereHighPoly in the object tree then choose rename • Name it planetEarth • Next click on the properties tab in the details panel • Click next to skinTexture • Choose World.NameOfYourPicture Note: Since I saved my picture under the name “Earth” It appears as world. Earth when I import it.
More Textures What we have done with this sphere can be done to almost every object in Alice • Move the earth back and we will add a new item to our world • In the shapes folder add the box shape to your world and use the resize tool to make it fairly big • The next slide will show you a relative size
Resizing the Box • Once you have add the box to your world • Place to the left side of your world and resize it with the resize tool
Adding texture to this building • Use paint to cut out a small picture of a portion of the surface of a sky scraper similar to the picture • Save it somewhere that you can find it later when we go to import into Alice
Cont.. • Click on file, then import • Locate the folder where you saved your picture • Open it then click on your picture • Then click Import
Set the texture • Once we have the texture map imported into Alice the rest simple • Right click on box in the object tree then choose rename • Name it Sky Scraper • Next click on the properties tab in the details panel • Click next to skinTexture • Choose World.building cover Note: Since I saved my picture under the name “building cover” It appears as world. Building cover when I import it.
Positioning • Move the camera back by clicking and holding on the camera control arrow that points backwards • Resize your building so it looks like a sky scraper as seen in the picture Position your sky scraper to look like the picture. Next we will add a person to our world and give the face a different texture
Last Object • We will add a flag pole and import a texture of the American flag and put it next to the building • In click local gallery then scroll over to shapes • Click and drag a pool stick into you world and drop it on the ground in front of your building • This is shown in the picture
Resize and texture • Use the resize tool to make the pole about the same height as shown in the picture compared to the building • Also Right click on poolCue in the object tree, select rename and type pole • It is not possible to effectively change just the color of the pool cue we must change it’s texture • Use paint to get a cut out of a steel surface like the picture Hint: Save pictures as a JPEG, PNG, or Bitmap: These formats are acceptable in Alice Save this piece of a steel color to a location that you choose. We will use this to set the flag pole’s texture
Cont.. • Click on file, then import • Locate the folder where you saved your steel cut out picture • Open it then click on your picture • Then click Import
Set the texture • Once we have the texture map imported into Alice the rest simple • Click on Pole in the object tree • Next click on the properties tab in the details panel • Click next to skinTexture • Choose World.steel cover Note: Since I saved my picture under the name “steel cover” It appears as world. Steel cover when I import it.
Add a Flag • To create a flag for our pole we will use paint to save the picture then drop as a bill board • Save the flag picture as a JPEG,PNG, or Bitmap • In the Alice window click File then Make Billboard • Locate the flag picture click on it then click Import
Position the Flag • Alice place in a random location • If you cannot locate the flag move the building backward . It maybe hiding the flag • Use the Move Object freely tool to bring the flag forward until it intersects the pole as shown in the picture • Move the flag up to the right height with the up and down tool
Set the vehicle property • It is necessary to make sure the flag is attached to the pole so if the pole is move the flag goes with it • Click on flag in the object tree • Click on properties • Click next to vehicle and choose pole Note: The flag can still be moved around by itself, But when the pole is moved the flag will move with it.
Try moving the flag Pole • Using the Move Object Freely Tool, move the flag pole around • Notice both pieces move together!! The End! Hope you enjoyed this tutorial :-D

