Download

1 / 25
250 likes | 378 Views
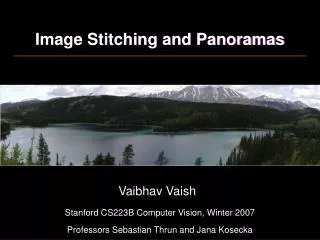
Panoramas & Joiners in PhotoShop. By Candice Foers -Bates. Panorama. Open all the composite images simultaneously in Photoshop These are the images I took to create the panorama…. Go to ‘file’ > ‘Automate’ > ‘ Photomerge ’ Leaving setting on ‘auto’, click to add open files then click OK.

E N D
Panoramas & Joiners in PhotoShop By Candice Foers-Bates
Open all the composite images simultaneously in Photoshop These are the images I took to create the panorama…
Go to ‘file’ > ‘Automate’ > ‘Photomerge’ Leaving setting on ‘auto’, click to add open files then click OK. Photoshop will do it’s thing… give it time, it’s got a lot to do.
The completed panorama which can then be cropped to straighten the edges
Save as a psd file (photoshop) which will retain all your layers,but you may also need to make the file smaller and save as a jpeg to make it more accessible to import into other programs.
Something like a railing in the foreground can create an interesting effect!
Let’s try another one. Here are the composite images used. Note: These were alltaken in portrait format(taller than wide).
Trying to follow the line of a feature can cause the edge to bow Plus, note the tone difference in some parts of the finished image – these can be corrected…
With all your layers selected, go to ‘Edit’ > ‘Auto-blend layers’
As before, you’ll have to wait for PhotoShop to do it’s thing…
Before blending above After blending below
You can of course always try tweaking the individual layers manually.
Open all the composite images simultaneously in Photoshop, like with the panoramas These are the images I took to create the joiner…
Leaving setting on ‘auto’, click to add open files then click OK. Photoshop will do it’s thing… Warning!Depending on how many images you have, this process could take some time, so please be patient. This one took over an hour!
Of course I could go through the auto-blend routine, but I like the way this looks like a real joiner, done the traditional way.
Note: This technique is only possible with Photoshop CS4 and above. This technique is not possible with PhotoShop Elements.