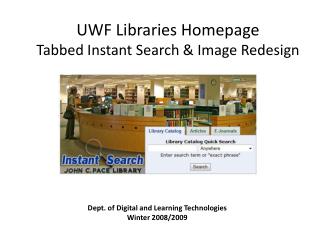
Creating a UITabBarController Application in Xcode
Learn how to create a UITabBarController application using Xcode. This guide covers the architecture of UITabBarController, detailing how to manage different view controllers and switch views based on tab selection. Step-by-step instructions show how to set up a new project, add view controllers, and customize tab bar buttons. Additionally, it explains how to connect external classes and views for a more complex application. Perfect for developers looking to enhance their iOS app with a tabbed interface.


Creating a UITabBarController Application in Xcode
E N D
Presentation Transcript
Tabbed Views UITabBarController
Controller Architecture • UITabBarController • Controls the first view that the user sees • The view controller class (and xib) that manages which view is currently being shown to the user • A tab controller switches views based on which tab button is selected. • Other controllers • Every view in the application has it’s own viewController and own xib file • Taps in the content area go to the viewController • Taps on the tab bar go to the UITabBarController.
The app • We will create a Tab bar view using Xcode • Choose File->new->project • Click on Tabbed Application then click next • Name your project, choose iPhone and Use Automatic Reference Counting, but unckeck everything else. • Choose a place to save the project. Do not create a local gitrepository. • Run the project. There should be an app with two buttons and two views.
What did you get? • Look at the file navigator: This is the controller for the first tab (it’s the root controller) The icon that shows up in the first tab bar button. This is the controller for the second tab The nibs for the two views.
View Controller • The code to establish the tab view is in the −(BOOL)application:(UIApplication *)application didFinishLaunchingWithOptions:(NSDictionary *)launchOptions { self.window = [[UIWindowalloc] initWithFrame:[[UIScreenmainScreen] bounds]] UIViewController *viewController1 = [[CMPFirstViewControlleralloc] initWithNibName:@"CMPFirstViewController" bundle:nil]; UIViewController *viewController2 = [[CMPSecondViewControlleralloc] initWithNibName:@"CMPSecondViewController" bundle:nil]; self.tabBarController = [[UITabBarControlleralloc] init]; self.tabBarController.viewControllers = @[viewController1, viewController2]; self.window.rootViewController = self.tabBarController; [self.windowmakeKeyAndVisible]; return YES; } Creates an instance of a viewController Associates the viewControllers with the tab bar
Adding Buttons • Figure out how to do this in your team.
Adding Buttons • Need a viewController with it’s nib for each new button. • Choose File−>New−>File • Choose Cocoa Touch and Objective-C class • Name the class CMPThirdViewController (subclass of UIViewController) • Make sure With XIB for user interface is checked • Choose the same folder that contains the rest of your code. • Make sure the checkbox next to Targets is checked.
Adding Buttons This is the third view controller
Adding View • Click on CMPThirdViewController.xib and make the view look like the following.
Adding icon • Create a png image that looks like the image below and call it “third.png”. Add it to the project.
Adding the tab bar button • Change CMPAppDelegate by adding the bold code below. #import "CMPAppDelegate.h” #import "CMPFirstViewController.h” #import "CMPSecondViewController.h” #import "CMPThirdViewController.h” @implementation CMPAppDelegate
Adding the tab bar button • Change CMPAppDelegate by adding the bold code below. −(BOOL)application:(UIApplication *)application didFinishLaunchingWithOptions:(NSDictionary *)launchOptions { self.window = [[UIWindowalloc] initWithFrame:[[UIScreenmainScreen] bounds]] UIViewController *viewController1 = [[CMPFirstViewControlleralloc] initWithNibName:@"CMPFirstViewController" bundle:nil]; UIViewController *viewController2 = [[CMPSecondViewControlleralloc] initWithNibName:@"CMPSecondViewController" bundle:nil]; UIViewController *viewController3 = [[CMPThirdViewControlleralloc] initWithNibName:@"CMPThirdViewController" bundle:nil]; self.tabBarController = [[UITabBarControlleralloc] init]; self.tabBarController.viewControllers = @[viewController1, viewController2, viewController3]; self.window.rootViewController = self.tabBarController; [self.windowmakeKeyAndVisible]; return YES; }
Modifying the third view controlller • Add the text in bold to CMPThirdViewController.m − (id)initWithNibName:(NSString *)nibNameOrNilbundle:(NSBundle *)nibBundleOrNil { self = [super initWithNibName:nibNameOrNil bundle:nibBundleOrNil]; if (self) { self.title = NSLocalizedString(@”Tjord", @”Third"); self.tabBarItem.image = [UIImageimageNamed:@”third"]; } return self;} Notice that you do not put the extension “png”
Adding an external class • What if we want to add an external class/view that we’ve developed somewhere else? • We’ll start by creating a new project. • Go to File−>new−>project and choose Single View Application • Name the project myBrowser
Creating the view • Click on the nib file to open interface builder. • Add two buttons, a text field and a web view. • Arrange as in the next slide
Connecting the web view • With the nib showing, control drag from the “Back” button to the web view. • Choose the goBack: method from the pop-up dialog • Next control drag from the “Forward” button to the web view • Choose the goForward: method from the pop-up dialog
Connecting the web view • Now create an IBOutlet for the textView and the webView. • …and connect them to the text field and web view
Connecting the web view • In the CMPViewController.h file add our old friend: −(IBAction)textFieldDoneEditing:(id)sender; • And then create the CMPViewController.m file: −(IBAction)textFieldDoneEditing:(id)sender{ NSString *newURL = self.theURL.text; NSURL *url = [NSURL URLWithString:newURL]; NSURLRequest *request = [NSURLRequest requestWithURL:url]; [self.theViewloadRequest:request]; [self.theURLresignFirstResponder]; } Creates an instance of a NSURL that contains a URL Creates a URL request object that can be sent to a web view. Makes the keyboard disappear Causes the webview to load the request
Connecting the web view • Finally, go to the xib file and connect the did end on exit sent event to the method that you just created in the file’s owner.
Run • Run the app; you now have a web browser! • Note that when you enter a urlyou must enter the http:// part also!
One last thing • Go back to the nib and drag an activity indicator view onto your window. • Control drag to create an IBOutlet for the activity indicator view. • Add this line as the first line in the textFieldDoneEditingmethod: -(IBAction)textFieldDoneEditing:(id)sender{ [self.activityIndicatorstartAnimating];
Run • Run the app again • When you enter a URL the activity indicator should start rotating • Notice that it does not stop. You have to make your view controller a delegate of the UIWebViewand add the method – webViewDidFinishLoad: • In this method you can stop the activity indicator from rotating: [self.activityIndicatorstopAnimating];
Adding a tab redeux • We know how to add a tab; how do we add a tab using a view controller from another project? • First go to the finder, locate the three files you need (CMPViewController.h, CMPViewController.m, and CMPViewController.xib) and drag them into the Project Navigator in Xcode • A dialog box will come up in Xcode. Make sure to check the box “copy into…” • See next slide
Adding files Drag from finder to Project Navigator
Adding files • You may have to ensure that the new files are part of the build. click on Build Phases click on Targets In the Project Navigator, click on the project name If you don’t see your new ViewController.m in the list, click on the + and add it. Only add the .m file
Adding files • Or you can go to Files−>Add Files to “yourProject” Make sure the Add to targets box is checked.
Adding the tab button • Now change the CMPAppDelegate by modifying the method below as you did before −(BOOL)application:(UIApplication *)application didFinishLaunchingWithOptions:(NSDictionary *)launchOptions
Adding the tab button • In the view controller that you just added, add this method − (id)initWithNibName:(NSString *)nibNameOrNilbundle:(NSBundle *)nibBundleOrNil { self = [super initWithNibName:nibNameOrNil bundle:nibBundleOrNil]; if (self) { self.title = NSLocalizedString(@"Fourth", @"Fourth"); self.tabBarItem.image = [UIImageimageNamed:@"first"]; } return self; } I’m reusing an icon; you could create a new one if you like.