Download
1 / 57
570 likes | 761 Views
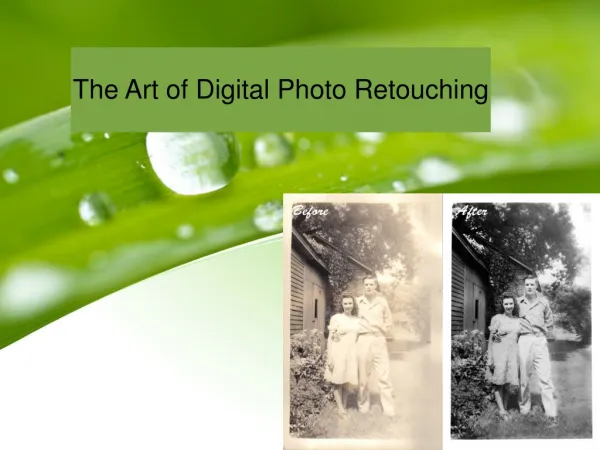
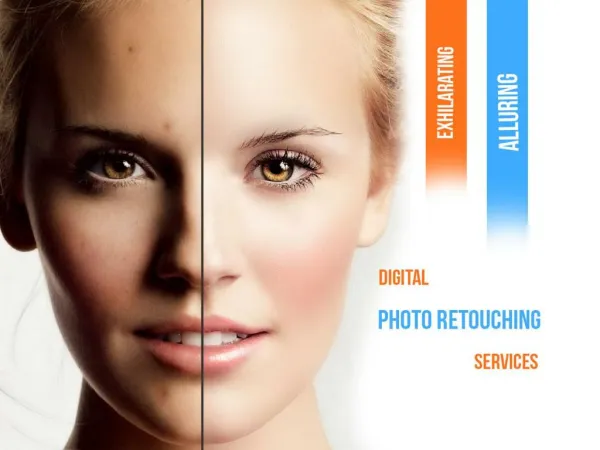
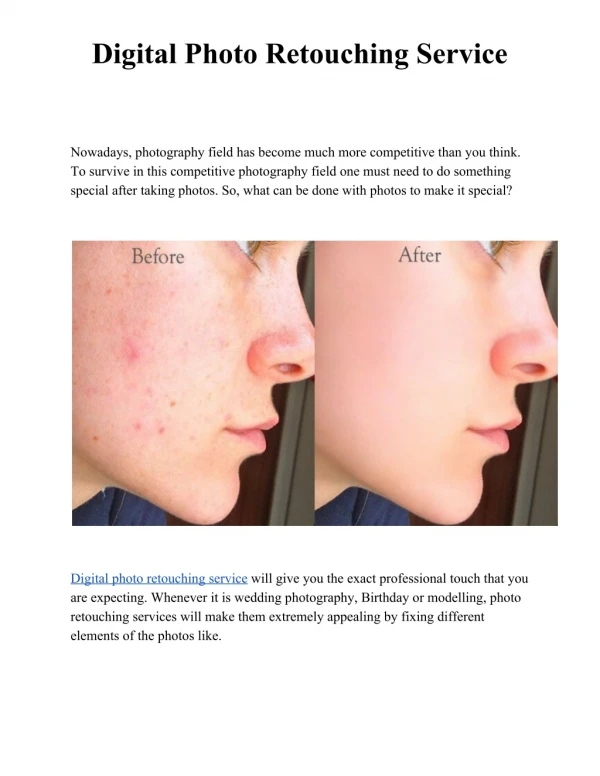
Digital Photo Retouching and Restoration. What you need Photoshop CS3 on computer Tutorial images on hard disk Better to use a mouse than the trackball No Photoshop experience required. First Off. Use WORKSPACE / DEFAULT. The Big Picture. Toolbox. Has mouseovers

E N D
Digital Photo Retouching and Restoration • What you need • Photoshop CS3 on computer • Tutorial images on hard disk • Better to use a mouse than the trackball • No Photoshop experience required
First Off • Use WORKSPACE / DEFAULT
Toolbox • Has mouseovers • Letter shows keyboard shortcut • Are additional tools not visible • Triangle indicates more tools Hidden Tools Revealed !! No Hidden Tools Hidden Tools
Toolbox (con’t) • Tools grouped by function
Tool Options Menu • Specific setting for selected tool • Has mouseovers
Palettes • Let’s clean up this a bit
Palettes In Control • Keep it simple
Setup • Settings • Palettes In Palette Well • Layers • History • Channels • EDIT / COLOR SETTINGS • RGB : use Adobe RGB (1998) • EDIT / PREFERENCES GENERAL • Redo Key: Ctrl+Z • History states: 25
Foolin’ With Brushes • FILE / NEW • Preset sizes : 4 x 6 inch • Contents : White • Select Brush from Toolbox
Foolin’ With Brushes (con’t) • Important Point – you will use this a lot later on !! • Foreground / Background Color Selector • Set to pure Black and White by little mini control • Swap Foreground and Background by curvy arrow gizmo
Foolin’ With Brushes (con’t) • Let’s do some tic-tac-toe • LAYER / NEW / LAYER • Layer for grid • Layer for game • FILE / SAVE • Note – Photoshop extension is PSD • Save in this format • Can save in JPG, GIF, etc. later
Layers are KEY !! • Always leave yourself a way out • Don’t touch original photo (layer) • Always Duplicate original photo (layer) and start work on duplicate Layers • Work incrementally • Name your Layers in a meaningful way • Layer1, Layer2 is not real useful • Can have dozens of Layers on a complex job • Build up effects and restoration as series of Layers • Layers have Blending Options and Opacity
Bail Commit Crop The Most Basic Tool - Crop • Can resize with handles • Dark area shows what you will lose • Hit RETURN to commit the Crop or use Check
Global Changes: Levels • What is the main problem ? • Is this a B&W or RGB image showing as B&W ? • Examine histogram • IMAGE / HISTOGRAM • Add Levels Layer • Work with Sliders Soccer_1894.jpg Two_Girls_1907.jpg
Global Changes: Multiply • Change Layer properties to build density • Multiply No_Density _St_Petersburg_1907.jpg
Overexposure • Severe • Go forth and Multiply • New Layer to Multiply again • Reduce opacity of last Layer if necessary Very_Bright _Girl.jpg
Underexposure • Bring out detail in shadows • New layer • Blending Mode = Screen • Repeat if necessary by duplicating Layer • Adjust opacity if necessary • Can also use New Layer of Brightness / Contrast • Not the best • Same effect applied equally to entire picture • No smart math behind it Too_Dark.jpg
Semi-Global Changes: Curves • Curves • “With great power comes great responsibility” • Make change only to small tonal regions • Ctl-click will place point on curve • Can place 14 points on curve • Can easily overdo it Woman_In_Dress.jpg
Extreme Color Cast • Bad film processing • Need to try and place a color • Several Layer types have cool little droppers for placing colors ! • What color to try and place ? • What can we do with Levels for color problems ? • Hint – need to do it three times Extreme_Green.jpg
Selection - Constrains The Tool or Effect • IMPORTANT POINT !! • Selecting an area (marching ants) means that the Tool will only work in the selected area Green Brush does not work outside of selection !
Selection – Many Selection Tools • Squares, circles, polygons, irregular shapes, color-based, contrast-based • Most Selection Tool modified by SHIFT, CTL and ALT keys • Look at menu too !
Just One Selection Tool - Elliptical • Need to pay attention to all this stuff • Feather – smoothes the transition • 0 pix • 5 pix • Style • Normal – can select ovals • Fixed Aspect Ratio – constrain to circle • Fixed Size – can specify exact size
Warp Pucker Bloat Reconstruct (local undo) Freeze Thaw Body Shop – Handle Reduction • Liquify, liquify and liquify some more • Most useful tools are at the right • Reduce handles • warp • Pucker • Revert button undos all changes • Easily make sullen teenagers smile • Bring up corners of mouth Handles.jpg
Body Shop - Major Surgery • Unflattering angle • Reduce backside • pucker • warp DanceParty.jpg
Send In The Clones • Clone Tool • Makes exact copy of selected area • Make empty layer and work on this • Especially useful for filling in large areas that have no detail • Generally • Settings = Use All Layers, Aligned • Sample frequently • Click once • Multiple clicks on same spot loses definition • Use Selection to avoid Cloning out of picture • SHIFT (and hold) will Clone in straight line Cracks.jpg
Heal Tool - Not Your Father’s Clone Tool • Examines texture, color, and luminosity of source. Merges texture from sample area into the color and luminosity of destination area. • Only works on a single layer • Spreads out effect 10-12 pixels • therefore, use hard-edged brush • Avoid alot of resampling, as is typically done with Clone Stamp • Sample once, paint often • High contrast areas difficult with Heal • May need to change Blending Mode to Lighten or Darken
Heal Away • Duplicate background layer • Reduce opacity to reduce effect of Healing on entire Layer • BETTER – can control each Heal • EDIT / FADE (Shift Ctl F) • High contrast areas are trouble • Clone instead Healing_Eyes.jpg Healing_ High_Contrast.jpg
Patch Tool • Repair a selected area with pixels from another area or a pattern • Matches the texture, luminosity, and color of the sampled pixels to the source pixels • Patch source • Select damaged area and move to good area • Patch destination • Select good area and move to damaged • Patch from pattern • Create or sample a pattern to use
Patching & Healing • Heal parts of the face • Patch from source • Select damaged section in the background, move to undamaged section • Patch from destination • Select good section of sweater and move down • Can use Free Transform to distort area • Can also use just plain old Move Patch_Tool _Sweater.jpg
The DeBlemishinator • Can use • Clone • Can destroy texture • Heal • Blending Mode of Lighten (often) • Use Hard-Edged Brush • Patch • Quick and efficient (another way of saying lazy) • Continue with eyes • Low opacity white brush Overexpose.jpg
Color Cast • Many ways to fix color casts • Image / Adjustments / Variations • Useful for prints with less extreme color shifts • Color Balance Layer • Levels Layer • Individual R, G and B • Curves • Find a white point, use dropper • Keep going !! • Add Levels Layer, Blending = Multiply • Copy background so this layer is just above original background • Zoom 200% so can see speckling. Fix by: • Filter / Noise / Despeckle • Filter / Noise / Dust and Scratches • Needs sharpening • Duplicate layer with despeckled image • Use Unsharp Mask to sharpen !! • Unsharp Mask is the best, use it often Adriana_1977.jpg
Local Changes: Masking, Gradient • Masking • Hide effects of global changes in certain regions • Add Brightness/Contrast layer • Concentrate on lightening houses, do not be concerned about sky • Using the Mask • Can add a Mask to Layers that don’t have a Mask • Black blocks layer effects, white allows layer effect • Paint • Gradient • SHIFT restrains to 0, 45 and 90 degrees SkyLine_Wrong_Exposure.jpg
Search and Rescue: Channel Mixer & Individual RGB Levels • Look at channels • Often one channel has very poor info • Blue has least info in this print • Two techniques • 1 ) Channel Mixer • Add Channel Mixer Layer, Monochrome • Increase R & G, Decrease B • Keep going !! • Add Levels layer, then save as Version1 • What we are about to do will cause us to lose our beloved starting layer. Therefore, we save the image. • Flatten Image (Layer / Flatten Image) • Convert to Grayscale (Image / Mode / Grayscale) • Dust and Scratches (Filter / Noise / Dust & Scratches), save as version 2 • 2) Levels with each R, G and B channel Tintype_AnyoneHome.jpg
Look at RGB Channels • Look at Channels for B&W prints scanned as RGB • Often one Channel is better • Activate the best channel • Image / Mode / Grayscale • Select black area above woman • Filter / Noise / Dust and Scratches • Clone out woman • Borrow nose from left girl • 1 px lasso, Ctl J to put on own layer, move, transform • Borrow left side of mouth from right girl • Transform, flip horizontal Scribble.jpg
Fungus and Mold • Fix unimportant areas using • Float and move • Select upper sky, 2-5 px feather, avoid straight lines • Copy to new layer, Blending = Lighten, move a few pixels • Try same thing on sidewalk (Blending = Lighten) • Note that lose texture • Use Dust & Scratches instead • Maintain texture Mold.jpg
Hands of Time - Wrinkles • Dodge Tool • 5-15% exposure, Midtones • Soft Light Neutral Layer • New Layer • Soft White, Fill with neutral color (50%) gray • Foreground color to white, Paintbrush with 5-15% opacity • Don’t rush either of the above, this is a very subtle process
Hands of Time – Wrinkles (con’t) • Patch & Heal • Both can make image look obviously retouched • Tip • Neither Patch or Heal Tools have Opacity adjustment • EDIT / FADE to reduce Opacity of last fix • Patch useful for quickly fixing large areas quickly Wrinkle_ Reduction.jpg
Glamor Skin Softening • Duplicate Layer • Gaussian Blur (Filter / Blur / Gaussian Blur) • 3 – 6 pixel blur • Reduce opacity • Note – very different effect obtained by doing Gaussian Blur at lower pixel setting and not reducing opacity • Erase sections that should be sharper • Eyes & eyebrows • Lips ? Skin_Softening.jpg
Body Shop: Low-Cost Rhinoplasty • Copy nose to layer • 10-20 px feather • Free Transform • Ctl click allows working on single corner • Clone out imperfections Nosejob.jpg
The Eyes Have It • WINDOWS / NEW DOC • 100% Size – will be working at high Zoom, see effects here also • Zoom 300% on left eye • Remove discolorization in whites • Brush 10% opacity, Normal, sample 3x3 pix for good color (Ctl – click) • Brush 70% opacity, Color, sample for good color • Blood vessels • Clone, 20% opacity, Lighten Eyes.jpg
The Eyes Have It (con’t) • Emphasis iris • Burn, 10% opacity, Shadows, and trace iris rim • More sparkle • Dodge to create half-moon opposite main catchlight • More color to iris • Sponge, 20% flow, Saturate
Sorry, Ansel • Need a outdoor, Ansel Adams-type scene • New Layer – Channel Mixer as shown AnselAdamsHack.jpg
Time Machine and General Fixin’ • Work on • Hands • Area below chin on left woman • White line in center • Local repair of a few wrinkles • Color • Woman on left too dark • Your choice !! Two_Grandparents.jpg
Overexposure • Moderate • Determine best RGB channel • New Channel Mixer Layer, Monochrome • 0% Red, 0% Blue, 100% Green • Change blending to Luminosity Overexpose.jpg
Backlighting • Camera meter fooled • Select luminosity • Channels, Control (Command) Click on Channels / RGB • Ctl Alt ~ or Cmd Option ~ • Select / Inverse (we are selecting non-luminosity or shadow detail) • Copy to new layer • Screen mode • New Color Balance Layer, work on flesh tones Backlighting _Underexposed.jpg
Wrong Temperature “Film” • Fluorescent lighting • New Empty Layer • Use Eyedropper to select mid- to highlight with cast • Paint Bucket Tool • Fill with offending color • Change Blending Mode to Color • Invert color (Image / Adjustments / Invert) • Reduce opacity Fluorescent_Lighting.jpg
All Torn Up • Large and upper-right piece on own layer • Background eraser • Erase pixels to transparency while maintaining edges • Settings control sharpness of edges and deleted pixels • Samples at center (+) and deletes that color inside the circle • Low tolerance limits erase to areas that are very similar to the sampled color. A high tolerance erases a broader range of colors. • Use big piece, hide all other layers, Erase top • Limits = Find Edges • Sampling = Contiguous • Protect Foreground Color = Not checked TornUp.jpg
All Torn Up (con’t) • Magic Eraser • Erases everything it can find, at once, that is within tolerance • Tolerance is as with Background Eraser • If Contiguous is not checked, it can erase pixels in the middle of the print • Use upper right piece, other layers not visible • Tolerance = 50%, Contiguous, 100% Opacity • Up to here has been saved as TornUp_02.psd • Move upper piece. EDIT / TRANSFORM / ROTATE • Add Layer Mask to upper piece. • Paint with black, paint lower edge of upper piece, move • Using a Layer Mask does not discard any information • Up to here has been saved as TornUp_03.psd
All Torn Up (con’t) • Try to fix seam with Clone • Use All Layers, Aligned = Checked • This is not working right !! • OK, then try Healing Brush • Ugh, this is not working either !! • Why ?? • Best to Flatten Image at this point • Up to here saved as TornUp_04.psd • Finish with Cloning and Healing