Download
1 / 10
100 likes | 149 Views
Learn how to write CSV files using EGL, with detailed steps on creating a page to search for orders, select data, and save it in a comma-delimited spreadsheet. This guide includes creating JSFHandler, modifying resource associations, and more.

E N D
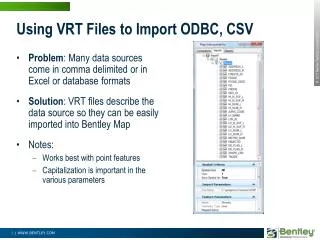
EGL .CSV (Excel) File Reading and Writing This section describes how to access .CSV (Excel Spreadsheet) files from a program. It assumes you understand EGL projects, the language, tools, build-files and statements used to access serial files.
Reading/Writing an MS-Excel Spreadsheet (.csv) File • Let’s say that you needed to write an MS-Excel spreadsheet using EGL. Here are the steps: • Create a page that allows users to search for orders from a customer. Then subsequently, select orders and write the data to a comma-delimited (spreadsheet) file. Your JSFHandler will contain: • Create a new record of type: CSVRecord – which contains a reference to a Resource Association logical name for the .CSV filespec • EGL/SQL search logic (explicit/custom SQL) • EGL write logic to read and/or write to an external file • Modify the Resource Association element for the external file • Logical (internal) name • File type • (Physical) file name/file spec • Run the page • The detailed steps begin on the next slide. Note that we will be combining writing a .CSV file with some fairly intense JSF dataTable work. Set aside the appropriate period of time Note – see the product help on the topic: CSVRecord stereotype – for detailed information on the CSVRecord properties
Writing to a .CSV File – 1 of 7 • Here’s what we’re going to be doing with this workshop This page will allow users to search for any customer’s orders Then select one or more orders To write to a .CSV file
Create the page and JSFHandler – 2 of 7 • Create a new, .JSP web page, named: csvRecPage.jsp • Copy/Paste the code in the ***Notes section of this slide – and read the comments. Observe the following: • The CSVRecord declaration – note that the screen capture is cut-off, and does not show all the comments, and code in the Notes section. • The selint[0] array is a dynamic array that will (at run-time) contain the index values of the Orders – for every row the user checks (checkbox control – U.I. technique shown on an upcoming slide) • The loop shows how to reference the selected Orders rows – by using the sel array’s occurrences - note the nested array brackets “shorthand” Ctrl/S – save your code 2. 3. 1.
Create the default dataTable and other Controls – 3 of 7 (From Page Designer/Page Data view) Drag and Drop orders on the page – and create the dataTable shown below - display all of the fields in the record – as Read/only (output) controls • Drag and Drop searchCustID – make it an Input field • Drag and Drop the getOrders() function – next to the field (by placing it inside the dotted line border) • Drag and drop the writeOrders() function – below the JSF dataTable
Modify the dataTable’s U.I. Properties – 4 of 7 From Page Designer, select the entire dataTable (note – the easiest way to select the entire dataTable is to click on a column, and press the up arrow key twice on your keyboard) From the hx:dataTableEx properties – give the control a Border: 1 From – Display options Delete Column classes:
Add a selection column to the table – 5 of 7 From - Row actions: • Click: Add selection column to the table • A new column will be added to your dataTable with a small checkbox inside it, representing the selection row action, and your Properties should show: • From: Value: click the Browse… icon • Select the sel – int[]array OPTIONAL • Click: Add selection toolbar • Click: Add selection combo box
Add a new Association to the Resource Association – 6 of 7 As you did in the previous workshop(s): - Add a new Resource Association to the EGLWeb.eglbldbuild file. - Add a File Name for orders – and point it to a systemName. - From the EGLWeb.eglbld file, select your resource associations part, as the resourceAssociations for the build file Generate your project
Run the Program – 7 of 7 • Run the page • Search for a Customer with orders • Select (check) some orders to add to the .CSV file • Click writeOrders • From MyComputer, open the .CSVFile
Topic Summary • Now that you have completed this topic, you should be able to: • List several of the EGL record types used for accessing external files • Define the purpose of the following EGL system files • Build file • Resource Association Part • Linkage Part • Create a new Resource Association to define an external file for EGL access • Write and Debug an EGL program that used external data access statements to read and write external files • Define a serialRecord for an external file