Download
1 / 62
620 likes | 639 Views
Gain insights from MCFRS Fleet Losses to master driving tasks and reduce collisions. Learn about at-risk behaviors and new proactive driving philosophy to avoid accidents. Discover the driving formula and essential daily checks for safe driving practices.

E N D
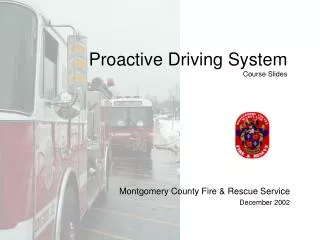
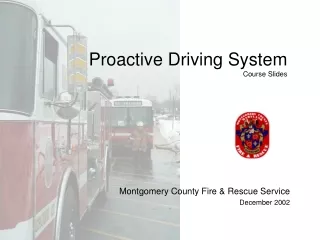
Proactive Driving SystemCourse Slides Montgomery County Fire & Rescue Service December 2002
Overview • MCFRS Fleet Losses • Starting • In-Motion • Intersections • Arriving on Scene or Stopping • Backing
MCFRS Loss Analysis 1 • Insurance • Special Causes • Driving Tasks • At-Risk Behaviors • New Philosophy
Insurance • Our collision loss experience is poor • Spending money for premium increases that could be spent for more worthwhile things • Pledged to the insurer that we would improve • Insightful loss study completed • We changed the way we understand collisions • Our driving is the loss source • Our drivers are the solution
Apparatus Type Emergency vs. Non-Emergency Driving Preventability(the other driver) Shifts Districts Stations Assigned Station vs. Detail Location of Vehicle Damage Driving Experience Multiple Collisions Time of Day Road Conditions Special Causes These loss factors are not root causes of our fleet losses
Driving Tasks Five common driving tasks were related to DFRS collisions. Collision reduction will occur by mastering these driving tasks.
At-Risk Driving Behaviors At-risk behaviors are simply actions that place the vehicle in harms way. The loss analysis revealed a distinct set of at-risk behaviors for each driving task. We have not made this connection in the past. Collision reduction will occur as more operators master the driving behaviors.
New Philosophy We drive our vehicles with the mindset that the other driver will make a mistake in the path of our vehicle. Our operators will drive proactively by adjusting their driving to avoid collisions triggered by other drivers, traffic, and environmental conditions.
Proactive Driving Formula Identify the hazard Predict outcome Decide action Execute maneuver This formula will help you avoid collisions
Starting 2 • Daily Apparatus Check • Circle Check • Adjustments • Seat Belts • Visual Scan
Daily Apparatus Check • Preventive maintenance process • Occurs at shift change • Identifies defects • Treats small problems • Mirror & seat adjustments • Documentation • Mark of a professional operator
Cab Adjustments • Passenger mirror • Driver mirror • Steering wheel height and angle • Seat height • Clean windshield • Clean windows • Clean mirrors • Rear spot lights Adjust mirrors so blind spot mirrors provide a view of the two blind spots.
Circle Check Rapid 360 degree vehicle scan • Sides • Compartments • Ladders, tools, lights, and equipment • Rear • LDH and hose • Appliances and loose equipment • Underneath • Obstructions or forgotten equipment • Wheel chock • Mark of a professional operator
E Visual Scan V Forward • Operator completes a visual scan of the field of vision before moving • Forward • Sides • Rear • Remain parked until the overhead door is 100% open • Proceed slowly through the door opening and hazard zone M T Side Rear Fire Station
Seat Belts • All crew members seated and restrained • Insurer’s hot button • Patient care providers must use their judgment during patient transport • EMS unit driver must adjust speed and space cushions when crew member is unrestrained • Zero Tolerance. Consequences imposed for failing to wear a seat belt Zero Tolerance
In-Motion 3 • Space Cushion • Visual Lead Time • Eye Movement • Cover the Brake • Safe Speed • Railroad Crossings • Hands Free • Steering • Signaling • Traffic Signs & Signals
Space Cushion How the space cushion works: Provides adequate space for braking Provides space for offensive or aggressive drivers Space Cushion
Four Second Rule What is an adequate space cushion for 60 mph on wet pavement? Up to 40 mph 4 seconds 4 seconds +2 seconds Each additional 10 mph +1 second +1 second Poor Road Conditions +1 second = 7 seconds
Stopping Time Perception 3/8 to 3/4 second Reaction 3/4 second Braking 21/2 seconds Stopping Time 4 seconds Based upon 40 mph on wet roads.
Stopping Distance How much distance do you need to stop on a dry road? 10 mph 30 feet 30 mph 113 feet 60 mph 315 feet
Stopping Distance Actual stopping distance on dry road (COF=0.70) StoppingTime (sec.) Actual Stopping Distance (ft.) Miles/Hour Feet/Second 60 90 3.5 315 40 60 3.0 180 20 30 2.5 75 10 15 2.0 30
Stopping Distance Actual stopping distance on wet road (COF=0.40) StoppingTime (sec.) Actual Stopping Distance (ft.) Miles/Hour Feet/Second 60 90 5.0 450 40 60 4.0 240 20 30 3.0 90 10 15 2.5 40
Four Second Rule Engine traveling at 40 mph Other vehicle traveling at 40 mph 4 seconds • It should take the engine 4 seconds to pass the light pole • Add 1 second for each 10 mph over 40 mph. • Add extra 1 second for poor conditions
Eye Movement V Eye Movement means keeping your eyes moving to see the fields of vision. Scan the entire field every 10 seconds. You need to monitor 3 fields of vision: Front – at least ¼ mile ahead and street sides Sides – lanes right and left next to vehicle Rear – lanes right and left behind vehicle Forward Tunnel Vision places your vehicle at-risk for a collision. Sides 1 Rear
Visual Lead Time (Forward) • Scan the horizon and look over the vehicles in front of you • Scan ahead and scan street sides • Try to see what you will encounter 12 -15 seconds from now • Helps vehicle stay in a straight line • Identify hazards and still have time to react • Intersections, crosswalks, RR crossings • Playgrounds, schools, construction, parking lots, shopping centers
Side Field of Vision • See what is happening to your sides • Use blind spot mirrors • Monitor left and side lanes • See what is about to enter your peripheral vision • See aggressive drivers before they cut in front you
Rear Field of Vision • Check your mirrors every 5 to 10 seconds • You may see a vehicle approaching too fast or following too close • You may still have time react • Check mirrors before slowing or changing your path
Mirrors Other times to check mirrors • Check mirrors before slowing down, stopping, decelerating • Check mirrors on long or steep hills • Mirrors distort the real image • Objects appear to be smaller and farther away than they really are
Railroad Crossings • 808 requires you to stop at unguarded crossings • Stop and look in both directions • Assume that guarded signals are not working • Trains travel in both directions • Wait a moment to proceed after a train passes • Assure the tracks are clear in both directions Stop for all railroad crossings
Safe Speed Posted speed limits are for ideal conditions • Do not go faster than the speed shown • Slow your speed for less than ideal conditions • Slow and smooth acceleration and stops • Maintain adequate space cushions • Your best defense is to SLOW DOWN
Steering • Hold steering wheel firmly • Two hand skill • Hands positioned at 3:00 and 9:00 • At-Risk Behaviors to avoid • One-handed steering • 360 heel turning • Elbow steering • Finger steering Hands grip steering wheel at 3:00 and 9:00
Signaling • Signal before any change of direction • Signal early • 3 blinks before lane change • Assure that your turn signal is off after the turn Signal early
Intersections 4 • Cover the Brake • Eye Movement • Reduce Speed • Intersection Stop • Jumping • Clear Space Intersections
Cover the Brake • Cover the brake when you identify a probable hazard • Approaching, entering, or traversing intersections • Remove foot from accelerator and prepare to brake • Advantages • Immediately decreases speed • Braking distance decreases • Reduces reaction & braking times • Resume speed without losing momentum
Eye Movement 1 2 4 3 5 Operator observes the entire intersection from right and left sides.
Reduce Speed • One of the best proactive driving tactics is to reduce speed • Reduces stopping distance needed • First gear or 10 mph no less than 100 feet before the intersection • Achieves stopping distance < space cushion 100 ft. E Reduce speed to 10 mph.
Intersection Stop • The Intersection Stop applies to emergency driving • Must stop at a red light, stop sign, or other intersection when you are against the right of way • Only proceed when you make eye contact with other drivers • Avoid using the apparatus as a moving roadblock – this is aggressive driving You must stop at intersections against the right of way.
Jumping • Operator depresses the accelerator hard from stopped position • Vehicle jerks or jumps forward • Hard on the apparatus • At-risk for rear-end collision • Jumps before other vehicle moves forward is a common low speed, at-fault collision • Smooth starts
Clear Space • Space cushion left while stopped • Clear space equals one-half of your vehicle length • Helps prevent low speed rear-end collisions • Adequate room to change lanes Too close. No room to maneuver right or left. Perfect. Clear space left for maneuvering.
Traffic Lights Pay attention to traffic lights • Stale green • Stop for yellow • Flashing yellow means proceed with caution • Flashing red means stop before proceeding
Zone of Confusion • Created by two or more emergency vehicles responding together • Civilian driver sees one emergency vehicle, but hears a different one at the same time • Civilian driver thinks the coast is clear but pulls into your path • Elderly and teenagers • High-risk situation • Anticipate other vehicles to make mistakes T E Confused driver sees the Engine and hears the Truck. Driver’s mind thinks there is only one emergency vehicle so driver pulls into the path of the trailing vehicle.
Zone of Confusion • Anticipate other drivers to make mistakes • Demonstrate care for other vehicles • Driving tactics for procession style response: • Travel single file. A larger vehicle leads. Leading vehicle creates a path. • Increase space cushions. NEVER travel nose to tail. • Each vehicle must traverse intersections alone and make eye contact with other drivers. Trailing vehicles NEVER bust the intersection. • Use contrasting siren tones. Switch to electronic siren with alternating or pulsing tone.
Arriving on Scene or Stopping 5 • Deceleration • Pass the Address • Spotting • Parking Brake • Wheel Chock
Deceleration • Important skill for heavy apparatus and EMS unit operators • Hard stops • Harsh on apparatus, equipment, crew, patient • Indicates operator was not scanning ahead • Smooth deceleration stops • Plan ahead • Good visual lead time – ¼ mile ahead • Pick your stopping point on horizon • Decelerate early
Stop at the Address • Common at-risk driving behavior is passing the address • U-Turns in traffic • Backing against traffic • Operator gets frustrated • Preplan & teamwork • Know block numbers • Know the cross street before the target block • Reduce speed on the target block • Use spot lights • Stop and read the map book
Spotting Consider these good habits when positioning or parking • Approach the final spot slowly • Spot for tactical advantage • Leave clear space around vehicle • Compartment doors • Walking paths • Outriggers • Drive out instead of back out • Leave access for incoming companies
Parking Brake Set the parking brake before personnel dismount the vehicle. It is good practice to set the parking brake when the vehicle is stopped for 10 seconds or longer in a non-driving situation.
Wheel Chock • Redundant parking brake • Downgrade side • Required for parked vehicles either attended and unattended • Light vehicles can use parking brake • Turn wheels toward curb • Mark of a professional operator Chock a wheel
Backing 6 • Safe Spotting • Hand Signals • Circle Check
Backing Policy Changes • Fire Administrator wants backing collisions eliminated • Zero tolerance • Minimum - Unit officer must dismount & spot • Driver must complete circle check if alone • EMS units must use spotters when patient care is not compromised