Dimension BST 1200 Additive Fabrication Printer - Setup and Usage Guide
80 likes | 200 Views
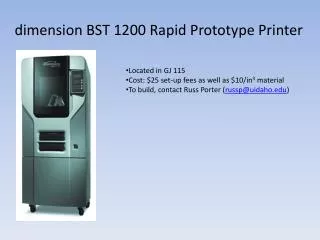
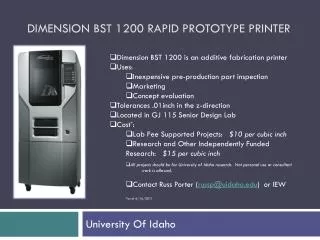
The Dimension BST 1200 is an additive fabrication printer located in the GJ 115 Senior Design Lab at the University of Idaho. It is ideal for inexpensive pre-production part inspection, marketing, and concept evaluation, with z-direction tolerances of 0.01 inch. The lab fees for supported projects are $10 per cubic inch, while independently funded research costs $15. This guide covers setup, file preparation, printing procedures, and maintenance for optimal functionality. Contact Russ Porter (russp@uidaho.edu) for inquiries.

Dimension BST 1200 Additive Fabrication Printer - Setup and Usage Guide
E N D
Presentation Transcript
Dimension BST 1200 is an additive fabrication printer • Uses: • Inexpensive pre-production part inspection • Marketing • Concept evaluation • Tolerances .01inch in the z-direction • Located in GJ 115 Senior Design Lab • Cost*: • Lab Fee Supported Projects: $10 per cubic inch • Research and Other Independently Funded Research: $15 per cubic inch • All projects should be for University of Idaho research. Not personal use or consultant work is allowed. • Contact Russ Porter (russp@uidaho.edu) or IEW • *as of 6/16/2011 Dimension bst 1200 Rapid prototype printer University Of Idaho
Setup Printer • Connect network cable to printer • Turn on RPM it takes 40 minutes to warm up • Switch is located on the front lower right of the printer • Printer status says “idle” when ready • New vs. Used Bases: • New bases can be purchased • Used bases can be used if cleaned properly
Inserting Base Plate • Place plate onto platform until it settles into place • Push the plate straight back till it stops • Lock the plate in place • Use the two rotating retainer clips
File Setup • Save part as an .stl file in parent program • Print single parts not whole assemblies • Open CatalystEX • Open the .stl file • Choose the interior and structural material setting under model interior and support fill • Check the units
Orientation Tab • Orientation can be select by hand using the rotation button for each axis • “Auto Orient” can be selected if unsure • Once oriented select “Add to Pack” • Pack Tab • CatalystEx has a default pack set-up so that the parts do not overlap • Just click and drag part to move • Fill parts in the upper right hand corner first they will print faster • NOTE: danger of Nesting see advanced .pdf
Printing • Push “Wait for Part” button on the printer after the pack is finished • Wait for prompt “Is Model Base Installed” • In CatalystEx press Print • NOTE: Cartridge contains 56.3in³ if you need more see advanced refilling the printer .pdf
Finished Product • Remove parts while still warm • Flex the board from the two opposite corners • Remove the support material from the finished product • This can be done by hand or carefully remove with a razor blade • Return the base back to the used stack
Cleaning the Printer • Vacuum out the printer (shop vac) • Check printer head for debris • Empty junk cartridge • Shut down the printer