Download
1 / 37
370 likes | 452 Views
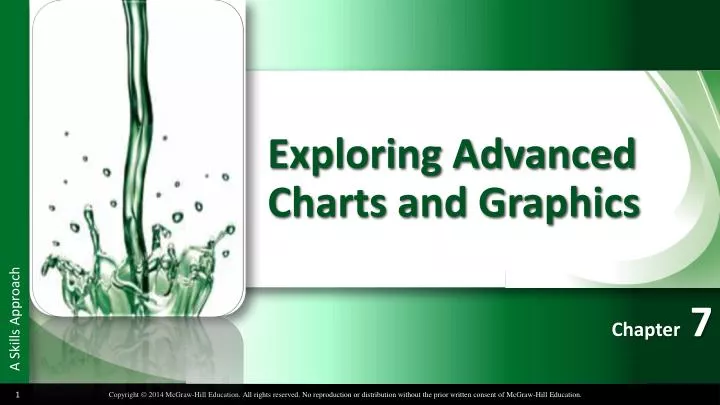
Exploring Advanced Charts and Graphics. 7. Chapter. 7. 7-1 Adding a Data Series to a Chart 7-2 Creating a Combination Chart 7-3 Formatting a Data Point or a Data Series 7-4 Emphasizing a Data Point in a Pie Chart 7-5 Formatting Other Chart Elements 7-6 Creating a Chart Template

E N D
Exploring Advanced Charts and Graphics 7 Chapter
7 7-1 Adding a Data Series to a Chart 7-2 Creating a Combination Chart 7-3Formatting a Data Point or a Data Series 7-4Emphasizing a Data Point in a Pie Chart 7-5Formatting Other Chart Elements 7-6Creating a Chart Template 7-7Applying a Chart Template 7-8Adding and Removing Trendlines 7-9Choosing the TrendlineType 7-10 Forecasting Values on a Trendline Exploring Advanced Charts and Graphics
7 7-11Changing the Sparkline Type 7-12Adding Markers to Sparklines 7-13Applying Quick Styles and Other Formatting to Sparklines 7-14Inserting a Picture 7-15Resizing and Moving Pictures 7-16Applying Quick Styles and Other Formatting to Pictures 7-17Adding a Picture to a Header 7-18Inserting a Shape 7-19 Applying Quick Styles and Other Formatting to Shapes 7-20 Capturing a Screenshot in Excel Exploring Advanced Charts and Graphics
Adding a Data Series to a Chart To add another data series to a chart: • If necessary, select the chart. • If necessary, select the chart. • On the ChartToolsDesign tab, in the Data group, click the SelectData button. • The Select Data Source dialog opens showing the current data series. • Click the Add button. Skill 7.1
Adding a Data Series to a Chart To add another data series to a chart: • The Edit Series dialog opens. Enter the appropriate cell reference for the new series name in the Series name box. You can type or click a cell reference or enter text. • Click in the Series values box and delete the default entry. Click and drag the new cell range to enter it in the Series values box or type the new cell range. Click OK. • The Select Data Source dialog opens again with the new data series added. Click OK to add the data series to your chart. Skill 7.1
Creating a Combination Chart A combination chart, or combo chart, allows you to specify different chart types for individual data series. The most common combination is a column chart combined with a line chart. To create a combination chart: • Select the data you want to include in the chart. • On the Insert tab, in the Charts group, click the Combo Chart button. • Click the chart type you want. To add a secondary axis to a combo chart: • If necessary, click the chart to select it. • On the Chart Tools Design tab, in the Type group, click the Change Chart Type button. • Click the Primary Axis or Secondary Axis check box next to the series name. Skill 7.2
Formatting a Data Point or a Data Series When you apply a chart style or color from the Chart Tools Design tab, Chart Styles group, it is applied to the entire chart. Shape Quick Styles allow you to apply a combination of formatting such as borders, rounded corners, and effects with a single command. To apply a Shape Quick Style to a data point or data series: • Select the data point or data series you want to change. • On the Chart Tools Format tab, Shape Styles group, click the More button to expand the Shape Quick Styles gallery. • Click the style you want. Skill 7.3
Formatting a Data Point or a Data Series To apply a fill color to a data point or data series: • Select the data point or data series you want to change. • On the Chart Tools Format tab, Shape Styles group, click the Shape Fill button and click the color you want. From the Shape Fill menu, you can also apply a picture, gradient, or texture to a data series or data point. To apply an outline to a data point or data series: • Select the data point or data series you want to change. • On the Chart Tools Format tab, Shape Styles group, click the Shape Outline button, and click the color you want. • To change the outline line width, click the Shape Outline button, point to Weight and select the width you want. Skill 7.3
Formatting a Data Point or a Data Series To undo changes and return the selected element to the default chart style: • Select the data point or data series to want to revert to the original chart style. • On the Chart Tools Format tab, in the Current Selection group, click the Reset to Match Style button. Skill 7.3
Emphasizing a Data Point in a Pie Chart To rotate the pie chart: • Click the pie once to select the data series, and then click the data point (slice) you want to emphasize. • On the Chart Tools Format tab, in the Current Selection group, click the Format Selection button. • The Format Data Point task pane opens to the Series Options panel. In the Angle of first slice box, type the degree of rotation for the chart (from 0 to 360) and press ↵ Enter. You can also use the Angle of first slice slider to change the rotation, but it can be difficult to select a precise angle. To explode a single data point: • If it is not already open, open the Format Data Point task pane. • In the Series Options panel, type a percentage in the Point Explosion box and press ↵ Enter. The higher the percentage of explosion, the further away the slice will appear. You can use the Point Explosion slider to change the degree of explosion, but it can be difficult to select a precise degree of explosion. Skill 7.4
Formatting Other Chart Elements To apply a WordArt style to a text chart element: • Click the chart element to select it. (Always double-check the Chart Elements box on the Chart Tools Format tab, Current Selection group to ensure that the correct chart element is selected.) • On the Chart Tools Format tab, in WordArt Styles group, click the WordArt Quick Styles button to expand the gallery. Click the style you want. Skill 7.5
Formatting Other Chart Elements You can apply individual formatting options to text elements using the other buttons in the WordArt Styles group: To change the font color, click the Text Fill button and select a color. To apply a border around each text letter or number, click the Text Outline button and select a color. To change the outline line width, point to Width and select an option. To change the line style, point to Dashes and select an option. To apply a text effect, click the Text Effects button, point to the type of effect you want (Shadow, Reflection, or Glow), and select an option. Skill 7.5
Formatting Other Chart Elements To add visual interest to the chart, try applying a gradient to the chart background. A gradient transitions the background from a dark shade to light shade of a single color. • If necessary, click an empty area of the chart to select the chart area. • On the Chart Tools Format tab, in the Shape Styles group, click the Shape Fill button, point to Gradient, and select the gradient you want. Be careful to choose a gradient that doesn’t overwhelm the chart data. Skill 7.5
Formatting Other Chart Elements To change the style of the gridlines: • On the Chart Tools Format tab, in the Current Selection group, expand the Chart Elements box and select the gridlines. • On the Chart Tools Format tab, in the Shape Styles group, click the Shape Outline button and click the color you want. • You can also change the style of the lines. Click the Shape Outline button again, point to the type of style you want to change ( Width, Dashes, or Arrows) and select an option. Skill 7.5
Creating a Chart Template Chart templates can be used to quickly apply a set of chart formatting saved from an existing chart. To create a chart template: • Right-click an empty part of the chart area and select Save as Template... to open the Save Chart Template dialog. • Excel automatically sets the location to the correct folder and the file type to .crtx. The Save as type box displays Chart Template Files (*.crtx). • Type a meaningful name for the template in the File name box. • Click Save Skill 7.6
Applying a Chart Template To use the chart template: • Select the data you want to visualize in the chart. • On the Insert tab, in the Charts group, click the Recommended Charts button to open the Insert Chart dialog. • Click the All Charts tab. • Click Templates to view the chart templates you have saved. • Click the chart template you want and click OK. Skill 7.7
Adding and Removing Trendlines • A trendline is a line that overlays the chart and shows the expected data points based on mathematical analysis of the data To add a trendline: • Click the chart once to select it. • Click the Chart Elements button that appears near the upper right corner of the chart. • Click the Trendline check box to add a checkmark. • If the chart has more than one data series, Excel will display a dialog and prompt you to select the series to which the trendline should be added. Select the data series for the trendline and then click OK. • Excel adds the trendline to the chart using the default trendline type and formatting. Skill 7.8
Adding and Removing Trendlines • A trendline is a line that overlays the chart and shows the expected data points based on mathematical analysis of the data To remove a trendline: • Click the chart once to select it. • Click the Chart Elements button that appears near the upper right corner of the chart. • Click the Trendline check box to remove the checkmark. • If the chart has more than one trendline, Excel will display a dialog and prompt you to select the series from which the trendline should be removed. Skill 7.8
Choosing the Trendline Type The trendline types you will use most often are: • Linear—Best suited to data that increases (or decreases) at a steady rate. • Exponential—Used for data that increases (or decreases) at an increasing rate. • Logarithmic—Best fits data that increases or decreases rapidly and then levels off. • Moving average—Use for data that swings up and down. Set the number of periods to average. • R-squaredvalue is a statistical measurement of the how well the data fit the trendline. Skill 7.9
Choosing the Trendline Type Once you have added a trendline, you can display its R-squared value and change the trendline type through the Format Trendline task pane: • Click the trendline once to select it. • On the Chart Tools Format tab, in the Current Selection group, click the Format Selection button to open the Format Trendline task pane. • To display the R-squared value, click the Show R-squared value on chart check box. (Scroll to the bottom of the task pane if necessary.) • To change the type of trendline, click one of the radio buttons at the top of the task pane. Notice that the R-squared value changes when you change the trendline type. • To undo any changes you have made, use the Undo command. Skill 7.9
Changing the Sparkline Type To change the Sparkline type: • Click one of the cells containing Sparklines to activate the Sparkline Tools Design tab. If necessary, click the tab. • In the Type group, click the Line, Column, or Win/Loss button to change the Sparklines to a new format. Skill 7.11
Adding Markers to Sparklines To add markers to Sparklines, first click anywhere in the Sparklines, and then check the options you want in the Sparkline Tools Design tab, Show group: • To add data point markers for every data point, click the Markers check box. • To remove data point markers, click the Markers check box again to remove the checkmark. • To add a marker for just the highest value, click the High Point check box. Skill 7.12
Applying Quick Styles and Other Formatting to Sparklines To change the Quick Style applied to the Sparklines: • Click one of the cells containing Sparklines to activate the Sparkline Tools Design tab. If necessary, click the tab. • In the Style group, if the Quick Style you want is not visible on the Ribbon, click the More button to expand the gallery. • Click a style to apply it to the sparklines. Skill 7.13
Applying Quick Styles and Other Formatting to Sparklines To change the Sparkline color or the marker color for a single Sparkline: • Click the individual Sparkline you want to format separately from the group. • On the Sparkline Tools Design tab, in the Groupgroup, click the Ungroup button. Now when you make formatting changes, only the single Sparkline is affected. • To change the Sparkline color, on the Sparkline Tools Design tab, in the Style group, click the Sparkline Color button arrow and select the color you want from the color palette. • To change the marker color, on the Sparkline Tools Design tab, in the Style group, click the Marker Color button. Point to the marker you want to change (such as High Point) and then select the color you want from the color palette. Skill 7.13
Inserting a Picture To insert a picture from a local file: • On the Insert tab, if necessary, click the Illustrations button to expand the Illustrations group. Click the Picture button. • The Insert Picture dialog opens. • If necessary, navigate to the file location. Select the file and click Insert. Skill 7.14
Resizing and Moving Pictures To resize an image by manually entering values: • If necessary, click the picture once to select it. • On the Picture Tools Format tab, in the Size group, type a value in the Width or Height box. • Press [Enter] to accept the change. Skill 7.15
Applying Quick Styles and Other Formatting to Pictures Picture Quick Styles allow you to apply a combination of formatting such as borders, rounded corners, and effects with a single command. To apply a Picture Quick Style: • If necessary, click the picture once to select it. • On the Picture Tools Format tab, in the Picture Styles group, click the More button to expand the gallery. • In the Picture Quick Styles gallery, click a style to apply it to the picture. To apply a color border to the picture or change the color of the existing border: • On the Picture Tools Format tab, in the Picture Styles group, click the Picture Border button. • Select the color you want from the color palette. Skill 7.16
Applying Quick Styles and Other Formatting to Pictures Skill 7.16
Applying Quick Styles and Other Formatting to Pictures Skill 7.16
Adding a Picture to a Header To add a picture to the worksheet header: • On the Insert tab, if necessary, click the Text button to expand the Text group. • Click the Header & Footer button. • Excel switches to Page Layout view with the center section of the header active. If necessary, click the header section where you want the picture to appear. • On the Header & Footer Tools Design tab, in the Header & Footer Elements group, click the Picture button. • Click the Browse button next to From a file to insert a file from your local hard drive or an attached drive or storage media. • Navigate to the file location. Select the file and click Insert. Skill 7.17
Adding a Picture to a Header Skill 7.17
Inserting a Shape To add a shape: • On the Insert tab, if necessary, click the Illustrations button to expand the Illustrations group. Click the Shapes button and select an option from the Shapes gallery. • The cursor changes to a crosshair. • Click on the spreadsheet to add the shape. To control the size of the shape more precisely, you can click and drag to draw the shape. All shapes, except lines, allow you to add text. To add text to a shape: • If necessary, click the shape once to select it. • Type the text. Click anywhere outside the shape to accept the text. Skill 7.18
Inserting a Shape Skill 7.18
Applying Quick Styles and Other Formatting to Shapes To apply a Quick Style to a shape: • Select the shape you want to change. • On the Drawing Tools Format tab, in the Shape Styles group, click a Quick Style in the collapsed gallery on the Ribbon. • If the Quick Style you want to use does not appear on the Ribbon, click the More button to display the gallery and click a Quick Style in the gallery to apply it to the shape. You can further adjust the look of a shape by changing the following: • Shape fill—The color that fills the object. You can choose a solid color from the color palette or fill the color with a gradient or texture. • Shape outline—The line that surrounds the shape. You can further adjust the outline of shapes by changing the color of the outline, width of the outline, and style of the outline. • Shape effects—Graphic effects you can apply to shapes including drop shadows, reflections, glows, and bevels. Skill 7.19
Applying Quick Styles and Other Formatting to Shapes To further adjust the formatting of a shape: • Select the shape you want to change. • Click the Drawing Tools Format tab. • To change the fill of a shape, in the Shape Styles group, click the Shape Fill button and select an option from the color palette. To make the shape appear transparent, click the Shape Fill button and select No Fill. • To change the outline of a shape, in the Shape Styles group, click the Shape Outline button. • Select an option from the color palette to change the color of the outline. • Point to Weight and select a thickness option for the outline. • Point to Dashes and select a dash style for the outline. • To apply a shape effect, in the Shape Styles group, click the Shape Effects button, point to a shape effect and select an option. Skill 7.19
Capturing a Screenshot in Excel To add a screenshot to a worksheet: • On the Insert tab, if necessary, click the Illustrations button to expand the Illustrations group. Click the Screenshot button. • The Available Windows section of the Screenshot gallery displays a thumbnail of each of the currently open windows. • Click a thumbnail to add the entire screenshot of that window to the worksheet. • Resize and move the screenshot image as necessary. For more information, refer to the skill Resizing and Moving Pictures. Skill 7.20
Key Terms Rounding Combination chart Combo chart Shape Quick Style WordArt Chart template Trendline Linear trendline Exponential trendline Logarithmic trendline Moving average trendline R-squared value Regression analysis Marker Sparkline Quick Style Aspect ratio Picture Quick Style Shape Shape Quick Style Screenshot