Download

1 / 2
20 likes | 170 Views
BASIC SOLDERING OF A RING BAND. 1. Using flat nose pliers bend the ends of the band so that they butt tightly without any gaps . If there are gaps you must file and reconnect ends. IF YOU ARE HAVING TROUBLE BENDING THEN ANNEAL THE METAL TO MAKE IT MORE MALIABLE. .

E N D
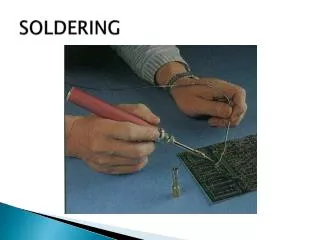
BASIC SOLDERING OF A RING BAND 1. Using flat nose pliers bend the ends of the band so that they butt tightly without any gaps. If there are gaps you must file and reconnect ends. IF YOU ARE HAVING TROUBLE BENDING THEN ANNEAL THE METAL TO MAKE IT MORE MALIABLE. (Annealing is when you heat the metal until it slightly discolors. You then quench it in water.) 2. Place the ring into the pickle for minimum of 10 MINUTES. PICKLE CLEANS THE METAL WHICH ALLOWS FOR THE PICKLE TO FLOW. Rinse after a pickle. YOU DO NOT PICKLE ANY OTHER TIME OTHER THEN BEFORE OR AFTER A SOLDER. KEEP FINGER PRINTS OFF THE METAL AFTER IT COME OUT OF THE PICKLE WASH. 3. With a small brush apply a thin line of flux to the top and bottom of the “butted” joint. On the joint apply small pieces of cut solder. REMEMBER: WHAT SOLDER YOU USE DEPENDS ON HOW MANY OTHER SOLDERS YOU INTEND TO DO. I WILL HELP YOU SOLDER WHEN YOU HAVE EVERYTHING SET UP ON A HONEYCOMB BRICK. 4. After soldering and pickling place the ring on a ring mandral and pound with a mallet to shape the ring into a circle. YOU ARE NOW READY TO FINISH THE RING (THAT MEANS POLISH)
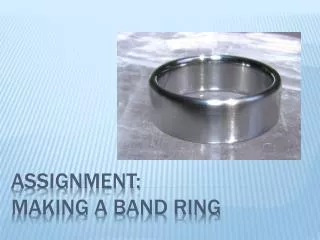
FINISHING YOUR RING- scratch free and polished. After you have shaped your ring around the mandral you are ready to finish the ring. Finish means to take the steps to make your design look polished and professional. You’ll want to get a small file and begin to remove any solder from the soldering site. Be careful not to scratch the metal. File over the joint, your goal is not to see the seam. If there are any obvious surface scratches you ‘ll want to sand them away. Choose a sandpaper appropriate for the scratch. If it is a deep scratch you might need to file or use a paper in the 220/320 range. If the scratches are mild use 400 or 600 sandpaper. Sanding under water at the sink tends to soften the impact of scratches on the metal. Next you’ll want to go to the TRIPOLI WHEEL. Tripoli has fine sand in the compound and will further sand away very small scratches. Please expect to Tripoli for at least 1 or 2 class periods. If you can still see scratches after this time period go back to sandpaper or file to remove scratches. CAUTION: YOU CAN REMOVE APPLIED TEXTURE BE GENTLE. REMEMBER TO TRIPOLI THE SIDES OF THE RING BAND. WITH LOTS OF TIME YOU CAN ROUND THE EDGES OF THE RING BAND WHICH MAKES IT LOOK VERY PROFESSIONAL. Don’t forget the inside of the ring.!!! One way to “finish” is to brush or rub the inside of the band with sandpaper. It looks clean and finished. You must rub the metal in one smooth direction for a true brushed look. USE 220 GRIT SANDPAPER. NOW YOU CAN GO TO THE ROUGE WHEEL FOR A BEAUTIFUL SHINE.