Download
1 / 48
480 likes | 631 Views
Filters and Blend Modes. Filters Filters are a method that processes the pixels of a graphic object to produce a specific visual effect Filters can only be applied to: text, buttons, and movie clip objects. Filters can be applied to objects on the Stage

E N D
Filters Filters are a method that processes the pixels of a graphic object to produce a specific visual effect Filters can only be applied to: text, buttons, and movie clip objects
Filters can be applied to objects on the Stage Filters operate by passing the image data of the object through an algorithm that filters the data in a specific way Filters can make objects glow, add drop shadows, etc. You could apply a blur filter to an object to make its edges appear softer, or may be apply a drop shadow filter to an object to make it appear as if it has a shadow behind it Remember, filters can only be appled to text, buttons, and movie clip objects
Filter Recommendations The more filters you apply to an object, the more calculation flash must create Filters may affect playback performance and will increase the file size However, lower settings will improve performance Filters available in Flash Pro but not Flash Basic Filters, set to a higher strength and quality will increase file size and this will affect your movie’s performance The more filters used, the more algorithms Flash must create, This will slow down the performance of .swf files Limit the number of filters by using them appropriately
Filters Demo Import a jpg image, File>Import To Stage Select image and convert to a symbol f8, pick movie clip Select the object on stage Select Filters located at the bottom of the properties inspector Select Add filterand then Glow Adjust the options via X, Y, Strength and Quality X, Y, Strength and Quality Add a keyframe (f6) to frame 30 Create a motion tween via the properties inspector Play the movie
Filters Preset Saving You can Save a preset of an applied filter Select instance on stage that has a filter effect already applied, make sure it is on a keyframe Click on the save button on the filters tab Select presets and then save as Enter a name for the custom preset The name now appears under the preset menu You can apply the custom preset to another object if you wish
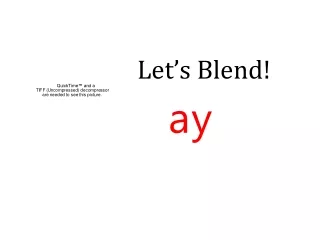
Composite Image defined A composite image is composed of more that one image, text, images and other elements Blends can be useful when compositing multiple elements in a document Blend modes produce composite images by varying the transparency or color interaction of two or more overlapping objects
Blend Mode Blends Layers Blends allow various colors of elements or objects to interact with other objects and their colors Blends are popular in programs like Photoshop The Blend Modes in Flash behaves similar to those used in Photoshop Blending works by blending the colors in overlapping buttons or movie clips
Blend Mode, apply to buttons or movie clips The blend mode is a method of making the colors of a graphic object interact with the colors of another graphic object that rests beneath it For example you could use the Lighten blend mode to make the parts of an object appear lighter in color to varying degrees depending on the colors of the objects beneath it
Blend requirements There must be 2 objects on the stage Blends can only be applied to text, buttons or movie clips Any other objects must be converted to buttons or movie clips Blend modes will not work with graphic symbols Apply via the Properties window, Display>Blending and then choose the desired blend
The Basics of Blend Modes The color(s), base object and blend object all affect the appearance of the objects on the stage
Blends practice Import a color image, like a jpg phot Create a movie and place image inside Drag two instances onto stage Select one of the movie clips and apply a lighten blend via the properties inspector Apply via the Properties window, Display>Blending and then choose the desired blend Drag movie clip with blend over other movie clip Continue to experiment with the other blend modes Multiply Darken Lighten
4 Important Aspects of Blend Modes Base Object and Color, the continuous tone appearance of the base object Blend Object and Color, the color appearance and shape of the object you are blending with the base object Result Object or Color, the visual effect of the blend mode on the base object or color. Different blends produce different effects Opacity, the amount of opacity applied to the blend mode. The blend mode and its color produce different levels of opacity. Some produce more transparency then others
Types of Blend Modes Layer, movie clips can be stacked over one another without affecting the color Darken, only replaces areas that are lighter than the blend color. Darker areas do not change Multiply, multiplies the base color by the blend color to produce darker colors Lighten, replaces only pixels that are darker than the blend color. Areas lighter than the blend color don't change Screen, multiplies the inverse of the blend color by the base color, resulting in a bleaching effect
Types of Blend Modes continued Overlay, multiplies or screens the colors, depending on the base colors Hard light,multiplies or screens the colors, depending on the blend mode color, the effect is similar to shining a spotlight on the object Difference, subtracts either the blend color from the base color or the base color from the blend color, depending on which has the greater brightness value. The effect is similar to a color negative Invert, inverts the base color
Types of Blend Modes continued Alpha, applies an alpha mask, requires that a Layer blend mode be applied to the parent movie clip, you cannot change the background clip to Alpha and apply it because the object would appear invisible Erase, removes all base color pixels, including those in the background image, requires that a Layer blend mode be applied to the parent movie clip. You cannot change the background clip to Erase and apply it because the object would appear invisible
Blend Modes demo Import to stage a color jpg image Convert into a movie clip f8 Add a second instance to the stage Select one of the movie clips and apply a lighten blend via the properties inspector Move the blend clip over the reg movie clip Create a new layer and draw a simple shape with a fill but no stroke Select the shape on the stage Press f8 to convert the symbol into a movie clip Once converted the blend option will appear in the properties inspector under Display>Blending
Blend Modes demo continued Select movie clip on the stage and hold down the Option key (Mac) or the Alt key (pc) to create a clone by dragging a copy Select Multiply from the Blending drop down menu Continue to experiment with the other blend modes like… Difference Additive Subtract Screen Darken Lighten
Blend Modes demo continued Tween the blend mode by adding keyframes and motion tweening Choose Insert > Motion Tween or Right+click (Pc) or Ctrl+click (Mac) the selection or current frame and choose Create Motion Tween from the menu. Experiment with animating the blend In addition, you can also adjust the color and transparency of any movie clip instance using the Color drop down menu in the Properties inspector
Motion Tweening Use with symbols, grouped objects, and text blocks …not with shapes …not with broken apart text turned into a shape …not with multiple items on same layer …not with boring teachers
Motion Tweening vs Shape Tweening Similarities… Both types of tweening take the location and attributes of the object from the starting keyframe and the ending keyframe, flash creates the in-between frames of the animation when tweened Both types of tweening can be scaled (use free transform tool or transform dialog box) Both types of tweening can have color changes between keyframes, see slide regarding tweening color changes
Tweening color changes To shape tween the color of text, break it apart 2x It then becomes a shape change color using the paint bucket To motion tween the color of text, convert it to a symbol and use the color effect drop down menu in the Properties inspector To motion tween the color of any symbol use color drop down menu in the Properties inspector Or to edit the original symbols color, double click on symbol or instance and use the fill color in toolbox, color mixer or color swatches
Differences…Shape Tweens Shape tweens used only with shapes Use shape tweening to morph from one shape into another shape Shape tweens cannot be created from a text block Text must be broken apart 2x into a shape before shape tweening or use motion tween for text blocks
Differences…Motion Tweens • Use motion tweening with Symbols (Button, Movie Clip, Graphic), Groups, Text blocks • Rotation and Advanced easing options available via Properties inspector • Cannot motion tween a basic Shape but can motion tween a Drawing Object Any “Shape” must be converted into a group or a symbol in order to motion tween To make grouped objects, select objects Modify>Menu> Group • Text must be used as a textblock not a shape • You cannot tween multiple items on the same layer, group them and motion tween or put on dif layers
Motion tween demo Create a symbol Drag symbol instance to stage Choose Insert > Motion Tween or Right+click (Pc) or Ctrl+click (Mac) the selection or current frame and choose Create Motion Tween from the menu. Select a new frame Move instance to a new location Select a new frame Then select instance on stage and under color for the Properties inspector select advanced, click settings, modify color and adjust alpha
Motion tween text demo Select a new frame Use the free transform tool to adjust size of instance in one key frame, skew in another key frame, and rotate in another key frame Add a new layer Create a text block using the text tool Choose Insert > Motion Tween or Right+click (Pc) or Ctrl+click (Mac) the selection or current frame and choose Create Motion Tween from the menu. Select a frame and move text to a new position
Symbols, Instances and Color Any symbol that is being used in your movie has color options available via the Properties inspector Add a symbol to a new layer Select instance On the Properties inspector select Color Color options: Brightness Tint Alpha Advanced You can customize an instance and it will not affect the original symbol You can modify each keyframe individually
Editing Multiple Frames Editing multiple frames lets you adjust a range of frames The edit multiple frames option is located at the bottom of the timeline (double solid squares) When the feature is turned on, two markers appear in the number field of the timeline Position the starting point and ending point of the markers (defines range) Represents the range of frames you will be editing at the same time Select the Modify Onion Markers icon and then the Anchor Onion option, this will lock the markers You can now move selected frames within this range Turn off by clicking on the edit multiple frames button
Editing Multiple Frames demo Draw a shape Add a keyframe to frame 24 and move to new location Add a shape tween Click on the Edit Multiple Frames icon (in timeline) Position the starting point and ending point of the markers (defines range) Select the Modify Onion Markers icon and then the Anchor Onion option, this will lock the markers Select all frames within this range Move selection to new location using selection tool Use transform tool to adjust the size of the selection Turn off by clicking on the edit multiple frames button
Motion guide A motion path allows for a tween to follow a custom path A motion path appears on the Stage showing the path from the position in the first frame of the tween span to the new position. Property keyframes are added for X and Y in the frame containing the playhead. Property keyframes appear as small diamonds in the tween span. Adjust motion path so object moves in a curving direction
Motion guide To specify another position for the object, place the playhead in another frame within the tween span and drag the object on Stage to another position. You can extend the tween by dragging out the edge or adding frames f5 The motion path adjusts to include all the positions you specify.
Motion tween with motion path demo Create a symbol and then place an instance on stage Create a motion tween(tween) Modify Motion Path so that animation moves in a curved direction Test the movie To speed up or slow down the graphic symbol, select any part of the Motion tween and in the Properties inspector, select the Ease slider You can even add a Rotate option, on the Properties inspector Test the movie Adjust settings as desired
Easing Flash offers easing options for any tween By default, when an object is tweened it will move at one, constant speed Ease out, (positive numbers) slows up the animation towards the last frame Ease in, (negative numbers) slow at beginning and speeds up towards the last frame
Advanced Easing Flash also offers advanced or custom easing controls Only available with Classic tweens Select any frame inside a classic tween in order to see a Edit button on the Properties inspector Click on Edit to open Custom Ease In / Ease Out window Click on curve and drag to change tween Adjusting curve changes a tweens velocity, speed, direction, etc You can adjust the curve of the tween using the handles Press play button to preview the changes
Advanced Easing continued Advanced easing controls allow you to precisely adjust how the tween will occur during the animation The easing controls let you control the start, end and any part of the animation You can even make an object move backwards and forwards within a single tween or create other complex tween effects On the custom Ease In / Ease Out window, tween(%) is dispayed on the Y axis and frames (# of frames) on the X axis The first keyframe is represented as 0% of the animation The last keyframe is represented as 100% of the animation
Advanced Easing continued The rate of change of the object is illustrated by the slope of the graph's curve The steeper the line, the faster the animation will play When the curve is horizontal (no slope), the velocity is zero When the curve is vertical, there is an instantaneous rate of change The vertical percentage indicates the percentage of the tween that has played
Advanced Easing demo Create a classic tween Click any frame in the tween Click on the the Edit button A graph will display your tween Position the Custom Ease In/Ease Out dialog box so that you can see your animation Next, click the Play button in this dialog box to watch the animation and then click the Stop button to end the animation Click on the tween curve and drag down Press Play button Customize to your liking If necessary, remove any extra keyframes, select them and press delete Click reset to removes all changes to your tween
Custom Ease Properties Edit an existing classic tween Tween so that the object size changes Click on the Edit button In the Property pop-up menu, uncheck the Use One Setting for All Properties check box A separate curve will be maintained for each of the five properties appearing in the menu Five properties: Position Rotation Scale Color Filter
Custom Ease Properties Scale Select the Scale property in the menu to display a curve for the scaling property Scale specifies custom ease settings for the scale of an animated object Adjust the curve in the Custom Ease In/Ease Out dialog box Press the Play button To reverse the ease in and ease out effect, move the curves in the opposite directions then play the movie again You can customize the scale of an object so it appears to be moving away from the viewer, then coming closer, and then moving away again
Color & Filters Color specifies custom ease settings for color transitions applied to an animated object Filters (the object must be a movie clip), specifies custom ease settings for filters applied to an animated object For example, you can control the ease setting of a drop shadow that simulates a change in the direction of a light source
Position & Rotation Position, specifies custom ease settings for the position of an animated object on the Stage. Rotation, specifies custom ease settings for the rotation of an animated object. For example, you can fine-tune how quickly or slowly an animated character turns around to face the user on the Stage
Exploding text example Using the Text tool, type your name Click on Modify>Break Apart Click on Modify>Timeline>Distribute to Layers Using the selection tool select a letter and click on f8 and convert to a graphic symbol Repeat this step for each layer/letter Add keyframes at frame 48 and use the freeform tool to modify (skew, scale and rotate) Select the last key frame and use the properties inspector to set the color, alpha Adjust to 0% to make transparent Motion tween all layers Set ease to 100 out (faster tweening at beginning?) Add a new folder layer and drag layers into folder
Onion Skinning demo Draw a star shape on the stage (draw in merge mode) Add a keyframe to frame 5, 10, 15, 20 Move the shape to new location for each keyframe Add a Shape tween Click on Onion Skin icon Position the starting point and ending point of the markers (defines range). Range represents the range of frames you will be editing or viewing in this case Click on Onion Skin Outlines to better see the individual frames Click on icon again to turn off
Motion tweening demo Create a symbol Drag symbol instance to stage. Turn on View>Rulers Drag a guide from the edge of the rulers to the stage, align it with the center of the symbol. Name the layer symbol Choose Insert > Motion Tween or Right+click (Pc) or Ctrl+click (Mac) the selection or current frame and choose Create Motion Tween from the menu. Move to a new location, line up using the guide
Motion tweening demo continued Create a new layer Type some text Select a particular keyframe Under Color for the Properties inspector select Advanced, Tint or Alpha Adjust settings in order to modify the instance Repeat step for several other key frames Add two more keyframes on both layers around frames 10, 30 and adjust symbol using the transform tool
Motion Tweening Text As Layers Type the word Flash on the stage Select the word and break apart 1x cmnd+b (mac) or cntrl+b (pc) With the text selected, Modify Menu>Timeline>Distribute to layers. Select each letter individually and convert it into a graphic symbol (f8) Motion tween Move each to new position
Motion Tweening Text As Layers continued Make each letter bigger, use the Free Transform Tool and adjust its alpha via Color/Alpha on the Properties inspector Set ease to 100 out (faster tweening at beginning)