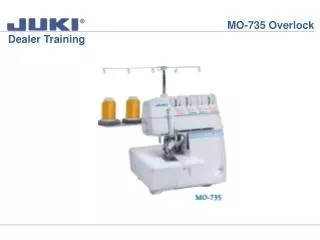
MO-735 Overlock
MO-735 Overlock. Dealer Training. MO-735 Overlock. 2-Thread Chain Stitch Lets thread the MO-735 for the 2-Thread Chain Stitch. Open the Clothplate Cover on the left side of the machine. The Chain Stitch Looper is located behind this door. MO-735 Overlock.

MO-735 Overlock
E N D
Presentation Transcript
MO-735 Overlock Dealer Training
MO-735 Overlock 2-Thread Chain StitchLets thread the MO-735 for the 2-Thread Chain Stitch. Open the Clothplate Cover on the left side of the machine. The Chain Stitch Looper is located behind this door.
MO-735 Overlock 2-Thread Chain StitchWhile this looper appears to havea lot of little parts, I can assure youthat it is very easy to thread. The looper disengages for easy threading. The illustration below shows the threading to be 1-2-3 and thatis pretty accurate. Let’s close the Clothplate Coverfor now and start setting up the machine to create a chain stitch.
MO-735 Overlock 2-Thread Chain StitchIn the accessories for the MO-735 there are two items we will need to set the machine up for the chain stitch. The Multipurpose Coverhem presser foot. The Cover/Chain Stitch Extension Plate. The spool holder for the chain stitch thread.
MO-735 Overlock 2-Thread Chain StitchLet’s remove the original presser foot. Turn handwheel towards you until needles are in the up position. Raise the presser foot. Press the catch release lever to release the presser foot. Remove the presser foot to the left.Look at the standard foot. There is a lever on the back of the foot that can be adjusted forspecific materials. When working with swimwear or similarfabric, flip the lever to the back and change the presser footpresser to L.
MO-735 Overlock 2-Thread Chain StitchThe standard presser foot is equipped with a built-in tape guide. This is a great tool for sewing tape into the shoulder or sideseams of garments created from knit fabrics. This is howthe professionals keep those seams from stretching out of shape. The Set Screw (A) can be loosened and adjusted to suit the width of the tape. The tape fits into the slot and flowsalong the guide on the foot (B). Look at the needle openings on this foot. There is space for the right 2 needles and the left 3 needlesto move through the foot. This foot is also used for applications such as the 5-threadsafety stitch.
MO-735 Overlock 2-Thread Chain StitchThere is space for the right 2 needles and the left 3 needlesto move through the foot. This foot is also used for applications such as the 5-threadsafety stitch where needles are placed in both the left frontand back right needle holders.
MO-735 Overlock 2-Thread Chain StitchLet’s place the Cover Stitch Presser foot on the machine.Place the foot under the shaft. The groove in the shaft should line up exactly withthe presser foot pin. Lower the presser foot and the foot should engage automatically. Look at the Cover Stitch Foot. The left and right sides of the foot can adjust to the heightof the fabric independently.Look at the needle opening on the foot.
MO-735 Overlock 2-Thread Chain StitchThere is only space for the three needles used in the Left needle holder. This foot can only be used for the Chain Stitch and 2 or 3 thread Coverhem stitches.
MO-735 Overlock 2-Thread Chain StitchFor the Chain Stitch and Coverhem stitches, we need toremove the Knife Guard and place the Chain Stitch Extension Table on the looper cover. Open the looper cover. Remove the Knife Guard by pulling it gently to the left.
MO-735 Overlock 2-Thread Chain StitchAttach the Chain Stitch Extension table byholding it at a slight angle to the looper cover. Position and hold both the cover and tableparallel.Push plate to the right until it clicks into place.
MO-735 Overlock 2-Thread Chain Stitch To place the spool holder for the chain stitchlift the foam pad (A), slide the guide tabs (C)of the spool holder (B) into the guide of the Upper side of the spool holder from the leftto right position (E) and press until tab (D)clicks into place (F).
MO-735 Overlock 2-Thread Chain Stitch To disengage the Upper Looperturn the handwheel to bring the Needles to the lowest position. Open the Looper Cover. Press the release lever back. The Upper looper is in active.
MO-735 Overlock 2-Thread Chain Stitch Let’s start setting up the machine for the Chain Stitch. Upper knife should be in the up or disengaged position.Place a needle in the front left holder in the positionmarked (R) for right.
MO-735 Overlock 2-Thread Chain Stitch Open the Cloth Plate Cover. Place the Brown thread on the Chain Stitch spool. Bring thread up and through antenna guide 1. Pull thread behind antenna and place the thread inguide 2. Pull thread towards base of machine and thenplace thread through guide 3. Pull thread through the open hinge area of theCloth Plate Cover.
MO-735 Overlock 2-Thread Chain Stitch Let’s look at threading the Chain Stitch Looper in steps. Step 1: Place the thread Into the guide near the hinge of the Cloth Plate Cover.Step 2: Place thread into Chain Stitch Tension. Tension should be set on M.
MO-735 Overlock 2-Thread Chain Stitch Follow the purple marked guides.One area that tends to bemisunderstood on the threadingchart is the loop around the rotary take-up. Place the thread in the guide.Loop back around and insert thread in the 1.4 inch opening on the metalguide. Do not attempt to force thread under this metal piece.
MO-735 Overlock 2-Thread Chain Stitch Once you have looped around the guideYou will see how the thread lays againstthe take up lever. Next guide is on the back of the metal guide plate. Do not pass thread through the hole inthe guide plate. If threaded properly, the thread should beready to just lay in the guide.
MO-735 Overlock 2-Thread Chain Stitch Now we need to thread the looper.Turn the handwheel on the machine so that theneedle bar is in the lowest position. Press the looper auto threader white buttonup towards the chain looper and gentlypull the looper downward.
MO-735 Overlock 2-Thread Chain Stitch For the chain stitch there is one extra guide that needs tobe threaded. Thread the lower looper eye from back to front. Then draw thread up to the top looper eye. Press looper button upwards to engage the looper. Leave a thread tail of approximately 3 inches.
MO-735 Overlock 2-Thread Chain Stitch Hold the thread tail from the chain stitch looper. Raise the needle bar to the highest position. Thread the needle using the Yellow tension guides. When you reach the guides above the needle the placement of the thread will beslightly different than what we have used Previously. Thread the guides as shown here andthen thread the needle.
MO-735 Overlock 2-Thread Chain Stitch Let’s change the machine settings. Yellow Needle Tension should be 4Differential feed should be N Stitch length should be 2.5 The Upper Knife is disengaged. Place two layers of cotton fabric with wrong side facing up, under the presser foot and begin sewing at a slow to medium speed. If you have the brown thread pulling to the topdecrease the needle tension. If the chain stitch thread is looping, check that you have threaded the looper properly.
MO-735 Overlock 2-Thread Decorative Chain Stitch Clip the needle thread close to the eye of the needle. Click the brown looper thread and then chain off until all thread has been removed from the machine. There is a spool of poly floss in your sewing kit. Please locate that now. Adjust the chain stitch tension to L. Thread the Chain Stitch Looper with the poly floss.
MO-735 Overlock 2-Thread Decorative Chain Stitch Thread the needle using the Yellow tensions. Change the Stitch length to 3.0.Place one piece of cotton fabric with wrong side facing up under the presser foot and begin sewing at a slow to medium speed. The poly floss will be stitched on the underside of the fabric. The chain stitch can be used for practical or decorative purposes.You can even create a mock quilt stitch usinginvisible thread and changing the tensions.
MO-735 Overlock Triple Cover Stitch or 4-Thread Cover Stitch The 4-Thread Cover Stitch uses three threads in the needles and one in the chain looper. To set the machine up for this stitch, open the Cloth Plate cover. Remove the thread from the small pigtail guide on thelooper. Raise the presser foot and chain off until all yellow thread is removed from the machine. Clip yellow needle thread above the eye of the needle.
MO-735 Overlock Triple Cover Stitch or 4-Thread Cover Stitch Place needles in the Center and RightNeedle positions. There will be three needles in thefront left needle holder.
MO-735 Overlock Triple Cover Stitch or 4-Thread Cover Stitch Use the chart at the front of the Overlock Notebook to thread the needles. Change the Stitch Length to 3.Set the tensions as noted on the threading chart.
MO-735 Overlock Triple Cover Stitch or 4-Thread Cover Stitch Instead of threading the blue threadthrough the upper looper follow thethread path for the Green needlethread.
MO-735 Overlock Triple Cover Stitch or 4-Thread Cover Stitch Thread the guides above the needlesas shown here. Hold the thread tails for the needle andchain looper thread. With the presser foot in the up position, slowly chain off stitches.
MO-735 Overlock Triple Cover Stitch or 4-Thread Cover Stitch Locate the one of the cotton fabric pieces that have been folded to create a hem. Place fabric under presser foot so that theright side is facing up and the folded edgeis lined up with the 2.5 marked line on theCover Extension Plate or Table. Begin sewing at a slow to medium speed. Your finished sample should look similar to this. The raw edge of the hem is finishing and a triplecover hem has been created.
MO-735 Overlock Triple Cover Stitch or 4-Thread Cover Stitch Look at the stitching on the back of thestitch sample. If the needle thread (green, blue or yellow) islooping on the bottom, tighten the thread tension for that needle. Look at the top cover stitching. If you see any of the looper (brown) thread on top, loosen the needle tension.
MO-735 Overlock Wide and Narrow Cover Stitch You can create different cover stitch effects by removing one of the needles. To create a wide cover stitch, clip the thread above the center needle position. Remove the needle. Locate one of the cotton pieces that have beenfolded to create a hem. Place fabric under presser foot so that the right side is facing up and the folded edge is lined up with the 2.5 marked line on the Cover Extension Plate or Table. Begin sewing at a slow to medium speed. Your finished sample should look similar to this.
MO-735 Overlock Wide and Narrow Cover Stitch You can create different cover stitch effects by removing one of the needles. A narrow cover stitch can be created using: Left and Center needles or the Center and Right needles. The Narrow Cover Stitch can also be used to createpintucks in lightweight fabrics.
MO-735 Overlock 5 Thread Overlock At the front of the training notebook there is a chart for the Interlock threading. Please locate that chart. This is a combination of the Chain Stitch and 3 Thread Overlock stitches. Thread the machine so that you can create this stitch. Remember to remove the Cover Extension Table and place the knife guard back on the looper cover.
MO-735 Overlock 5 Thread Overlock Remember to engage the Upper Looper.Turn the handwheel to bring the needlesto the lowest position. Open the looper cover. Pull the release lever forwards until it snaps into position. The upper looper is now active.
MO-735 Overlock 5 Thread Overlock Change the presser foot on the machine to thestandard presser foot. Replace or add needles. Thread the machine and start sewing. Your finished sample should look similar to this.
MO-735 Overlock The MO series has additional accessory presser feet that when added to the stitch functions, can greatly increase the creative potential of the Mo 735 and Mo 734-DE.