The best way to keep your installation profitable
220 likes | 481 Views
The best way to keep your installation profitable. PRESENTATION. MONACO. Created in 1990, 3X Engineering is one of the world leader in : Composite Repair Online Leak Sealing Pipe on support repair Specific Engineering Polymer Solution

The best way to keep your installation profitable
E N D
Presentation Transcript
PRESENTATION MONACO Created in 1990, 3X Engineering is one of the world leader in : • Composite Repair • Online Leak Sealing • Pipe on support repair • Specific Engineering Polymer Solution Based in Monaco, 3X Engineering has Distributors and Affiliates around the World.
DISTRIBUTORS LOCATION 3XENGINEERING MONACO 3X INDIA
3X - SERVICES • ENGINEERING SURVEY • INSTALLATION ON SITE • TRAINING
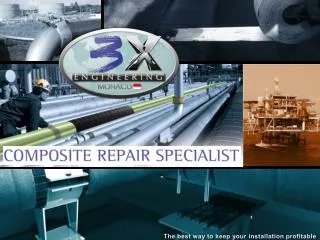
COMPOSITE REPAIR • REINFORCEKIT 4D OIL & GAS REINFORCEKIT 4D
REINFORCEKIT 4D OIL & GAS REINFORCEKIT 4D
REINFORCEKIT 4D • Complying with ISO/TS 24-817 & ASME PCC-2 • Thickness loss: INTERNAL or EXTERNAL CORROSION • Permanent repairs • Pinhole repairs • From -20°C to +250°C • All Diameter OIL & GAS REINFORCEKIT 4D
TRAINING REINFORCEKIT®-4D-Subsea on a straight pipe
TRAINING REINFORCEKIT®-4D-Subsea on a straight pipe General method to implement a REINFORCEKIT®-4D-S : - Make sure you are at the right defectplace • Read the 3X procedure to check the length to fix • Thanksto a measuring tape, define the correct area to bereinforced • The REINFORCEKIT® 4D must becentered over the defect • Delimit the area usingstraps or ropes • Surface preparation by sandblasting : • SA 2½ • At least 60µm roughthness • Rebuilt the surface using 3X subseafiller • Apply the primer before the filler’scuring • Pre-impregnate the tape by the 3X subsearesin • Wraprespecting the gap and tightening the tape as strong as possible
TRAINING REINFORCEKIT®-4D-Subsea on a straight pipe Define the correct area to be treated • Define the surface that have to befixed as below • The repaired area must becentered on the defect Lrepair Lrepair/2 Lrepair/2 Ldefect/2 Ldefect/2
TRAINING REINFORCEKIT®-4D-Subsea on a straight pipe Surface preparation by sandblasting Requirements : * Rougthness > 60 µm * SA 2.5 standart
TRAINING REINFORCEKIT®-4D-Subsea on a straight pipe How to apply the 3X filler ? • Mix the two components of the filler • Applystrongly the filler onto the surface using a spatula or the hand • Filler has to beapplied by thinlayers • Do not let anycorroded area free of filler • Createa domewith the filler • Applythe primer before the filler has cured
TRAINING REINFORCEKIT®-4D-Subsea on a straight pipe P3X32 primer application • Primer has to beappliedusing a 2 components gun to ensurepropermixing ratio • The primerizedpipesection shall be slightly whiteonce covered.
TRAINING REINFORCEKIT®-4D-Subsea on a straight pipe Kevlar wrapping Green thread issewn on the tape to help the worker to wrapcorrectly Respect the thread
TRAINING REINFORCEKIT®-4D-Subsea on a straight pipe How to wrap the aramid tape ? • The aramid tape iswrappedhelicoidally over the pipe • In order to move forward the tape, the new lap must cover50% of the previous one Note : It iseasier to unroll the tape as shown on the picturebelow :
TRAINING REINFORCEKIT®-4D-Subsea on a straight pipe How to wrap the aramid tape ? • The tape ispre-impregnated by 3X team on board • Place the aramid tape at the beginning of the area to befixed • Overlapthe first layer • Wrapthe tape helicoidallyrespecting the gap • Tightenstrongly the tape on the pipe aftereachhalf tour (to avoidfolds) • Repeatthe previousstepsuntil the tape isfinished
TRAINING REINFORCEKIT®-4D-Subsea on a straight pipe How to start a new tape ? • Use the dedicatedgrid to stick the new tape togetherwith the previous one :
TRAINING REINFORCEKIT®-4D-Subsea on a straight pipe Wrap not only in one way : When arriving at the end of the repair length : wrap helicoidally in the other way always keep the same direction of rotation permits to cross the directions of fibers increases the REINFORCEKIT®-4D resistance to pressure Wrapping way Wrapping way
THANK YOU 9 Avenue Albert II 98 000 MONACO + 377 92 05 79 81 info@3xeng.com www.3xengineering.com