Download
1 / 84
840 likes | 1.14k Views
Microsoft Office 2010. Office 2010 and Windows 7: Essential Concepts and Skills. Objectives. Perform basic mouse operations Start Windows and log on to the computer Identify the objects on the Windows 7 desktop Identify the programs in and versions of Microsoft Office

E N D
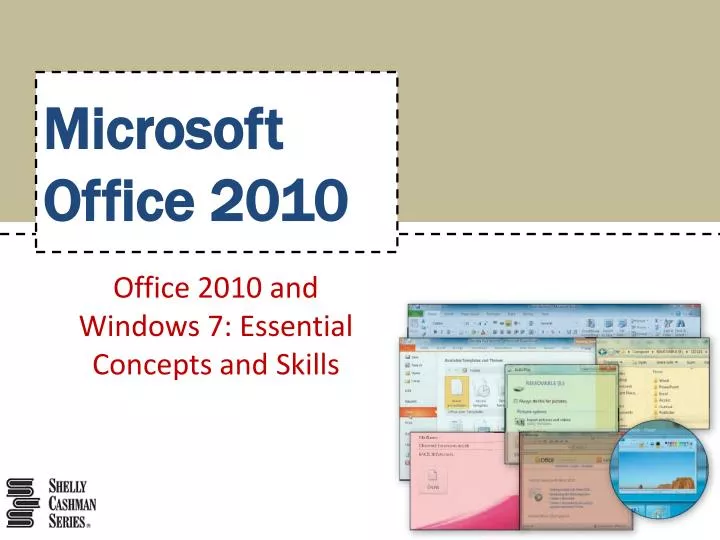
MicrosoftOffice 2010 Office 2010 and Windows 7: Essential Concepts and Skills
Objectives • Perform basic mouse operations • Start Windows and log on to the computer • Identify the objects on the Windows 7 desktop • Identify the programs in and versions of Microsoft Office • Start a program • Identify the components of the Microsoft Office Ribbon Office 2010 and Windows 7: Essential Concepts and Skills
Objectives • Create folders • Save files • Change screen resolution • Perform basic tasks in Microsoft Office programs • Manage files • Use Microsoft Office Help and Windows Help Office 2010 and Windows 7: Essential Concepts and Skills
Introduction to the Windows 7 Operating System • Windows 7 is the newest version of Microsoft Windows, which is the most popular and widely used operating system • An operating system is a computer program (set of computer instructions) that coordinates all the activities of computer hardware such as memory, storage devices, and printers, and provides the capability for you to communicate with the computer • Windows 7 is used to run application software Office 2010 and Windows 7: Essential Concepts and Skills
Using a Mouse Office 2010 and Windows 7: Essential Concepts and Skills
Scrolling • A scroll bar is a horizontal or vertical bar that appears when the contents of an area may not be visible completely on the screen Office 2010 and Windows 7: Essential Concepts and Skills
Logging On to the Computer • Click the user icon on the Welcome screen to either display a password text box or the Windows 7 desktop • If Windows 7 displays a password text box, type your password in the text box and then click the arrow button to log on to the computer and display the Windows 7 desktop Office 2010 and Windows 7: Essential Concepts and Skills
Logging On to the Computer Office 2010 and Windows 7: Essential Concepts and Skills
The Windows 7 Desktop Office 2010 and Windows 7: Essential Concepts and Skills
Introduction to Microsoft Office 2010 • Microsoft Office 2010 is the newest version of Microsoft Office, offering features that provide users with better functionality and easier ways to work with the various files they create • Microsoft Word 2010 • Microsoft PowerPoint 2010 • Microsoft Excel 2010 • Microsoft Access 2010 • Microsoft Outlook 2010 Office 2010 and Windows 7: Essential Concepts and Skills
Introduction to Microsoft Office 2010 • Microsoft Publisher 2010 • Microsoft OneNote 2010 • Microsoft InfoPath 2010 • Microsoft SharePoint Workspace 2010 • Microsoft Communicator • Microsoft Web Apps Office 2010 and Windows 7: Essential Concepts and Skills
Microsoft Office 2010 Suites Office 2010 and Windows 7: Essential Concepts and Skills
Starting a Program Using the Start Menu • Click the Start button on the Windows 7 taskbar to display the Start menu • Click All Programs at the bottom of the left pane on the Start menu to display the All Programs list • If the program you wish to start is located in a folder, click or scroll to and then click the folder in the All Programs list to display a list of the folder’s contents • Click, or scroll to and then click, the program name in the list to start the selected program Office 2010 and Windows 7: Essential Concepts and Skills
Starting a Program Using the Start Menu Office 2010 and Windows 7: Essential Concepts and Skills
Maximizing a Window • Click the Maximize button next to the Close button on the window’s title bar to maximize the window Office 2010 and Windows 7: Essential Concepts and Skills
The Word Document Window, Ribbon, and Elements Common to Office Programs Office 2010 and Windows 7: Essential Concepts and Skills
Displaying a Different Tab on the Ribbon • Click a tab on the Ribbon to display it Office 2010 and Windows 7: Essential Concepts and Skills
Minimizing, Displaying, and Restoring the Ribbon • Click the Minimize the Ribbon button on the Ribbon to minimize the Ribbon • Click Home on the Ribbon to display the Home tab • Click Home on the Ribbon to hide the groups again • Click the Expand the Ribbon button on the Ribbon to restore the Ribbon Office 2010 and Windows 7: Essential Concepts and Skills
Minimizing, Displaying, and Restoring the Ribbon Office 2010 and Windows 7: Essential Concepts and Skills
Displaying and Using a Shortcut Menu • Right-click the Quick Access Toolbar to display a shortcut menu that presents a list of commands related to the Quick Access Toolbar • Click Show Quick Access Toolbar Below the Ribbon on the shortcut menu to display the Quick Access Toolbar below the Ribbon • Right-click the Quick Access Toolbar to display a shortcut menu • Click Show Quick Access Toolbar Above the Ribbon on the shortcut menu to return the Quick Access Toolbar to its original position Office 2010 and Windows 7: Essential Concepts and Skills
Displaying and Using a Shortcut Menu Office 2010 and Windows 7: Essential Concepts and Skills
Customizing the Quick Access Toolbar • Click the Customize Quick Access Toolbar button to display the Customize Quick Access Toolbar menu • Click the command you wish to add to the Quick Access Toolbar Office 2010 and Windows 7: Essential Concepts and Skills
Entering Text in a Document • With a blank document open in Microsoft Word, type the text you wish to add • Press the ENTER key to move the insertion point to the beginning of the next line Office 2010 and Windows 7: Essential Concepts and Skills
Creating a Folder • Connect the USB flash drive to an available USB port on the computer to open the AutoPlay window • Click the ‘Open folder to view files’ link in the AutoPlay window to open the USB flash drive window • Click the New folder button on the toolbar to display a new folder icon with the name, New folder, selected in a text box • Type the desired folder name, and then press the ENTER key Office 2010 and Windows 7: Essential Concepts and Skills
Creating a Folder Office 2010 and Windows 7: Essential Concepts and Skills
Expanding a Folder, Scrolling through Folder Contents, and Collapsing a Folder • Double-click the desired folder to display its contents and display a black arrow to the left of the folder icon • Double-click the folder identifying your class to collapse the folder Office 2010 and Windows 7: Essential Concepts and Skills
Expanding a Folder, Scrolling through Folder Contents, and Collapsing a Folder Office 2010 and Windows 7: Essential Concepts and Skills
Switching from One Program to Another • Point to the program button on the taskbar to see a live preview of the window • Click the program button or the live preview to make the program associated with the program button the active window Office 2010 and Windows 7: Essential Concepts and Skills
Saving a File in a Folder • With a USB flash drive connected to one of the computer’s USB ports, click the Save button on the Quick Access Toolbar to display the Save As dialog box • Type the file name in the File name text box. Do not press the ENTER key after typing the file name • If the navigation pane is not displayed in the dialog box, click the Browse Folders button to expand the dialog box • Scroll to display the location to which you wish to save the file • Expand drives and folders as necessary to locate the desired save location, and then double-click the folder in which you wish to save the file • Click the Save button Office 2010 and Windows 7: Essential Concepts and Skills
Saving a File in a Folder Office 2010 and Windows 7: Essential Concepts and Skills
Minimizing and Restoring a Window • Click the Minimize button on the program’s title bar to minimize the window • If necessary, click the program button on the taskbar to restore the minimized window Office 2010 and Windows 7: Essential Concepts and Skills
Changing the Screen Resolution • Right-click an empty area on the Windows 7 desktop to display a shortcut menu that displays a list of commands related to the desktop • Click Screen resolution on the shortcut menu to open the Screen Resolution window • Click the Resolution button in the Screen Resolution window to display the resolution slider • If necessary, drag the resolution slider to the desired screen resolution • Click an empty area of the Screen Resolution window to close the resolution slider • Click the OK button to change the screen resolution • Click the Keep changes button to accept the new resolution Office 2010 and Windows 7: Essential Concepts and Skills
Changing the Screen Resolution Office 2010 and Windows 7: Essential Concepts and Skills
Quitting an Office Program with One Document Open • Click the Close button on the right side of the program’s title bar • If necessary, save changes to the document Office 2010 and Windows 7: Essential Concepts and Skills
PowerPoint • PowerPoint is a complete presentation program that allows you to produce professional-looking presentations • Word processing • Outlining • Charting • Drawing • Inserting multimedia • Saving to Web • E-mailing • Collaboration • Preparing delivery Office 2010 and Windows 7: Essential Concepts and Skills
Starting a Program Using the Search Box • Click the Start button on the Windows 7 taskbar to display the Start menu • Type the program name as the search text in the ‘Search programs and files’ text box • Click the desired program name in the search results to start the program Office 2010 and Windows 7: Essential Concepts and Skills
Starting a Program Using the Search Box Office 2010 and Windows 7: Essential Concepts and Skills
The PowerPoint Window and Ribbon Office 2010 and Windows 7: Essential Concepts and Skills
Entering Content in a Title Slide • Click the label ‘Click to add title’ located inside the title text placeholder to select the placeholder • Type the presentation title in the title text placeholder • Do not press the ENTER key because you do not want to create a new line of text Office 2010 and Windows 7: Essential Concepts and Skills
Entering Content in a Title Slide Office 2010 and Windows 7: Essential Concepts and Skills
Creating a New Office Document from the Backstage View • Click File on the Ribbon to open the Backstage view • Click the New tab in the Backstage view to display the New gallery • Click the Create button in the New gallery to create a new Office document Office 2010 and Windows 7: Essential Concepts and Skills
Creating a New Office Document from the Backstage View Office 2010 and Windows 7: Essential Concepts and Skills
Closing an Office File Using the Backstage View • Click File on the Ribbon to open the Backstage view • Click Close in the Backstage view to close the open file without quitting the active program Office 2010 and Windows 7: Essential Concepts and Skills
Opening a Recent Office File Using the Backstage View • Click File on the Ribbon to open the Backstage view • Click the Recent tab in the Backstage view to display the Recent gallery • Click the desired file name in the Recent gallery to open the file Office 2010 and Windows 7: Essential Concepts and Skills
Opening a Recent Office File Using the Backstage View Office 2010 and Windows 7: Essential Concepts and Skills
Excel • Excel is a powerful spreadsheet program that allows users to organize data, complete calculations, make decisions, graph data, develop professional-looking reports, publish organized data to the Web, and access real-time data from Web sites • Workbooks and worksheets • Charts • Tables • Web Support Office 2010 and Windows 7: Essential Concepts and Skills
Excel Office 2010 and Windows 7: Essential Concepts and Skills
Creating a New Blank Office Document from Windows Explorer • In Windows Explorer, display the folder in which you want to create the new Office document • Right-click an open area in the right pane of the folder window to display a shortcut menu • Point to new on the shortcut menu to display the New submenu • Click the document type you wish to create on the New submenu • Type the desired file name in the text box, and then press the ENTER key Office 2010 and Windows 7: Essential Concepts and Skills
Creating a New Blank Office Document from Windows Explorer Office 2010 and Windows 7: Essential Concepts and Skills
Starting a Program from Windows Explorer and Opening a File • Display the folder window containing the file you wish to open • Right-click the file icon or file name to display a shortcut menu • Click Open on the shortcut menu to open the selected file in the program used to create the file Office 2010 and Windows 7: Essential Concepts and Skills