Download

1 / 26
260 likes | 430 Views
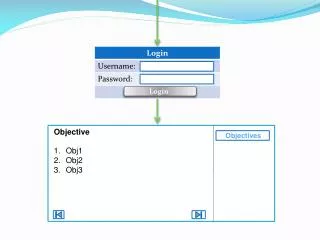
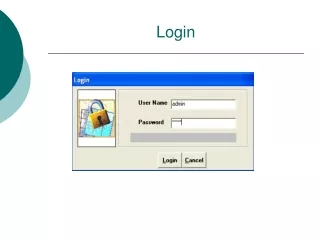
Login. “Blacked out” password. The user can choose his presence status before signing-in. New user. Password storage and automatic sign-in are not enabled by default. Services Selection. The first one shows the WLM service option and the second one, the same option but highlighted.

E N D
Login “Blacked out” password The user can choose his presence status before signing-in New user Password storage and automatic sign-in are not enabled by default
Services Selection The first one shows the WLM service option and the second one, the same option but highlighted. User can see his presence status icon, display name and e-mail address. User can see the number of Messenger contacts currently online. The icon is bigger as user is over the option User can select create your Space User selects a service from a multi-service Windows Live Client
Contact List • Single Party Conversation • Multiparty Conversation • Add contact • Contact Card • View/Edit Profile • Insert File • Settings
Contact List Contacts ordered by Status(Online/Offline) Display picture Presence icon, display name and status text Read IM icon New IM: Unread IM icon & blinking tab User can see the contact's display name, display picture and e-mail.
Contact List Contacts ordered by Groups Display picture Presence icon, display name and status text Read IM icon New IM: Unread IM icon & blinking tab User can see the contact's display name, display picture and e-mail.
Single Party Conversation User can scroll through a conversation to see previous text Sent and received text are easily distinguished User knows the time that the last IM in a conversation was received.
Multiparty Conversation Number of participants User can have multiple simultaneous conversations. More participants can be added
Contact Card • The contact card offers information about a contact: • Display name • Status text • Display picture • Presence icon • First and last name • E-mail • Address • Phone • Birthday • Send IM, E-mail, view Spaces and Call links
View/Edit profile The user can set up and change his display name, status text, presence status, and display picture
Insert file A file can be sent during an active conversation
Inbox • Folders • E-mail Message • Compose Message • Address Book • Edit Contact • Settings
Inbox 3 new unread E-mails New IM notification (actionable link) User can easily distinguish between a read and unread e-mail message Email information:From, subject, size and date/time sent. User can see all new messages, listed by date/time received. Not a WLM contact User can open an E-mail from the inbox view
Inbox New E-mail function from the Inbox The status icon changes dynamically according to the status set by the contact. If the user receives an E-mail from a contact that doesn’t belong to his Messenger contact list, this icon will be shown. Go to an IM conversation Services selection
Inbox and Folders The user can mark an E-mail as junk and move it to the local Junk E-mail folder The user can delete or move one or multiple E-mails
E-mail Message Windows Live branded header element Previous message Next message User can see the name, type and size of the attachment
Compose message Windows Live branded header element When replying, the original message is included User can attach a file. User can specify one or more addresses in the To:, CC: and BCC: fields
Address Book When writing an E-mail, user selects his recipients From the Inbox, The user selects “Address book” Windows Live branded header element • Contact Information: • Presence status • First and Last name • E-mail Address book is alphabetically ordered
Add/Edit contact • The user can Add a contact: • First and last name • Nickname • E-mail • Windows Live ID • Address • Phone • Birthday • Mark the contact as Messenger • The user can see and edit: • First and Last name • Nickname • E-mail • Windows Live ID • Address • Phone • Birthday
Settings Windows Live Services is organized in tabs The user can switch notifications “on” and “off”.
Windows Live Spaces • Select image • Preview • Upload image
Select and upload photo The user can preview the picture In this initial screen, the user selects an image and uploads it to his Spaces The user selects the image he wants to upload