Download
1 / 21
250 likes | 638 Views
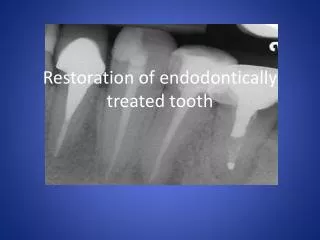
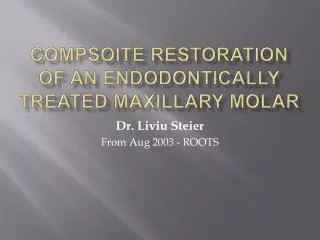
Compsoite Restoration of an Endodontically treated Maxillary Molar. Dr. Liviu Steier From Aug 2003 - ROOTS. Fig 1: Immediate post-operative view. Dr. Liviu Steier.

E N D
Compsoite Restoration of an Endodontically treated Maxillary Molar Dr. Liviu Steier From Aug 2003 - ROOTS
Fig 1: Immediate post-operative view. Dr. Liviu Steier
Fig. 2 : The Ribbond (Ribbond®, Seattle, WA) is prepared to be cut in size. To obtain an accurate measurement of the needed length, thin foil was used.
Fig. 3 The foil is placed to determine the measurement needed. Dr. Liviu Steier
Fig 4: The Toffelmire matrix band is secured in place. Dr. Liviu Steier
Fig 5: Self-etch primer used to condition the dentin and dried with an air blast directed from a Stropko irrigator before the application of bonding material. Dr. Liviu Steier
Fig 6a: Applying Tetric® Flow Chroma (IvoclarVivadent, Amherst NY). During the light cure, this flowable resin changes colour to dark green. The discoloration eventually neutralizes Dr. Liviu Steier
Fig 6b: Passing with an explorer threw the resin minimizes the creation of voids. Dr. Liviu Steier
Fig 7: The flowable resin immediately after curingdemonstrating the change in colour. 37% phosphoric acid used to etch the enamel margins. Dr. Liviu Steier
Fig 8: Separate applications of Primer and Bonding agent (Optibond FL, Kerr Dental, Orange CA) Dr. Liviu Steier
Fig 9: The proximal wall buildup with Point 4™ (Kerr Dental, Orange CA Dr. Liviu Steier
Fig 10: Lingual view of the rebuilt external outline of the missing walls. Dr. Liviu Steier
Fig 11: Silane used for bonding – Monobond-S Dr. Liviu Steier
The glass fiber is activated using Silane (Monobond-S, IvoclarVivadent, Amherst NY). The Silane is then dried using a photo-thermal oven (D500 byColtène/Whaledent Inc. Cuyahoga Falls, Ohio), Dr. Liviu Steier
Fig 12: The Ribbond is placed on the rebuilt external walls. Dr. Liviu Steier
Fig 13: The glass fibre is secured in place with a flowable resin (Revolution Formula 2, Kerr Dental Orange, CA). Dr. Liviu Steier
Fig 14: A more opaque layer of flowable composite (Point 4 Flowable, Kerr Dental, Orange CA) is applied over the Tetric® Flow Chroma . Dr. Liviu Steier
Fig 15: Before starting the build up of the cusps. Dr. Liviu Steier
Fig 16: The occlusal relief immediately after the rebuilt with a condensable resin (Point 4 Kerr Dental, Orange CA). Dr. Liviu Steier
Fig 17: Occlusal view of the completed restoration. Dr. Liviu Steier
Fig 18: Lingual view of the completed restoration. Dr. Liviu Steier