Download
1 / 10
100 likes | 191 Views
General Information. Structures: 2 cars/unit – Single Car also available module sizes: 65in.x40in.x2in. or 65in.x40in.x2in. Module quantity/unit: 18pcs (6 lines x 3 rows) or 21pcs (7 lines x 3 rows) Structure material and finishing treatment: Steel / Hot Galvanized. Dimensions

E N D
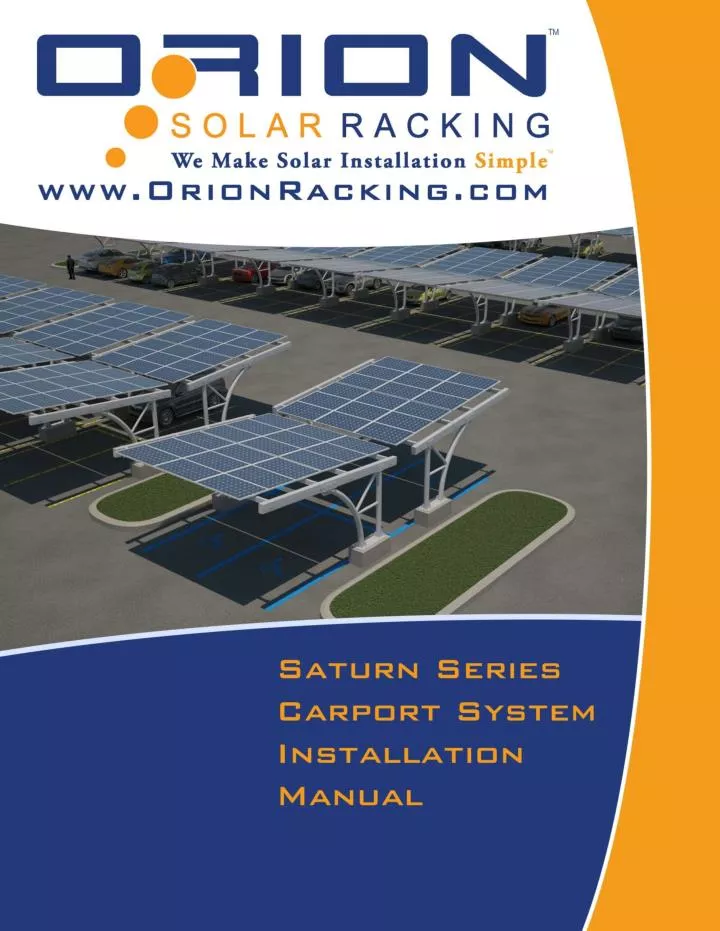
General Information Structures: 2 cars/unit – Single Car also available module sizes: 65in.x40in.x2in. or 65in.x40in.x2in. Module quantity/unit: 18pcs (6 lines x 3 rows) or 21pcs (7 lines x 3 rows) Structure material and finishing treatment: Steel / Hot Galvanized Dimensions · Structure Width: ~ 197in. (16.4’), 99in. (8.2’)/car · Slope Angle: 5 degree · Structure Height (Front): 100in. + base 20in. ~ 120in. (10’) · Structure Height (Back): 82in. + base 20in. ~ 102in. (8’-6”) · Structure is scalable and customizable to any project size Package View 40’H container
Components Solar Panels Rail Beam (rb) Cross Beam (cb) Main Support Beam Main Support Bracket (ms) Concrete Base Base Plate Hardware M20 x 220mm with Nut and Washers – Main Support Assembly M20 x 140mm with Nut and Washers – Rail Beam Assembly M10 x 160mm with Nut and Washers – Cross Beam Assembly Concrete Anchors for Baseplate Assembly – If Applicable M8 x 20mm with Nut and Washers – Solar Panel Installation
Installation Steps (for Reference Only) Step 1 Set up Concrete Base According to Engineering Data (Footing Design Force & Reaction ID), Base Plate dimension, and site soil condition to make the Concrete Base. the Base Plate dimension: (45in.) x (15in.) x (0.73in.) the Concrete Base (min) is needed to be (52in.) x (22in.) with fc’ (force) = 4,500 PSI min the Concrete Base height is needed to be ≥20in. from the ground. there are 19 x ȼ.87in. holes Pre-fabricated on Base Plate, M20 anchor bolts embedded into Concrete Base are needed. There are two ways to make the concrete base. A. Precast base B. Pouring the foundation, anchor bolts embedded Make your choice to build the concrete base. Notes: Center distance between the two concrete bases is 204in., as shown below. · Adjust the horizontal width 204in. distance. · Must ensure that all bolts embedded in concrete bases are on the same horizontal straight line.
Step 2 Install Carport Main Support (MS) After concrete base thoroughly solidified, to fix Carport Main Support (CMS) onto the concrete base. Make sure all bolts embedded in concrete bases are on the same horizontal straight line, which will enable CMS on concrete bases are on the same horizontal straight line. Step 3 Install Carport Main Support Beams Connect Carport Main Support Beam (MSB) with Carport Main Support. Use Bolt (M20x220) to connect MSB and MS, but no need to tighten until MSB is adjusted well, and then tighten the fixing. Illustration of Bolt with Washers and Nut
Step 4 Install Cross Beams Connect Crossbeam with Carport Main Support Beam (MSB). Use Bolt 3 (M20x140) to fix. Notes: When putting Crossbeams, please pay attention to place direction. Adjust the Crossbeam to ensure that each vertical mounting holes in the same straight line. After adjustment, tighten all bolts.
Step 5 Install Rail Beams (For Solar Modules) Before fixing 6 Rail Beams with 4 Crossbeams, make “Pre-mounted solar module units” (Solar modules to mount with Rail Beams) first. As shown below: a) Turn Solar modules onto the reverse side, three for one group Bottom side UP Solar Side DOWN b) Place the Rail Beam, align the mounting holes (Rail Beam holes and Solar module mount holes)
Step 5 - continued c) Use Bolt (M8x20) with Lock Washer, Washers and Nuts, Qty of 4 sets to mount 1 Solar Module Assembled View
Step 6 Connect 6 Rail Beams (Pre-mounted solar module units) with 4 Crossbeams Use Bolt (M10x180) to Mount