1 / 5

The Ultimate Windshield Replacement Checklist

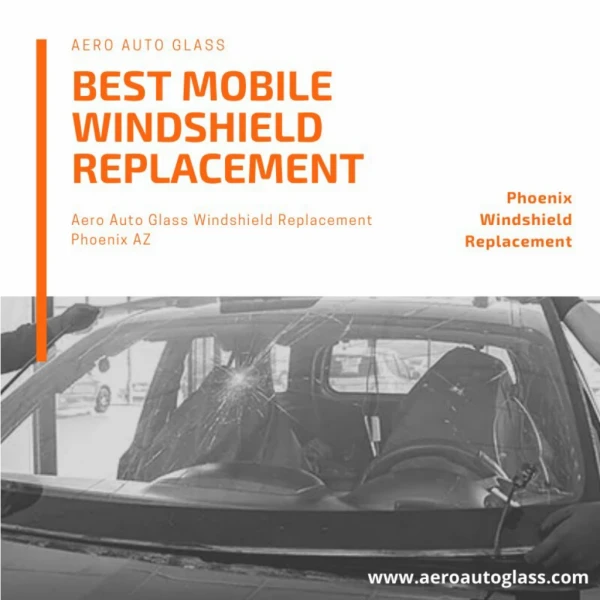
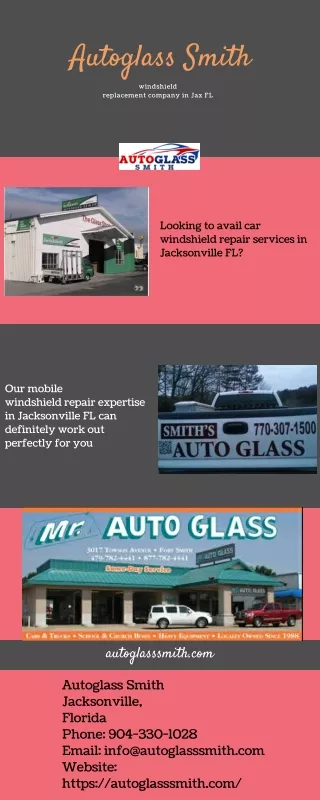
Restore the safe practices of your windshield without replacement. Chip restoration is rapid, effectual, and nontoxic.

thoinnrggt
Download Presentation

The Ultimate Windshield Replacement Checklist

An Image/Link below is provided (as is) to download presentation Download Policy: Content on the Website is provided to you AS IS for your information and personal use and may not be sold / licensed / shared on other websites without getting consent from its author. Content is provided to you AS IS for your information and personal use only. Download presentation by click this link. While downloading, if for some reason you are not able to download a presentation, the publisher may have deleted the file from their server. During download, if you can't get a presentation, the file might be deleted by the publisher.

E N D

Presentation Transcript


  1. A windshield carries more responsibility than most drivers give it credit for. It holds the roof structure together in a rollover, frames the camera that keeps your lane assist honest, deflects debris at highway speeds, and gives airbags something solid to bounce off during deployment. When it’s cracked, pitted, or poorly installed, every one of those safety systems loses some of its margin. That is why a proper windshield replacement isn’t a swap of glass, it’s a controlled repair with real consequences if you cut corners. I’ve spent enough time around Auto Glass Replacement teams, from dealership bays to mobile vans in grocery store parking lots, to know what separates a clean, safe install from a headache that leaks in the first rain. This checklist is the one I keep in my head when I’m advising a friend or inspecting my own car after a job. Use it end to end or dip into the parts that apply to your situation. The details matter. Start with a repair-or-replace decision Not every crack needs a new windshield. If the damage is a stone chip smaller than a quarter, not in the driver’s direct line of sight, and the impact didn’t spider more than a few inches, a skilled tech can often save the glass with windshield chip repair. A proper resin fill restores structural integrity in that spot and keeps the crack from creeping. I’ve watched chips survive several winters after a good repair, while neglected ones ran ten inches the first cold snap. Replace the windshield when the crack originates at the edge, obstructs the driver’s view, intersects with advanced driver assistance sensors, or spreads beyond repairable limits. Deep pitting can also push you toward replacement, especially on cars that see a lot of highway miles behind trucks. You can clean wiper chatter and bugs off glass, but you can’t polish away years of sandblasting. Insurance makes the decision easier in many states. Some policies waive the deductible for Auto Glass Repair, while others treat Windshield Replacement as a comprehensive claim with a deductible. Call your carrier before you schedule anything. A ten‑minute call can turn a $400 bill into a $0 out‑of‑pocket repair, or help you decide to pay cash if the deductible sits higher than the quote. Choose the right glass and parts for your car Two categories matter here: glass quality and the hardware glued to it. For many cars you can choose between OEM glass that comes from the vehicle manufacturer’s approved supplier and high‑quality aftermarket glass that meets the same DOT standards. I’ve installed both. Good aftermarket glass fits fine, but on some models the OEM piece has better acoustic lamination or a tint band that matches your side glass. If your car is high‑end or you’re sensitive to cabin noise, OEM can be worth the premium. If your commuter is a decade old, quality aftermarket will do the job without fuss. Modern windshields carry more than glass. They host rain sensors behind the mirror, heated wiper park zones, built‑in antennas, humidity sensors, heads‑up display layers, and even special coatings to reflect infrared heat. When you book the job, give the shop your VIN so they pull the exact variant your car needs. I’ve seen the wrong sensor window cause endless false warnings. A good shop checks the options twice, then orders the right clips and molding so nothing rattles later. If your windshield supports cameras for adaptive cruise or lane departure, plan for calibration. Some systems require static calibration on a level floor with targets and lasers. Others self‑calibrate during a road drive under specific conditions. Either way, this isn’t optional. A camera that thinks the lane is three inches to the left is worse than having no camera at all. Vet the shop before you hand over the keys The difference between a leak and a lifetime seal lives in the technician’s habits. Ask a few pointed questions and you’ll know who you’re dealing with. How do they prep the pinch weld? What urethane system do they use, and what’s the safe drive‑away time at your current temperature? Do they follow the vehicle maker’s procedures for ADAS calibration? You want answers that sound like specific process steps, not vague reassurance. Look for technicians certified by the Auto Glass Safety Council or with documented training on the urethane product they’re using. The adhesive matters as much as the glass. Some urethanes cure quickly and meet Federal Motor Vehicle Safety Standards in one hour at 73°F and 50% humidity. In winter, the same product may take several hours. That time window is the difference between airbags hitting glass that holds or glass that pops.

  2. If you do mobile service, confirm that the installer has a clean, dry space or significant weather protection. A windy, dusty lot is a poor environment for bonding. Rain is a deal breaker. Moisture on the bonding surfaces can compromise adhesion even if it looks dry later. Pre‑install inspection: fix small things before they turn into big problems Before anyone cuts out your old windshield, walk the car with the tech. Note existing windshield scratches, chips, and any rust on the pinch weld where the glass sits. Surface rust must be treated before new urethane goes down. I once saw a small rust bubble blossom into a palm‑sized hole beneath a molding. The new glass seemed fine until the first car wash. Water poured down behind the dash because the urethane never had clean metal to bite. Check the cowl panel, the plastic trim at the base of the windshield. Many cars use fragile clips here. If the panel is brittle, ask the shop to have replacement clips on hand. A broken clip will let the panel lift at speed and channel water where you don’t want it. Finally, confirm that the shop will replace the cabin air filter if access requires removing it. Some designs place the filter right under the cowl. I’ve fished leaves and glass dust out of brand‑new filters because someone rushed reassembly. Removal and surface preparation: the quiet art that determines whether it leaks A clean cutout keeps the pinch weld intact. Skilled techs avoid slicing into the body paint. They leave a thin layer of the old urethane, about a millimeter, as a bonding surface for the new bead. That layer improves adhesion and protects the paint from stray blades. If they gouge through to bare metal, it must be primed to prevent corrosion. This is tedious work, and it’s where speed hurts quality. I’d rather have a tech take an extra twenty minutes than chase a leak later. The glass itself should be handled like a safety part, not a pane of house window. Keep the ceramic frit area, the black band around the edge, clean and free of skin oils. The urethane bonds to that frit. Any contamination reduces bond strength. Good shops use clean gloves, glass prep solvent, and primers compatible with their adhesive system. These steps are not optional decoration. They’re chemistry. Adhesives and cure times: why patience is part of safety Ask what urethane is going into your car, then follow its rules. A typical high‑modulus, non‑conductive urethane meets FMVSS 212/208 requirements after 30 to 120 minutes at room temperature and moderate humidity. Cold slows cure. Humid air speeds it. That’s why safe drive‑away times change with weather. If the shop says you can leave immediately in sleet, you’re either hearing bravado or a misunderstanding. Vehicles with passenger‑side airbags rely on the windshield as a backstop. If the urethane hasn’t set, the glass can push out during deployment. That is not a hypothetical risk. I’ve seen test videos that will make you wait the extra hour without complaint. Calibration: bring the tech back into harmony Many cars from the past eight years need ADAS calibration after Windshield Replacement. The glass may be optically correct, yet the camera sits a hair higher or lower than the old one. That tiny change shifts how the system interprets the road. Static calibration uses targets placed at precise distances and heights. The technician adjusts the camera’s perception until it matches the real world. Dynamic calibration asks you to drive at specific speeds on roads with good markings, while the system recalibrates itself. Some cars require both. Plan the time. A thorough calibration can take 30 to 90 minutes beyond the glass work. After calibration, test the features where it’s safe. Turn on lane keeping, confirm adaptive cruise follows smoothly, and check automatic high beams at night. If anything behaves oddly, return to the shop. The sooner you flag a problem, the easier it is to isolate. The first 48 hours: small habits that protect a new bond

  3. A fresh bead of urethane will keep curing after you drive away. For the first day or two, avoid slamming doors with windows fully up. The pressure spike can flex the bond. Leave a window cracked if the car bakes in the sun to reduce pressure and heat. Hold off on high‑pressure car washes, especially those with spinning brushes and vigorous dryers that can force water under fresh moldings. If rain arrives, don’t panic. A proper installation resists water immediately, but it’s smart to park under cover if you can. Keep the dash area clear in case moisture shows up. If you catch even a hint of water inside or hear wind noise at highway speed, call the shop right away. Good installers welcome the chance to fix a problem. It’s often a quick seal correction or clip reseat, not a redo. Signs of a quality install you can see and hear Stand outside and sight down the glass edges. The windshield should sit centered in the opening with even gaps under the moldings. Wiper arms should park at the right height and clear fully. Inside, check the bead line where you can see it near the A‑pillars. It should be continuous without bare spots or globs. No loose trim, no rattles over bumps. Drive at 50 to 60 mph on a calm day. A clean install sounds like the car used to, maybe better if your old glass was pitted. Whistles or buffeting at speed suggest a gap under a molding, a missing clip, or a distorted cowl. Those are fixable. Don’t settle. If your windshield has acoustic glass, a quick test is to call someone on Bluetooth at highway speed and ask if they notice an echo or unusual noise your car didn’t have before. I’ve picked up on an unseated A‑pillar trim piece this way that I didn’t hear alone. When cheap becomes expensive I once watched a neighbor choose the lowest bid by $75. The mobile installer arrived with the right glass but used a universal molding instead of the model‑specific one backordered at the dealer. It looked acceptable in the driveway. Two weeks later, a storm drove water past the universal strip and into the BCM under the dash. The car lit up like a Christmas tree with electrical ghosts. The repair cost more than ten windshields. That sounds dramatic until you see how many modules live under the dash in modern cars. A fair price isn’t always the highest, but quotes that sit far below the market usually hide something. The savings might be a generic part, a low‑grade urethane, or a rushed schedule that leaves no time for calibration. If a shop can explain their numbers and process clearly, that’s a good sign. If they wave off questions, find another. Mobile service versus shop service Mobile service is convenient and, when done by a disciplined tech, just as safe. The trick is environment control. A garage, a carport, or a tented workspace keeps dust and moisture off the bond. On windy days or in heavy pollen season, I prefer a shop bay. Static calibration almost always goes smoother in a shop with level floors and measured setup points. If your car needs a static calibration, ask whether the mobile crew has that capability or whether they bring the car in afterward. There’s also a practical note: some cowls and trim auto glass repair Burke County pieces get brittle with age. A shop will have more clip inventory and trim tools on hand than a van. If your car is more than eight years old, I lean toward a shop appointment unless the mobile team shows up with a parts bin that would make a dealer proud. Insurance, billing, and managing costs If you file a claim for Auto Glass Replacement, your carrier may steer you toward a network provider. You’re allowed to choose your shop in many states, but the billing process is smoother with a shop that knows your insurer’s system. I’ve had painless experiences when the shop handled approval, calibration documentation, and payment directly with the carrier. If you’re paying cash, ask whether there’s a discount for same‑day payment or a price difference between OEM and aftermarket. It’s reasonable to see a spread of 20 to 50 percent depending on the vehicle. For a common sedan, aftermarket can run in the $250 to $450 range including installation, while OEM might add $100 to $300. For luxury cars with HUD and rain sensors, start higher and don’t be startled by a four‑figure estimate.

  4. One more tip: if your windshield keeps cracking in the same place from rock strikes, consider a clear paint protection film designed for windshields or a quality ceramic coating. They won’t make glass invincible, but they can improve chip resistance and make bugs and ice easier to remove, which reduces the temptation to scrape aggressively. What to do if a chip happens tomorrow A brand‑new windshield seems to attract trouble. If you take a fresh hit, treat it fast. Keep a disposable windshield chip repair kit in the glove box. A quick resin fill in the first 24 to 72 hours can stabilize a chip until a professional can finish the job. Avoid washing the car or blasting the defroster on high heat, which can push dirt and moisture into the damage. Then schedule proper Windshield Chip Repair or, if the hit is severe, another replacement. It’s frustrating, but the faster you act, the less likely you’ll see a crack spread. The checklist: what to confirm from start to finish Here is a compact reference you can keep on your phone. Use it to vet shops, track the job, and inspect the results. Confirm whether repair is viable or if replacement is required, considering chip size, location, and safety systems. Provide your VIN so the shop orders the correct glass and sensor package, and schedule ADAS calibration if needed. Ask about the urethane system and safe drive‑away time for current weather, and verify the installer’s training. Inspect the pinch weld for rust, the cowl for brittle clips, and agree on any trim or clip replacements before work starts. After installation, verify calibration, check for even gaps and quiet at highway speeds, and follow curing precautions for 24 to 48 hours. Edge cases and models that deserve extra attention Some vehicles complicate the job in ways that surprise first‑time techs. Ford trucks with camera brackets that require precise angling, BMWs with HUD layers that cause double images if the wrong glass is used, and Subarus with EyeSight cameras that are exceptionally sensitive to misalignment. If you drive one of these, choose a shop that can show you they’ve replaced and calibrated that exact system, not just something similar. Vintage cars bring a different challenge. Some use rope‑in rubber gaskets rather than urethane. The technique is old‑school and requires hands that have done it. Finding new‑old‑stock gaskets or high‑quality reproductions matters as much as the glass. And because body tolerances varied more decades ago, patience and dry‑fits are part of the game. Expect more time and cost, and plan for potential trim refinishing if clips fail. Care and maintenance that extends windshield life Treat your wiper blades like tires for your eyes. Replace them every six to twelve months depending on climate. A tired blade scrapes grit across glass and accelerates pitting. Keep washer fluid topped with a winter blend if you see freezing temperatures. Warm water on a frozen windshield can cause thermal stress cracks. So can cranking the defroster to maximum heat on a frigid morning. Step the heat up gradually. If you drive construction corridors or on gravel, give yourself extra following distance. A single car length more at 60 mph saves you from most pea‑sized rocks that bounce once before they fly. It’s not flawless protection, but it’s free and effective. Parking under trees avoids sun damage but invites sap and droppings. Clean both promptly with glass‑safe cleaners. Letting sap bake into the frit area can interfere with moldings over time, and vigorous scraping invites scratches. What a good shop promises and stands behind A trustworthy shop offers a written warranty against leaks and defects in materials and workmanship. Ask for the length in writing. Many reputable installers stand behind their work for the life of the vehicle as long as you own it. They also document ADAS calibration results, not just perform the procedure. Keep those records with your service history. If you sell the car, buyers appreciate evidence that safety systems were maintained properly. Professional pride shows in small details. The tech sets the old glass aside safely, vacuums the dash and carpets, and returns your inspection stickers and toll tags precisely where they were. They torque wiper arm nuts to spec and test

  5. water flow at the cowl drains. If your installer behaves like a clean mechanic rather than a rushed contractor, you’re in good hands. A final word on judgment Auto Glass Replacement sits at the intersection of bodywork, chemistry, and electronics. The right choice often balances cost against risk: aftermarket versus OEM, mobile versus shop, quick appointment versus waiting a day for the exact molding. Use this checklist to weigh those trade‑offs. Respect the steps that aren’t visible once the glass is in place, because those are the ones that keep your windshield bonded when you need it most. If you invest a little attention at each stage, from repair assessment through calibration and early care, your new windshield will be invisible in the best way. Quiet, solid, distortion‑free, and dependable when the rest of the car counts on it. That’s the standard worth holding to, and it’s absolutely achievable with a thoughtful plan and a competent team.

More Related