Download
1 / 9
90 likes | 207 Views
Accessing an Implantable Port. Preparation. Preparation includes: Washing your hands well before approaching the patient and beginning the procedure! Gathering all equipment Preparing and cleaning the work surface Preparing the patient: Explaining the procedure

E N D
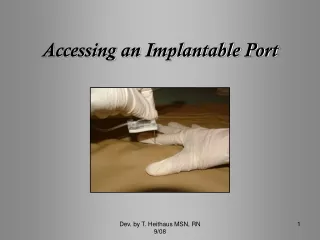
Accessing an Implantable Port Dev. by T. Heithaus MSN, RN 9/08
Preparation Preparation includes: • Washing your hands well before approaching the patient and beginning the procedure! • Gathering all equipment • Preparing and cleaning the work surface • Preparing the patient: • Explaining the procedure • Positioning the patient so the YOU can easily reach the portal site with your dominant hand • The patient does not require a face mask unless actively coughing or sneezing • Assess the portal-site by observation and palpation. For newly placed ports also assess the cut-down site
Prepping 1 2 3 • After donning a face mask, wash your hands, then don sterile gloves. Organize equipment on sterile field. • Assemble needle by applying sterile injection cap. Attach sterile 10 cc pre-filled saline syringe to cap and then fully prime. (Keep syringe attached after priming) • Prep skin well with chlorhexidine swab-sticks using a back and forth/up and down scrubbing action. Each swab-stick should be used for at least 10 seconds.
After prepping skin, hold the needle assembly by: Hold the syringe in your dominant hand Then loop the tubing next to the syringe and grasp as above With your pointer finger and thumb, hold onto the needle by the white “gripper” pin on top of the needle Holding the Needle Assembly 1 2 3
Access the port by: Spreading the skin taut around the port to stabilize it prior to needle penetration. Aim mid-way between fingers to your best approximation of portal septum. Prior to insertion, ask the patient to “Hold his or her breath. Decisively, push the needle through skin into the port. Stop pushing when you feel the needle touch the base of the port. Ask the patient to “Breath.” Accessing 1 2 3
Check for blood return by: Aspirating attached syringe for blood. If you are unable to attain a good blood return, consider repositioning the patient and continue to assess the portal region. If the port has not been accessed for 2 weeks or greater, withdraw at least 5mLs of blood from the port (see “Emptying the Reservoir”). Blood sampling can be done at this time if required. Discard the initial 5mLs of blood. After blood withdrawal, flush the line well with using at least one pre-filled sterile saline syringe. Use an additional pre-filled syringe if blood sampling was done. Checking for Blood Return 1 2 3
Apply the antiseptic patch around the needle if room is available. Adjust the needle base down if applicable. Secure the needle to the skin using either the dog-bone or tape found in the dressing kit. Antiseptic Patch and Securing the Needle 1 2 3
Apply the dressing over the needle. Try to center the top of the needle in the clear dressing portion. Add the lower half of the dressing by placing it under the tubing and over the top of the first dressing placed. Indicate the date, your initials, and the gauge size of the needle. Secure the tubing with additional tape. Applying the Dressing 1 2 3
You have completed the section on accessing implantable ports. To close this page out, click on the “x” located above to return to the Port Accessing course.