Download

1 / 29
300 likes | 479 Views
Dive deep into understanding light frames, noise signals, bias, dark and flat frames, and how to calibrate your camera for optimal imaging results in astrophotography. Learn the importance of calibration frames and how they impact your final images.

E N D
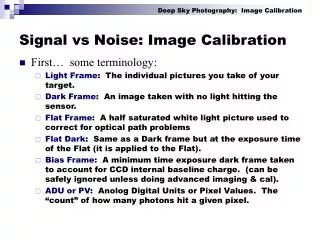
Image calibration Geoff Smith, September 2018
Calibration—A Word of Many Uses • Calibrate your mount so it knows where it’s pointing • Calibrate your guider so that it knows how to move the mount to make a correction • Calibrate your light frames—Today’s topic
What’s in a Light Frame?1. The signal from your object. • A Light Frame is an image downloaded from the camera. • It contains a representation of the object you are imaging. • Unfortunately, it contains other unwanted stuff as well.
What’s in a Light Frame?2. Read Noise • When the camera downloads an image there may be an error in the value assigned to any given pixel. • Typically • As an aside, we can convert electrons to ADU by the formula • The camera gain will need to be obtained from your camera specs.
What’s in a Light Frame?3. Bias Signal • Most cameras add a small (constant) amount of signal to the pixel sites before readout. • One purpose is to prevent a near zero signal being reported as zero because of read noise. • If you expose with the shutter closed for the shortest possible exposure you will still get a positive readout from your camera. This is the Bias Signal and the resulting frame is a Bias Frame
What’s in a Light Frame?4. Dark Current • The heat in the sensor generates electrons . • These add to the electrons from the sky signal. • These extra electrons are the Dark Current Signal • Dark current signal is proportional to the exposure time and is temperature dependent. • If we expose the sensor with the shutter closed for a time we will get the dark current signal plus the bias signal. • The resulting frame is called a Dark Frame. • As an aside: Dark current is NOT noise. It is UNWANTED SIGNAL. Signal is, within the limits of physics, repeatable, noise is not.
What’s in a Light Frame?5. Optical and Camera Defects • Vignetting • Dust on the sensor, producing dark spots (aka dust donuts) on the image • Variation in pixel-to-pixel sensitivity—Typically no more than 1% • These effects can be mitigated by the use of Flat Frames, which I’ll explain in the next slide.
Flat Frames • We generate a Flat Frame by pointing the telescope at an evenly illuminated surface and taking an exposure. • All the defects mentioned in the previous slide will be in the resulting flat frame and we can use the flat frame to reverse engineer these defects in our light frame Vignetting
Flat FramesRemoving dust donuts Dust donut
Signals and noise. • ALL signals—light signal, bias signal, dark signal, the signal in flat frames— have noise. • There will be a slight frame to frame variation. • We do the usual thing and increase the signal to noise ratio by taking many exposures and stacking.
Taking calibration crames1. Bias Frames • Most capture software will have a camera setting to take bias frames. Just select and click the button. • I usually take 100 bias frames, stacked to form a Master Bias Read the manual for your chosen software! • Take bias frames when you are not imaging. The camera does not have to be connected to the telescope.
Taking calibration frames1. Bias Frames (continued) • Cameras slowly change their characteristics with time. I usually redo bias frames every 4–6 months • Keep all master bias frames with dates since you may want to reprocess old images. Select the master frames nearest the date of your picture.
Taking calibration frames2. Dark Frames • Most capture software will have a camera setting to take dark frames. Just select and click the button. • I usually take 50 dark frames and stack to form a Master Dark Read the manual for your chosen software! • Take dark frames when you are not imaging. The camera does not have to be connected to the telescope.
Taking calibration frames2. Dark Frames (continued) • Cameras slowly change their characteristics with time. I usually redo dark frames every 4–6 months. • Keep all master dark frames with dates since you may want to reprocess old images. Select the master frames nearest the date of your picture.
Taking calibration frames2. Dark Frames (continued) • Your dark frame exposure should ideally be the same length as your light frames. • You may use dark frames of a longer exposure than your light frames, but never shorter.
Taking calibration frames3. Flat Frames • Conceptually simple—Take a picture of a uniform light source • Difficult in practice • Getting a uniform light source is a challenge • Spectral characteristics of the light source and the night sky may differ
Taking calibration frames3. Flat Frames (continued) • I usually take 40 frames in each filter. • Aim for 40–60% of full well depth • Exposures are short, 5 to 10 seconds, so the time investment is not large. • Flat frames must be taken under the same configuration as the light frames—no focus change, no change in camera orientation
Taking calibration frames3. Flat Frames: T-Shirt Flats • Cover the telescope with a towel and point at a twilight sky, a shaded lawn or a screen in an observatory if you have one.
Taking calibration frames3. Flat Frames: Flat Panel Flats • Use an electroluminescent panel • Google EL panels for local sources http://www.elec2go.com.au/ • Overseas links https://www.gerdneumann.net/english/ https://optecinc.com/astronomy/catalog/alnitak/flipflat.htm
Taking calibration frames3. Flat Frames: Light Box Flats • Translucent material lit from behind by LED lights. • Usually DIY. Plenty of hits if you google.
What’s in a frame?(Or what you want is not what you get) This is all we want. We don’t want any of this.
One-shot colour camerasIncludes DSLR • Capture images as monochrome undebayered images in fits format. The capture software should allow you to do this. Read the manual for your chosen software! Debayerafter calibration but before alignment and stacking Captured
Calibration stepsDark frames same exposure length as light frames • Subtract master dark from each light frame • Subtract master bias from each flat frame • Apply bias subtracted flat frames to each image via software • Debayer the images if using one-shot colour • Align the images • Stack the calibrated and aligned images. Do this separately for each colour filter. Fortunately, astrophotography software will reduce the number of steps considerably. Read the manual for your chosen software!
Calibration procedure • One-click calibration in PixInsight once files have been entered
Colour CalibrationAn enormous and contentious topic—just dipping our toes in the water here • What causes colour problems? • Spectral dependence of the sensor • Different atmospheric transmission • Presumably other stuff as well • First we have to distinguish between colour balance and colour bias
Colour Bias • This occurs when the amount of each colour may be correct, but the brightnesses may be off
Colour Balance • The amounts of colour in each channel need adjusting • Although the colour bias has been removed, there is too much red