GUI Layout Managers
GUI Layout Managers. Learning Outcomes List and distinguish between the four most common, standard layout managers in Java. Use these and other layout managers to build good GUI applications. Introduction FlowLayout Manager GridLayout Manager Self-check Exercise 1 BorderLayout Manager

GUI Layout Managers
E N D
Presentation Transcript
GUI Layout Managers • Learning Outcomes • List and distinguish between the four most common, standard layout managers in Java. • Use these and other layout managers to build good GUI applications. • Introduction • FlowLayout Manager • GridLayout Manager • Self-check Exercise 1 • BorderLayout Manager • Self-check Exercise 2 • Exercises Unit 13
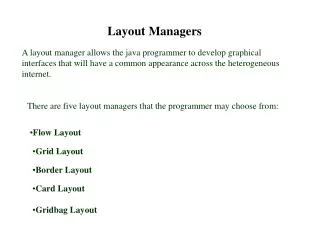
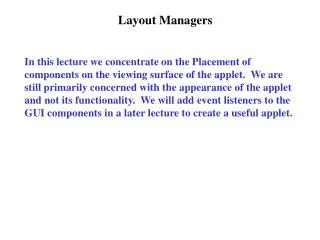
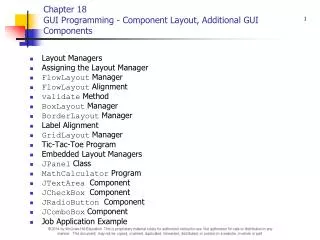
Introduction to GUI Layout Managers • A layout manager determines the placement of components with a container. • Each container has a default layout manager. • A new layout manager can be installed using the setLayout method. • Each layout manager implements one of the two interfaces: LayoutManger or LayoutManger2. • Here are some common standard layout managers of Java: • FlowLayout • GridLayout • BorderLayout • GridBagLayout Unit 13
Introduction to Flow Layout • FlowLayout places components sequentially from left to right in the order added. • Components placement depends on the current size of the container. • When the container is resized the components are automatically resized. • FlowLayout is the default layout for panels. • FlowLayout has three constructors: • FlowLayout() • FlowLayout(int align) • FlowLayout(int align, int hgap, int vgap) Unit 13
Example 1: Flow Layout Test import javax.swing.*; import java.awt.*; class TestFlowLayout extends JFrame{ public TestFlowLayout(){ Container cp = getContentPane(); cp.setLayout(new FlowLayout()); cp.add(new JButton("1")); cp.add(new JButton("2")); cp.add(new JButton("3")); cp.add(new JButton("4")); cp.add(new JButton("5")); cp.add(new JButton("6")); cp.add(new JButton("7")); setSize(300,300); setTitle("Flow Layout Test1"); setVisible(true); } public static void main(String [] args){ new TestFlowLayout(); } } Unit 13
Introduction to Grid Layout • GridLayout places components in a rectangular grid. • GridLayout is good for laying out containers that look like grids. • GridLayout forces occupation of all available container space. • GridLayout has three constructors: • GridLayout() • GridLayout(int rows, int cols) • GridLayout(int rows, int cols, int hgap, int vgap) Unit 13
Example 2: Grid Layout Test import javax.swing.*; import java.awt.*; class TestGridLayout extends JFrame{ public TestGridLayout(){ Container cp = getContentPane(); cp.setLayout(new GridLayout(3,3)); cp.add(new JButton("1")); cp.add(new JButton("2")); cp.add(new JButton("9")); cp.add(new JButton("4")); cp.add(new JButton("5")); cp.add(new JButton("6")); cp.add(new JButton("7")); cp.add(new JButton("8")); cp.add(new JButton("3")); setSize(300,300); setVisible(true); } public static void main(String [] args){ new TestGridLayout(); } } Unit 13
Example 2: Another Grid Layout Test import javax.swing.*; import java.awt.*; class TestGridLayout extends JFrame{ public TestGridLayout(){ Container cp = getContentPane(); cp.setLayout(new GridLayout(3,3)); cp.add(new JButton("1")); cp.add(new JButton("2")); cp.add(new JButton("9")); cp.add(new JButton("4")); cp.add(new JButton("5")); cp.add(new JButton("6")); cp.add(new JButton("7")); cp.add(new JButton("8")); setSize(300,300); setVisible(true); } public static void main(String [] args){ new TestGridLayout(); } } Unit 13
Introduction to Border Layout • BorderLayout places components according to five areas: "North", "South", "East", "West" and "Center". • When you enlarge a container the center area grabs as much of the new space as possible. • BorderLayout is good for maintaining a row of buttons in one of the areas near the edgees. • BorderLayout has two constructors: • BorderLayout() • BorderLayout(int hgap, int vgap) Unit 13
Example 3: Border Layout Test import javax.swing.*; import java.awt.*; class TestBorderLayout extends JFrame{ JPanel jb = new JPanel(); public TestBorderLayout(){ jb.setLayout(new GridLayout(3,3)); jb.add(new JButton("1")); jb.add(new JButton("2")); jb.add(new JButton("3")); jb.add(new JButton("4")); jb.add(new JButton("5")); jb.add(new JButton("6")); jb.add(new JButton("7")); jb.add(new JButton("8")); jb.add(new JButton("9")); Unit 13
Example 3: Border Layout Test Container cp = getContentPane(); cp.setLayout(new BorderLayout()); cp.add(jb,"Center"); cp.add(new JButton("NORTH"), "North"); cp.add(new JButton("WEST"), "West"); cp.add(new JButton("EAST"), "East"); cp.add(new JButton("SOUTH"), "South"); setSize(300,300); setTitle("Grid Layout Test"); setVisible(true); } public static void main(String [] args){ new TestBorderLayout(); } } Unit 13
Exercises • Move the call to the setVisible() method from the main() method to the TetFlowLayout constructor in Example 1. Then compile and run each of Examples 2, 3 and 4. You will notice some changes when displaying the frames. Explain. • Modify Example 2 to add two other types of borders to it. • Compare Example 2 and Example 3. In Example 2 we inherited a panel, added more components to it and then changed the panel’ÿ layout manager. In Example 3 we had to create an additional panel. Can Example 3 be written in similar manner to Example 2 without the additional panel? If it is possible, write the equivalent program otherwise explain why it is not possible. • Change the fill constraint variable on Line 13 from BOTH to each of the following: NONE, HORIZONTAL and VERTICAL. Run the program in each case and study the effect. • Change the value of the gridy constraint variable on Lines 29 to a smaller value. Run the program and observe the result. Do the same for the value on Line 32. Also change these values to bigger values and observe the results. Unit 13