Research Paper Step-by-Step Guide: Organizing Your Writing Process
Learn the process of crafting a research paper step-by-step from topic selection to final draft. Tips on choosing a narrow topic, finding sources, taking notes, creating an outline, drafting, and more. Stay organized and efficient in your research journey.


Research Paper Step-by-Step Guide: Organizing Your Writing Process
E N D
Presentation Transcript
Research Paper Step-by-step Process
Don’t Panic • The following steps will be followed and checkedat separate dates so that you will have a plan of attack and be organized for this paper. • When finished, the paper must be a minimum of 3 pages (not including title page or bibliography.) There is no maximum.
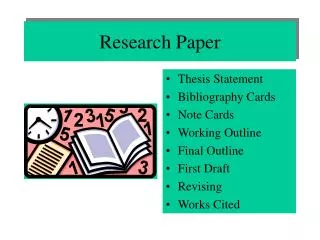
Steps • TOPIC • SOURCES • NOTES • OUTLINE • FIRST DRAFT • BIBLIOGRAPHY • FOOTNOTES • FINAL DRAFT
Topic 1. Be sure your topic is narrow enough to be covered in a 3 page paper. You should try to cover the topic very thoroughly and completely. • For example, don’t choose baseball. Choose a particular player or team or a particular year. • Don’t choose cancer. Pick a particular type of cancer, or symptoms of cancer, or cure rate of cancer, etc. 2. Choose a topic in which you are interested. If you are not interested, it will be hard for the reader to be interested. 3. Choose something on which you can find information. Spend the first day looking to make sure there is enough information on your topic. • Remember, you must find information from at least 3 different sources. 4. Choose something recent if possible, rather than something historical.
Sources • You must use information from at least 3 different kinds of sources. You want to be brief, yet include enough so that you can create a rough draft out of the notes when you are done. 2. Keep a list of all of the sources you used to find information. You may or may not end up using the information in your report but list it anyway. 3. Number the sources and then list the following information for each source: • name of book, magazine, newspaper, internet address, etc. • title of the article • author • publisher • date • (You can then use these numbers when you are writing notes to keep track of the sources from which you got your information. Just list the number of your source on each note and the page number if applicable.) • Make sure you do this as you will have to footnote your information using these sources.
Notes 1. Read through all of your sources taking notes as you go. You want to be brief, yet include enough so that you can create a rough draft out of the notes when you are done. 2. Use an open word document to insert your notes. You may copy and paste the following info: quotes, data, statistics, definitions – everything else should be rewritten as notes in your own words (I will search if it sounds like you plagiarized.) 3. Keep track of the sources from which all of your notes come. You will need this for footnotes. (Put the number of the source and page number if applicable next to each note.) 4. Take down only notes that pertain to your topic or that fit your subject matter. You will not want to take notes on everything you read – only useable information for your report. 5. A good rule of thumb is that you will need at least 1 1/2 – 2 pages of notes to equal one double spaced typed page, depending on how well you write and how you use transitions between your notes. 6. Be sure to get enough notes – better to have too many and not use some of them than to not have enough.
Outline 1. This may be the most important part of the process. 2. Indentify all of your subtopics – there should be anywhere from 3-7 subtopics. 3. Open a separate word document for each subtopic and label it with that subtopic. 4. Now cut and paste each note (including its source and page number) from your original notes document into the corresponding subtopic document. Each of these subtopic documents represents a section of your paper. Delete notes that don’t fit. 5. Arrange the notes in each document in order as you think they should come in your paper. 6. Arrange and number the subtopic documents in order as you think they should appear in your paper. 7. You now know the basic content of your paper. Try to write down some ideas for an introductory paragraph and a concluding paragraph. The introductory paragraph should state your main topic or thesis and give a short outline of what your paper will cover. It may also include a good hook, story, quote, statistic, etc. The concluding paragraph should summarize the paper briefly, restate your thesis, and include your response to your research – conclusions you made, things you learned, etc.
First Draft 1. Now comes the easy part. 2. The first draft of your paper is taken directly from your outline. Start with a clean word document and write your introductory paragraph. 3. Then copy and paste your outline from the first subtopic document into your new one. 4. Using your outline, simply fill in and complete the sentences with proper transitional words, grammar, and punctuation. You, of course, add your own thoughts and ideas as you do this, creating a smooth flow from one note to the next. 5. Make sure you keep the paragraphs and subtopics separate just as you did in your outline. You may find you can do each page of notes in one paragraph or you may need two or three paragraphs for each subtopic. 6. Make sure to keep your source number and page number with each note as these will make up your footnotes. 7. Add your concluding paragraph at the end.
Bibliography 1. A bibliography is a list of all the sources that you used for your report. 2. The bibliography comes at the end of the report in the form of a numbered or alphabetical list. 3. MLA (Modern Language Association) Format is used for bibliographies and can be found on this website or many others: http://owl.english.purdue.edu/handouts/print/research/r_mla.html 4. There are different rule for various kinds of sources but here are a few: (website) The Purdue OWL. Purdue U Writing Lab, 2010. Web. Date of access. (books) Last name, First name. Title of Book. Place of Publication: Publisher, Year of Publication. Medium of Publication. (periodical) Author(s). "Title of Article." Title of Periodical. Day, Month, Year: pages. Medium of publication.
Footnotes 1. Footnotes give your source credit. It tells the reader the sources from which you got your information. Not revealing this is called plagiarism. 2. You should footnote the following information: any statistical information – numbers, percentages, dates, facts, etc. terms and definitions new ideas, theories, hypotheses, etc. direct and indirect quotes 3. Citingthe footnotes should be done immediately after each piece of information to be credited according to the MLA standards. Simply place the source name or number and the page number in parenthesis following each piece of information that should be credited. 4. MLA footnotes should look like this: In a 1998 interview, she reiterated this point even more strongly: "I am an artist, not a politician!" (Weller 124). (Weller is the first word of the source and 124 is the page number.)
Final Draft 1. After receiving your corrected first draft, make the necessary revisions and corrections. 2. Make sure that you also proofread it again as your teacher or the group that corrected your paper may also have missed some things. A good idea might be to have your parents or an older brother or sister proofread it too. 3. Make sure to also make corrections to the footnotes and bibliography page and hand it in with the final draft. 4. Put a separate title page on the front. (see final slide)