Download
1 / 44
440 likes | 712 Views
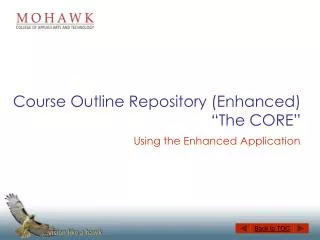
Course Outline Repository. Using the Application Printing Hard Copies Where Students Go Getting the Course Outline Channel How to Get Full Access to the Application. Course Outline Repository. Rolling out in phases: 2007/08 – 1 st Year Course Outlines

E N D
Course Outline Repository Using the Application Printing Hard Copies Where Students Go Getting the Course Outline Channel How to Get Full Access to the Application
Course Outline Repository • Rolling out in phases: • 2007/08 – 1st Year Course Outlines • 2008/09 – 2nd Year Course Outlines • 2009/10 – 3rd Year Course Outlines • Benefits: • One time input and approvals • Easy editing • Course outlines accessible across departments • Instant access for students when registering • On-line archives for students in 2007/08 intake onward
Ontario College Quality Assurance Service Credentials Validation Service (CVS) Provincial Quality Assurance Process Audit (PQAPA) Post Secondary Program Quality Assurance • Program Mapping: • Outcomes based course outlines • Links to Standards • Curriculum Mapping Matrix • Analysis • Program Reviews • KPIs • FITS • Mapping Report • Other Initiatives • Semester Start • Program Quality Enhancement Developed in response to Ministry and Colleges Ontario call for quality processes and assurance. • Course Outline Repository • New on-line application • One outline per course • Quality ownership • On-going Matrix Updates • May/June • Mini-review • Quality Enhancement • Learning Plan • Implementation • Coordination • Assessments • Measure outcomes • Standards • Essential Employability Skills
Course Outline Repository Using the Application
Faculty access via Teaching Tools Faculty access the course outline channel via the Teaching Tools tab. If you don’t have the course outline channel on any tab, instructions follow at the end of the PowerPoint.
Support Staff access via Staff Member Support staff and others access via Welcome or Staff Member tabs. If you don’t have the course outline channel on any tab, instructions follow at the end of the PowerPoint.
To review course outlines: Faculty and staff can view, but not edit, course outlines using “Faculty View”
What is the term code? The term code refers to the year, semester and area) in which the course is being offered. For instance: Year = 2007 Winter Semester = 1, Spring Semester = 2, Fall Semester =3 Post-secondary = 5, Continuing Ed = 0, Apprenticeship = 3 Once in Faculty View, enter: Subject Code: 4 letter code preceding course code (ie COMM) Course Code: 2 letter, 3 number or 5 number code (ie LL041, or 10092) Course Major Code: Program Number (ie 650) – find on Mohawk website Term Code: 200815 (year/semester/post secondary code)
Using the Course Outline Repository To input a new or edit an existing outline
For most post-secondary programs you’ll be using this area for creating, editing, or rolling over course outlines. Roll over means that you have an existing, likely approved, outline from a previous term or another program that you want to use.
If you’re from Continuing Ed or teaching an elective or a course where students from multiple program enroll, you’ll likely use this area.
This is where you can check to see what outlines have been input by program or for a particular course taught to multiple programs (i.e. LL041)
Fill fields, in order, across the screen: Program Code: Program Number (ie 650) – find on website Term Code: 200815 (year/semester/post secondary code) Subject Code: 4 letter code preceding course code (ie COMM) Course Code: 2 letter, 3 number or 5 number code (ie LL041, or 10092)
Once you fill in the top fields and press enter, the repository automatically populates the remaining fields on this page using information from Banner. If you have any problems with the data that appears, contact cathy.ozols@mohawkcollege.ca Course descriptions usually appear here … Make sure you continue to press Next until you reach the end of the application to ensure all information or changes are captured.
Course Descriptions:Sometimes the course descriptions in Banner are outdated … if that’s the case or if it doesn’t populate at all, you’ll need to: • push the Refresh button (at the same time breath deeply, then chant “please, please, please update”) • If that doesn’t change anything, you’ll need to: • complete a course update formand send hard copy to to Tammy Capone. Check with your Associate Dean for appropriate departmental process to follow.
PLAR: • While the repository defaults to CH, there are three kinds of PLAR, • CH (Challenge), • PA (portfolio assessment), and • CH & PA (a combination of both) • The repository defaults to CH. If you’re not sure what kind of PLAR is listed on the POS, contact: • Darlene Brinker ext. 2395 ordarlene.brinker@mohawkcollege.ca • While there is also the choice of NA on the drop down menu, this is used only in very rare cases!
Course resources are added on this page. Use the title field to list supplies and URLs that students need in order to successfully complete the course.
Topics are like “titles” for your course learning outcomes. If you have 3 outcomes, you likely have 3 “titles.” They should be input one at a time (so they show up as bullets) Non linear editing Edited sequences If you cut & pasted from a Word doc, there may be times that you get an error message saying you have too many characters in a field. Check to see if there is a hard return at the end of your last word. It confuses the program.
Drop down menu for Vocational Standards (VS) by program and Essential Employability Skills (EEs). If the outline is one that’s been rolled over from a different program, you will have to re-select the appropriate VS links for the new program. Links to EEs always remain the same for a course no matter to which program it is being offered. (You can use the Ctrl button to select more than 1 VS or EE at a time.) You will have to input any links to External Standards (ES).
You can edit but not delete individual learning outcomes. Since they are linked in the database, deleting learning outcomes also removes learning elements and assessments. • Learning outcomes, usually 3-5 for a 42 hour course: • Describe one of the required skill proficiencies for course • Capture performance a competent person would use outside context of the course • Begin with an action verb (at the appropriate level of Bloom’s Taxonomy) • Specify an integrated performance instead of multiple performances • Describe a performance that is observable and can be assessed • Require application of skill, knowledge or attitude/value • Present a clear, concise and precise statement describing the required action • Describe learner performances, not instructor’s activities, learning plans, or instructional standards
Learning elements are associated with specific learning outcomes. Input learning elements one by one so they appear as a list (as below). If the list is long, the elements will wrap to a second page. Development of learning elements follows the same 8 characteristics as learning outcomes.
In most cases, there is a selection from the drop down menu that will meet broad assessment requirements. Since there is only one outline per course, the assessments section must remain broad enough to allow for faculty and student flexibility while maintaining the overall integrity of the course.
All learning outcomes must be linked to at least one assessment type. Assessments may link to more than one learning outcome. Participation is automatically linked to all outcomes. Weight refers to the percent of the overall grade the specific type of assessment(s) contribute. Assessment weights must add up to 100%.
Once the input is complete and proofed, it is sent for Associate Dean approval. Once approved, course outlines cannot be edited. Approvals remain when a course is rolled over by semester. Students will not be able to access course outlines until they are approved.
You can check if program course outlines have been input but not submitted, are pending approval, or are approved. You can sort by clicking on any column title
You can check whether multi-program courses have been input, if they are pending approval, or are approved. You can sort by clicking on any column title
Course Outline Repository Printing Hard Copies
You can print hard copies but it’s recommended you “Print Preview” first to make sure the setup and margins are OK.
At times, you may see a header/footer you want to delete. Simply go to page setup and backspace them out. Also, if the outline “bleeds” off the page when you do print preview, change the left and right margins to 0.16 each. Backspace out the header. Backspace out the footer 0.16 0.16
Course Outline Repository Where Students Go
For Students – On the Welcome Tab Students can access their course outlines in several ways
Course Outline Repository Getting the Course Outline Channel
If you don’t have the course outline channel, you can easily add it. Click on “Content/Layout”
Pick the tab where you want the course outline channel to appear. Most faculty put it in Teaching Tools, support staff in Staff Member. Click on “Add Channel”
Follow steps for adding a new channel: • From the drop down menu, choose “Select All” • From Select a Channel, choose “Course Outline” • Click “Add Channel”
When you’ve added the channel, click on “back to Welcome Tab”
Check back in the tab to make sure the channel’s been added.
Course Outline Repository How to Get Full Access to the Application
If you’ve been through the tutorial: • Email Jim Cummings to get access to the full application.