Download
1 / 11
110 likes | 125 Views
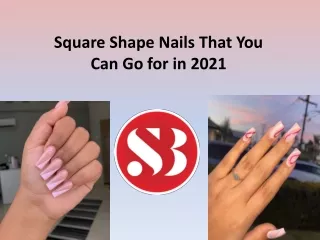
The tips of square shaped nails are squared off. This is most likely one of the most popular nail designs. It's a wonderful choice for nail shapes because it follows the natural width of your nails, which reduces the danger of it breaking. Trim your nails and shape them straight across with a nail filer to achieve square shaped nails results. If the margins are rough, clean them up. Visit here for more information: https://bit.ly/3NDGjKr <br><br>

E N D
Hands need no less cautious consideration than your face. Nail treatment is an essential piece of hand care. How amicable it looks relies to a great extent upon the Nail Shapes. In the first place, it is important that there are a wide range of adaptations of square-shaped nails on the planet. Beginning from the expert ones, long and short, for example simply behind the tip. Those that have sharp edges and the ones somewhat adjusted. Each nail beautician has their own particular manner to square shaped nails. It's likewise critical to know what end-product the client might want to see. Assuming the square shaped nails that we present in the video will be not quite the same as what you have seen up until this point, remember that both are presumably fine. How about we recollect a certain something! Each nail styling that is protected to make, protected to wear and preferred by clients is right.
Upgrading your nail magnificence with the rich nail plan and nail shedding causes your nail to appear to be complimenting. With outright nail shape blending, the fingers and hands look glorious. Since the nails outline not just adorns the nail plan, it further improves the normal nails. This article expects to show you the best nail shapes for your nail. Peruse on to know! The human nail body comprises of a few sections: Nail Plate Side Rollers Fingernail skin Grin Lines Free Edge The vitally 4 types of nails: Square Trapezoidal Rectangular Oval
'Square' shaped nails are the best shape to begin with on the off chance that you want to keep your nails short for work or are simply starting to develop them. They're incredibly simple to make; all you have to do is leave the sides of the square-shaped nails alone and draw a straight line through the tip. Assuming that your nails are extremely short it might take you some time to cut to the chase of having the option to do this, yet it gives an exceptionally perfect and clean look to your fingers and looks awesome with a very shimmering shine.
We utilize Easy Shape Light Rose gel. We take the item, we apply it with beating development on the free edge, shaping a casing. We arrive along the edge with the brush's edge. We lead the edge of the lengthy nail straight. With the edge of the brush, we level the surfac. We put our hand to the light for 30 seconds. • We eliminate the structure. Delicately, exactly at the free edge, press the structure, moving it left and right. We strip off the upper wings and pull the structure down. • We take a little gel and spread it on the meager overall surface of the nail, coming precisely to the fingernail skin region. • We add somewhat a greater amount of the item and begin throbbing Light Rose on a superficial level. We start from the upper piece of the nail - from the fingernail skin region. Also we brush the item down, driving it from right to left and from avoided to right until we run with regard to the item. Then, at that point, we add the gel and proceed with the throbbing crisscross. • In the wake of applying the item, the surface may not be even. We shouldn't stress over it, simply place the brush upward, and stick it tenderly into the gel surface, going all over. Thus, we spread the surface until we get a smooth construction. • We put the hand into the light, and when we begin experiencing the heat - we rapidly contact and fix the passage. We use tweezers and cinch the pressure region and the whole free edge - investigate, the tweezers are at a point. We must be mindful so as not to press it excessively on the grounds that we can crush the passage or curve it. Since the tension was adjusted, the passage is well fitted to the regular nail - neither too bended nor excessively level. • Note! significant message: squeezing ought not do any harm! Assuming you imagine that main difficult nail squeezing will have a decent impact and will thin the nail, you should know that something is off-base. • We actually look at the state of our nails. Assuming we think it is excessively level, we add a slim layer everywhere and select the following part of the item, to make a pinnacle. We put our hand to the light for 30 seconds.
We clear off the scattering layer with a residue free q-tip absorbing a wipe off, and we move to the recording. • To begin with, we will document the shape seen from the front, so the sidewalls and free edge. We place the record straight and take action as though we were cutting bread. We don't incline the record back - on the grounds that then we will document the edges, and we would rather not do it yet. Just presently we are prepared to move to the free edge. On the off chance that we need the square shaped nails to have sharp edges, we place the record at a point of 90 degrees. In any case, while doing salon nail looks, we somewhat record so as to get milder edges. • We record the side edges. Holding the document alongside the finger, we make delicate developments. We don't shift the record. We just aide it completely straight alongside the finger. assuming we swing the document, then, at that point, the last look of our square edges will bring about them being adjusted. Also we need it to be straight. It should be delicate yet straight. Assuming the scrape is held down, the edge will likewise go down, and in the event that we keep the record up, the edges will go up as well. • We go after a mandrel with a 180 coarseness. We fit it on and set the e-document at around 8-9 speed, we arrive at a limit of 10 thousand insurgencies, contingent upon the force of the e-record. If the e-record is set at too high of an insurgency, the mandrel might slide off the nail surface. Setting the mandrel corresponding to the nail plate, we run it from right to left, and back once more, drifting on the focal piece of the nail, and moving lower to the sides. We run the e-document handle in the 'U' square shaped nails.
At the point when the surface is evened out, we move to the passage, and we record it to get an ideal, slight hairline. • We control the nail profile and make an upper curve, which means, a stretched external curve that starts at the fingernail skin, goes through the whole zenith and closes at the hairline. We document it, recalling that the mandrel ought not be laid level, and the peak was made perfectly located.