Download
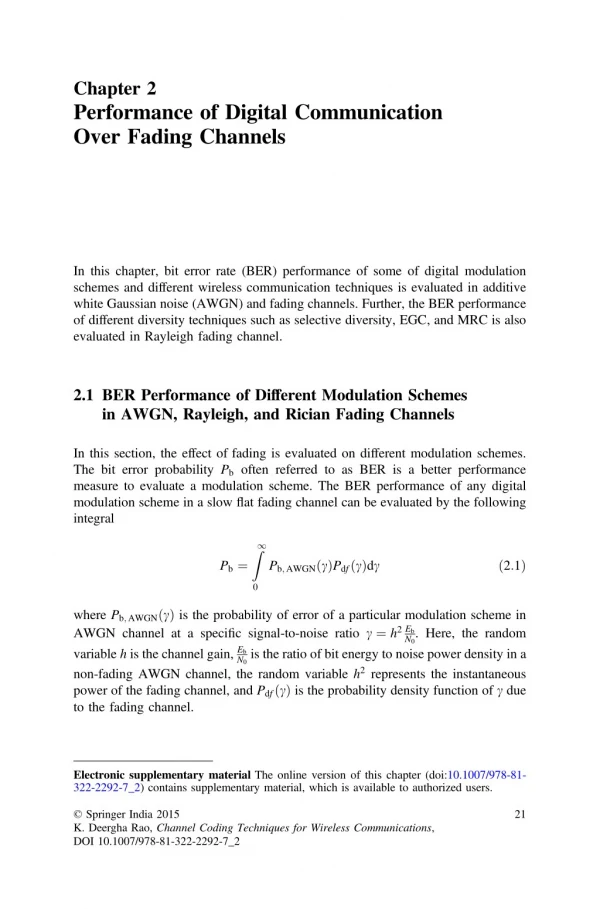
1 / 12
120 likes | 132 Views
Learn how to effectively use paper space for creating finished layouts for printing or plotting, including designing viewports and inserting borders and title blocks. Discover how to switch between model space and paper space, adjust scales, and navigate between the two.

E N D
PAPER SPACE • TIPS TO GET STARTED IN PAPER SPACE • HANDOUTS AVAILABLE
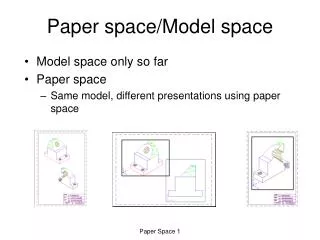
PAPER SPACE • One of two primary spaces in which objects reside. • Paper space is used for creating a finished layout for printing or plotting, as opposed to doing drafting or design work. • You design your paper space viewports using a layout tab. • Model space is used for creating the drawing. • Design your project in Model Space.
Here I start out with a typical “plan view” in model space. On the bottom of the screen, you see that “MODEL” is selected, for model space.
This is a finished “PAPER” space view with border, title block, etc. On the bottom of the screen, you see that “PAPER” is selected, for paper space.
1. Let’s say I want a view that shows only the embankment. First, I want to create a new layout. Right click on the “Model” tab and select “New Layout”.
2. A new layout (Layout1) has been created. Now you need to choose the printer/page settings you want to associate with this new layout.
3. I am still in paper space. Next I want to insert a border and title block using “Insert Block” or through Symbol Manager. 4. I will also delete the rectangle in the middle. It is the current view port. The view port is your “window to the world”. Such as a picture frame is to a picture. Select the viewport, right click and select “cut”.
5. Next, right click on any command bar. Select “Viewports” to get viewports toolbar.
6. The “Viewports” command bar is now showing. Select “Polygonal Viewport”. Now you can select the viewport shape you want. I use the “OSNAP” setting and select the endpoints of the border, excluding the title block.
7. The dark black polygon is now the current viewport. Double click inside this polygon. Now you are in model space.
8. Typing “ZE” or “Zoom Extents” will show the entire plan view. The scale happens to be 0.008305 or 120.4 to 1 for this project. Note that the plan view does not show up beyond the current viewport. The title block does not have contour lines in it.
9. You can change the scale to suit your needs. Here I chose 50:1. Note that we are still in model space. If you want to get to paper space, double click outside of the viewport. 10. When you are back in paper space the scale should be at 1:1.