
INSPECTIONEASY TUTORIALS
E N D
Presentation Transcript
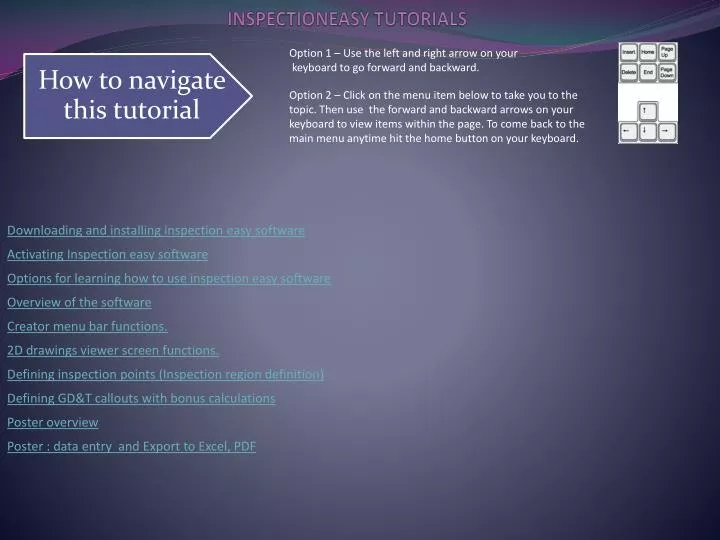
Option 1 – Use the left and right arrow on your keyboard to go forward and backward. Option 2 – Click on the menu item below to take you to the topic. Then use the forward and backward arrows on your keyboard to view items within the page. To come back to the main menu anytime hit the home button on your keyboard. INSPECTIONEASY TUTORIALS Downloading and installing inspection easy software Activating Inspection easy software Options for learning how to use inspection easy software Overview of the software Creator menu bar functions. 2D drawings viewer screen functions. Defining inspection points (Inspection region definition) Defining GD&T callouts with bonus calculations Poster overview Poster : data entry and Export to Excel, PDF
Downloading and installing InspectionEasy software. When you download and install our two programs (creator.zip and poster.zip) From our website you will see the above three icons on your desk top. We encourage you to install on multiple computers so all your employees can become familiarized with our programs. These are full feature programs with no restrictions.
Step one When you click on the activate inspectioneasy icon you will see the following window: If you have an internet connection please use step one here to activate your license. You will be able to use it for thirty days. This will also register your computer MAC address into our database. This way we can send you a permanent license when you purchase. Activate inspectioneasy (If there is no internet connection or if your firewall blocks the license transfer then please Use steps two and three above to activate.)
There are three options for learning our software • Continue with this power point tutorial. • Watch the videos on our website. Or click the question mark icon while in the creator or poster. • Purchase custom one on one training from inspection easy inc.
Software overview • Creator • Use this to create an inspection plan file. Our format for this has an .idf extension. The drawings, inspection points, operations etc are all integrated into this file. • First start by importing a drawing file (pdf, tiff, jpeg, dwg, dxf, bmp and many others) • Define inspection points and operations. • Poster • Open a inspection plan file. • Post data for a part, session or batch. • Create a check sheet for manual input. • Create a report(Excel, PDF) file from posted data.
This is where you can rename or delete the current operation. Please note that to delete the operation all inspection points for that operation must be deleted. Creator menu bar Functions- Open a previously created quality plan file. ( .idf extension) Open an image file . This will load the file into the quality plan file. You can load pdf, tiff, dxf, dwg, jpeg etc. This will load a model file into the quality plan. This can be iges, step, parasolid, acis, solidworks, unigraphics, pro E, Catia, etc. Check this option if you want to post the data immediately after creating inspection point Click on this down arrow to open recent idf files. This box keeps track of who is making changes to inspection plan images and models. Save the quality plan file ( .idf) Close the .idf file. Exit the creator program Shows the currently logged in user Save .idf with a new name This takes you to help videos This AQL tab is for setting the standard AQL list. These values will used in lot posting. In Batch Posting, Based on the this tab and lot size, batch size is determined for each inspection point Add or modify the upper and lower tolerance values, angle values in inches or millimeters . You can use them in Op settings Click on this tab to add an inspection operation. You can add as many as you need and you can name them what ever you like. Create or edit tolerance class specifying the different tolerance limits. So using this setting, tolerance values are calculated depending on nominal values. Here you can enter part number and rev level. Also other apqp (advanced part qualification process) informaion. These are your operation tabs. Layout, laser , vmc, lathe, op1, op2 etc. Select the tolerance object from drop down. It sets the values as per defined through "Add ISO" form (see top of the menu bar). You can see upper and lower tolerances, which will be used while creating and posting IDRs if you click on “Set Block Tolerance” button for that tolerance object. “Reset Block Tolerance” resets the tolerance back to original To edit and save, check the “Edit “ This box keeps track of who is making changes to the inspection plan
These three boxes contain the border information for the selected drawing. Once this is set, your first article will be output with the zone location for all your balloons. The optical character recognition tries to find this information when you load a drawing. It again tries for it when you crop the page. You can always overwrite this info if the OCR fails. 2D drawings viewer screen functions. This tool is used to crop your drawing. This can be used to eliminate extra white space around some drawings. This is also useful to crop certain views. For example, you can add a second copy of the same drawing and crop a certain view to show more clearly. This red back button will undo functions done by the 5 buttons to the left of this. This will work only till you hit save. These two buttons will rotate the selected drawings by 90 degrees Click this button to thicken all lines and characters to improve visibility Window zoom This is the default tool and this is the main tool you will be using. Click on this tool, then click and drag a box around your inspection point. A dialog box appears for filling in the limits, feature, description, measurement device etc. This tool also can be obtained by right clicking once or twice on the drawing area. This is the select tool. You will use this to select an already defined inspection region. You can also use this to point and right click to copy, move or delete an inspection region. This tool also can be obtained by right clicking once or twice on the drawing area. If you are zoomed in and you want to pan, click this tool and then you can move around by left clicking and dragging. Zoom to fit the full page in the screen You can export posted data for IDRs in different formats like in poster The buttons in this region are used to add annotations, call outs or dimensions to the drawings. By clicking on one of the two buttons to the upper left you can make your additions visible to one operation or all operations. The right most button in this set can be used to set the font size of your annotations. You can also select and drag the corner of the annotation to make them, bigger or smaller. You can copy multiple IDRs at a time from one operation to another. With this set of buttons you can control your balloons. You can make them visible or not, and you can change the sequence, and you can change the size. You will get this window when you right click on one of the thumbnail images of the drawings. You can insert a page or remove a page. With the overlay function you can compare drawings for rev changes and then you can replace the drawing
Inspection region defination These three boxes are the buffer area for the OCR. The OCR will put everything it finds in the region here. You may click the N box to the right to move the box into the nominal field. The program will look for the number of decimal places and moves the appropriate tolerance to the limits. If you have a high low call out on the print , You can check the two boxes to the left and the system will place the midpoint in the nominal field and will calculate the limits. Here you can select a measurement device for this item. Please note if you do not select one here, you may select one later in the poster (while entering data). Also you may add to your list by clicking the edit button here. Also note that once you select one it will carry forward to your next inspection region. This is the bitmap image of your inspection region. Some times you may need to click the green button here to rotate your image by 90 degrees Here you can enter the sampling rate. You may add to your sampling rate list by clicking the edit box here. You can have value in whole number or minutes which will be used in session mode of posting Here you can define if the item is a reference, variable or an attribute (pass/fail). For GD&T items you can check SSS (single sided spec). This will make the nominal zero and move the number to the upper limit. You can use the SSS for true position also if you are having your CMM give you a true position. If you want to input the x-y basic for your truepositon, this process will be explained in the next slide. Here, you can select the AQL level for inspection point. This will be used in poster for batch posting where AQL table and lot size decides batch size for each inspection point This area contains the default tolerances. This comes in from the units setting (inch or mm) set in the operations setting window. You may change this and it will carry forward to future operation tabs. If you have already started operation tabs you will need to change this in each operation tab. You may enter a description here. It will show in the poster and in the reports. When you use the cross (+) tool and drag a box around your inspection callout you will see this dialog box. Here you can define if the item is a Single, range or a multiple. If it is a multiple enter the number times in the box next to it. Most of the time the OCR will populate this if it is a multiple. If you would like to add a reference item, click this button. This dialog box will move out of the way. Then you can drag a box around your reference item. Then save the reference and then save this. Please note when you add a reference the balloon will have a suffix. Example 4a, 8b etc. Once you set the ISO and then want to use the same for next IDRs then lock this ISO. Otherwise to use the ISO settings for the current IDR only, click on “N” button. Nominal value is used to derive the limits from the ISO setting form This is the feature name with the symbol. You can click the down arrow and select the right feature. The selection is easier if you type the first character after clicking the down arrow. You can use the edit here to add feature names. Here, you can specify the tolerance for the angle measurement
Gd&T features with bonus calculation Step 1 a. Define a true position or a sub feature Use true position if you have xy basic to define or angle and distance basic to define. Use sub feature button if it is a single feature such as perpendicularity, concentricity, parallelism etc. This Slide explains the two step procedure to setup gd&t callouts with MMC and LMC modifiers. b. Use click to add references and pick up the basics if you have xy or angle/dist c. Populate the grid of xy , angle/dist and match the number of features. d. Hit save. At this time the defined regions will be yellow. Step2 Pick up the feature of size – Diameter, dist etc. Link the step one items to the feature and select MMC, LMC, RFS And select if it is a hole or a boss. Step 3
Select the quality plan file (.idf extension). The down arrow here gets you to the recent files or use the browse to find the file. Poster overview Use this button to post data to a single part. At the end of part one, it asks whether to create a new part or remain in the same part for exporting the report Use this button if you are posting data continually as inprocess inspection. The data for all the parts will be saved in the session. You may run reports or export to excel the entire session data. This will also allow you to control the inspection frequency. Use this button if you are entering the data for a batch. It will allow you to predefine a batch size and you will be able to enter data by feature. For example you can enter #1 for all 5 pcs and then enter #2 for all 5 pcs. Again, all this data is saved in the database. Use the down arrow here to select the inspection operation. First article , mill, lathe etc. Lot posting is also available here. If lot quantity is entered, batch size for each inspection point is determined by the AQL requirement The pass/fail mode allows you to enter pass or fail for all the features. This is helpful to speed up your checks where variable data is not required. Please note that you will not be able to create a first article report with data entered in this mode. You can always view and edit data that has been posted into the database. Also you can generate report in excel and pdf.
In this section you can create a map to cmm program for auto input from a CMM. This will map to a text file output from a CMM. You can run this poster program on the computer that is running your CMM. Every time a part is measured on the cmm the data will get imported. Poster: Data entry and Export Window zoom It shows you the edit history Zoom to fit the full drawing You can control the size of the balloons. This is the part number that you are checking. You can enter a serial number in this box and it will increment on the next part. It takes you back to the main poster screen. This will stop the current inspection and will start a new part. This partial inspection will be saved. This will cancel the current inspection and will delete the data. It will start a new part. These two check boxes will show the dimensions in alternate units and you will be entering the data in alternate units. In this section you can set up a serial device. Data can be imported from the serial device by turning on the check box, once you set up the device parameters here. This is the the postings done and the total postings needed for this part. It allows you to export data in different formats Other zoom options including auto zoom. In auto zoom it will automatically center and zoom to the inspection point being inspected. You can enter the zoom factor in the box here. If you enter 200 the image will look twice as big with the center at the inspection point. The check box will start inspection as per sequence. It will go from balloon one and up. Dialog boxes will come up looking for data input. By clicking to down arrow next to auto seq here you can change the balloon sequence. The new sequence will be the default till you change it. You can un check here to stop and recheck to restart This is the refresh button. It will bring in any changes made in the creator. If you made a mistake in the creator or left some thing out, this will let you bring in the corrections with out having to get out of the poster. You can output the report in pdf form. First dialog will ask for the pdf image file name. Once you save, it will ask for the data pdf filename It shows you the Statistical process chart for the selected region from Region selection form. You can take print out of it. This check box will make the frequency show above the check points. This is used in the session mode where the sampling rate is defined. If for some reason the drawing zones got left out in the creator you can enter them here. Use the down arrow to select if the numbers on top or letters on top. These zones will show up in your reports. A1, b4 etc. Please note that changing these here will not change permanently. To change on a permanent basis for this part, you need to do this in the creator This check box will bring up a summary window. This window can be moved around or can be placed on a second monitor if needed. This checkbox will display the limits above the inspection point. This is helpful if the characters on the drawing are very small. You can output the report in excel as9102 / AIAG form. First dialog will ask for the pdf image file name. Once you save, it will ask for the data excel filename You can import custom excel template where you can define exact data you need. Once defined you can keep re-using it going forward. You can import many different templates. Once a custom excel template is imported you can select any of the templates you have imported The user can sign in using his name or number. Also he can input work order and/or shift. This information will be visible in the data base when you go to create a report or edit a posting.
Poster: Data entry and Export When selecting data, the line that is hovered over, the line shows green meaning its within tolerance and red showing outside tolerance Once in auto sequence you can easily start posting your data points quickly using the scale or by typing the value in this box Our graphical interface shows the nominal in center and upper and lower tolerances The bars located here shows previous data. A quick view of your SPC, every five data entries are combined and an average (red) is placed on the line.