Download
1 / 124
1.24k likes | 1.42k Views
Home Food Preservation Made Easy. Prepared by:. Renay Knapp, Henderson County Tracy Davis, Rutherford County Cathy Hohenstein, Buncombe County Julie Padgett, McDowell County Sue Estridge, Madison County Sandi Sox, Polk County. Acknowledgements. Angela Fraser, NC State University

E N D
Prepared by: • Renay Knapp, Henderson County • Tracy Davis, Rutherford County • Cathy Hohenstein, Buncombe County • Julie Padgett, McDowell County • Sue Estridge, Madison County • Sandi Sox, Polk County
Acknowledgements • Angela Fraser, NC State University • Cheryl Beck, Jackson County • Pam Staton, Clay County • Jessica Robison, Swain County • April Conley, formerly in Cherokee County • Latresa Philips, formerly in Graham County • Lynda Spivey, formerly in Buncombe County • Megan Schaffer, formerly in Henderson County
Basics of Canning • Food is placed in a jar and heated to a temperature that destroys targeted microorganisms. • Heat also inactivates enzymes that cause spoilage. • Air is driven from the jar during heating. As the jar cools a vacuum seal is formed. Basics of Canning
High Acid Foods (pH <4.6) • All fruits, except for: • figs • tomatoes, and • melons • Fermented pickles, such as sauerkraut • Acidified foods, such as pickles Basics of Canning
Low-acid Food (pH >4.6) • All vegetables, except rhubarb • Meats • Poultry • Seafood • Soups • Mixed canned foods (low-acid + high-acid) Basics of Canning
Two Methods of Canning Boiling Water Canning -- used for high-acid foods Pressure Canning -- used for low-acid foods (and some high-acid foods) Basics of Canning
Why Two Ways to Can? • Yeast, molds, and most bacteria are destroyed at boiling temperatures -- 212ºF at sea level. • C. botulinum forms spores that require higher temperatures for destruction in a reasonable period of time -- usually 240ºF or above at sea level. Basics of Canning
What Makes Canned Food Unsafe? • Clostridium botulinum • Causes botulism poisoning • Found naturally in soil and water. • Produce heat-resistant spores that only destroyed by pressure processing. • 10-35% of people who get botulism die. Basics of Canning
Botulism and Growth To grow, the spores need: • oxygen-free environment • low-acid food • temperature between 40ºF to 120ºF • relatively high moisture Basics of Canning
Botulism and Growth Conditions for C. botulinum to grow can be found in: • Home canned foods • Smoked fish and sausage • Foil-wrapped baked potatoes • Packaged mushrooms • Pot pies Basics of Canning
Preventing Botulism • Spores do not grow in high-acid foods. • Spores killed when low-acid foods heated long enough at a specific temperature. • Process low-acid foods at 240ºF. • Use pressure canner for all low-acid foods. Basics of Canning
Other Ways to Prevent Botulism • Test pressure canner dial gauge for accuracy each year before use. • Correctly operate canner. • Check canned food carefully before use. • If toxin is suspected, detoxify food before discarding. The toxin is destroyed by boiling even though the spores are not. Basics of Canning
Unsafe Canning Methods • Open Kettle • Oven Canning • Dishwasher • Addition of Aspirin • Steam Canners • Microwave Oven Canners Basics of Canning
Boiling Water Bath Used for high-acid foods and acidified foods Boiling Water Bath
Boiling Water Bath • Have water simmering or hot in canner, high enough to cover jars (about six inches). • Hot packed jars = simmering water • Raw packed jars = warm to hot water • Wipe rim of jars and adjust lids. • Lower jars slowly into canner. Basics of Canning
Using a Boiling Water Bath • Place jars on rack in canner. • Add more hot water if necessary, once jars are in canner. (Don’t pour hot water directly onto raw-packed jars). • Count processing time when water returns to a boil. • Remove jars to a padded surface. • Cool away from drafts, 12 to 24 hours. Boiling Water Bath
Pressure Canning Used for low-acid foods Pressure Canning
Inspect Your Pressure Canner • Some parts might need assembling -- see manufacturer’s directions. • Become familiar with parts and their functions. • Clean to remove oils. • Lightly coat the exposed gasket and lugs on the canner bottom with cooking oil. • Before each use be sure vent pipes are clear and open. Presssure Canning
Using a Pressure Canner • Have 2 to 3 inches of water simmering or hot in canner. • Hot packed jars = simmering water • Raw packed jars = warm to hot water • Place jars on rack in canner. • Put lid on canner with weight off or petcock open. Pressure Canning
Exhaust canner for 10 minutes. • Close vent or petcock. • Start counting processing times when correct pressure is reached. • Turn off heat at end of processing. • Let pressure drop to 0 psig naturally. Pressure Canning
Wait 2 minutes after pressure drops to 0 psig. (For some canners, check that locks in handles are released). • Remove weight or petcock. • Open canner. Watch steam! • Remove jars to padded surface or rack. • Cool jars for 24 hours, undisturbed. • Check that jars have sealed. Pressure Canning
Process Food Properly Follow a credible recipe exactly • The following slows heat penetration: • Extra sugar or fat • Oversized food pieces • Added thickeners Process food properly • Heat-up and cool-down times in pressure canners are counted toward sterilizing value of the process. Never rush them. Pressure Canning
Importance of Processing Time • Each food and preparation style has its own processing time. • Processing time differs with size of jar. • Too short • Underprocessing • Spoilage or unsafe food • Too long • Overprocessing • Overcooked Pressure Canning
What Affects Processing Time • Acidity of the food • Preparation style of the food • Composition of the food - Viscosity - Tightness of pack - Convection vs. conduction transfer of heat - Starches, fats, bones • Initial temperature of food as it is packed into jar • Temperature of processing • Size and shape of jar Pressure Canning
Altitude Adjustments • As altitude increases, the temperature decreases at a given pressure. • Dial-gauge processing changes: • 0-2000 feet = 11 pounds pressure • 2001-4000 feet = 12 pounds pressure • 4001-6000 feet = 13 pounds pressure • 6001-8000 feet = 14 pounds pressure Pressure Canning
Weighted gauge adjustments • 0-1000 feet = 10 pounds pressure • At altitudes above 1000 feet, process at 15 pounds pressure. • Boiling water canner adjustments • Generally, the processing time will increase. • Use a credible resource to determine processing time. Pressure Canning
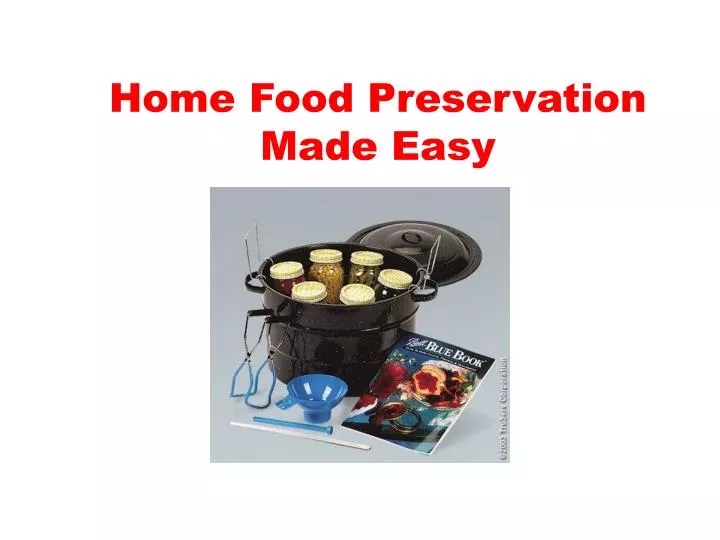
Canning Equipment Proper equipment is essential to a safe product. Equipment
Canning Jars • Check jars for nicks, cracks, and rough edges. • Wash in soapy water, rinse well, and keep hot. • If food is processed for less than 10 minutes, need to be sterilized. • Do not use single-use jars, such as mayonnaise and tomato sauce jars, to process food at home. Footer
Canning Lids • Use two-piece lids. • Flat lid cannot be reused but the ring band can. • Follow the manufacturer’s instructions for treating them. Equipment
Preparing and Packing Food Preparing and Packing
Raw Pack • For foods that lose shape when cooked. • Place raw food directly in jars. Boiling hot liquid is then poured over the food. • Pack firmly, don’t crush. • Add jars carefully to warm canner to avoid breakage from heat shock. • Follow a reliable recipe. Preparing and Packing
Hot Pack • Preferred method for most foods. • Food is cooked in liquid before packing. Cooking liquid is then poured over food in jar. • Fewer jars needed. • Less floating of food and better color and flavor. • Foods easier to pack. • Kills some microorganisms. Preparing and Packing
Headspace • Space in the jar between the inside of the lid and the top of the food or its liquid. • Check canning directions to determine the correct headspace for each food. • Usually: • 1/4” for jellies • 1/2” for high-acid foods, such as fruits, tomatoes, and pickles • 1” to 1-1/4” for low-acid foods Preparing and Packing
Problems with Headspace Too little: • Food may bubble out during processing. • Deposit on rim may prevent proper sealing. Too much: • Food at the top is likely to discolor. • Jar may not seal properly, because processing time not long enough to drive all the air from inside the jar. Preparing and Packing
Before Sealing Jars • Remove air bubbles. • Re-adjust headspace if necessary. • Wipe jar rims. • Adjust two-piece lids, fingertip-tight. Preparing and Packing
Jams and Jellies Jams and Jellies
Types of Jams and Jelly • Jam • Jelly • Marmalade • Preserves • Conserves • Butter Jams and Jellies
Jelly Made from strained fruit juice. Should be clear and sparkling. Gelled enough to hold its shape outside the jar, yet soft enough to spread easily. Forms sharp angle when cut. Jam Made by cooking crushed or chopped fruits with sugar until the mixture will round up on a spoon. Can be made with one or more fruits. Should be firm but spreadable. Does not hold the shape of the jar. Jams and Jellies
Preserves Fruits preserved with sugar so that the fruit retains its shape Is clear, shiny, tender and plump Syrup is clear and varies from the thickness of honey to that of soft jelly Marmalade Tender jelly with small pieces of fruit or citrus peels distributed evenly throughout Jams and Jellies
Conserves Jam-like product made by cooking two or more fruits with sugar until it. roundups on a spoon or flakes from it. A true conserve contains nuts and raisins. Butter Cook fruit pulp and sugar to thick consistency. Add spices -- amount and variety vary. Cook slowly after sugar is added until thick enough to round up on a spoon. Process pulp in a food mill and strain through a fine-meshed sieve. Jams and Jellies
Essential Ingredients • Fruit • Pectin • Acid • Sugar Jams and Jellies
Fruit • Provides flavor • Furnishes pectin and acid for gelling • 1 pound fruit = 1 cup juice • Use top quality fruit Jams and Jellies
Pectin • Natural substance found in varying amounts in fruits that causes jelly to gel. • Slightly under-ripe fruit contains more pectin than fully ripe fruit. • When making soft spreads without added pectin, use ¼ under-ripe and ¾ ripe. Jams and Jellies
Fruits High in Pectin • Tart Apples • Concord Grapes • Sour Blackberries • Cranberries • Currants • Gooseberries • Quinces • Sour Plums Jams and Jellies
Fruits Low in Pectin • Apricots • Blueberries • Cherries • Peaches • Pineapple • Rhubarb • Strawberries Jams and Jellies
Commercial Pectin • Liquid • added to mixture after all other ingredients have been brought to a boil. • Powdered • stirred into the fruit and brought to a boil before the sugar is added. • Purchase fresh pectin each year. Jams and Jellies
Why Use Commercial Pectin? • More jelly produced from the fruit • Better color • Less chance of failure • Shorter cooking time Jams and Jellies
Acid • Needed for gel formation. • Under-ripe fruits have more acid. • Commercial pectin contains some acid. Jams and Jellies