Download

1 / 62
620 likes | 692 Views
This course covers basic driving skills for fire engine operators, including driver walk-around, STOP procedure, hazard reduction, and engine danger zones. It includes start-up and shifting procedures, hazardous driving situations, handling and maneuvering capabilities, and pre-trip inspections. The STOP procedure covers seat belts, stowing tools, situational awareness, and personnel accountability. Engine danger zones detail safe operation proximity guidelines, while engine spotter usage and techniques are explained for safety. The course also includes vehicle operations and recovery techniques, driving safety practices, and response strategies for blown tire incidents.

E N D
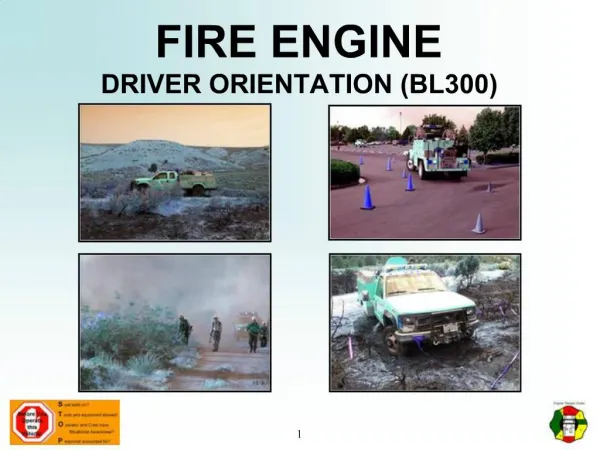
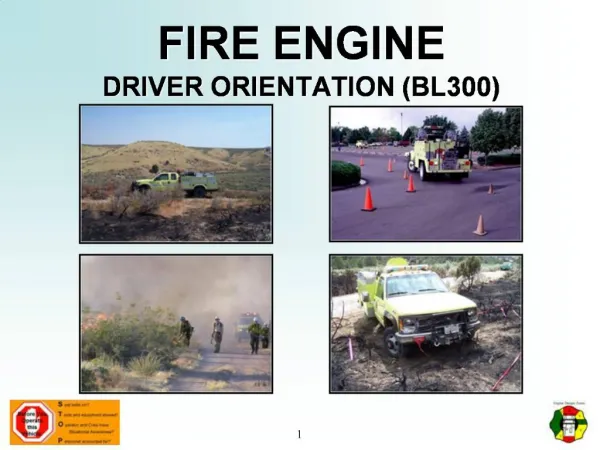
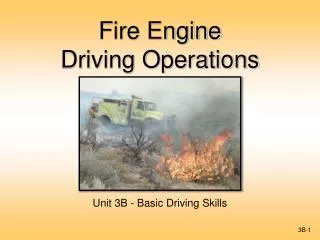
Fire Engine Driving Operations Unit 3B - Basic Driving Skills
Describe and demonstrate the driver walk-around before moving a fire engine. Describe the STOP procedure and how it relates to the driver when operating a fire engine. Identify danger zones around fire engines and describe actions that can be performed to reduce risk in these areas. Objectives
Describe and demonstrate the start-up and shifting procedures an ENOP must perform when operating fire engines. Identify hazardous driving situations and describe actions that can be performed to reduce risk. Demonstrate on an established course fire engine handling and maneuvering capabilities. Objectives
Pre-trip Inspection(Preventative Maintenance Check) Performed daily during fire season Documented in the FEMPR Different from the driver walk-around
Driver Walk-Around Passenger Side Rear Driver Side Rear Cab Passenger Side Front Driver Side Front
Walk-Around Watch Outs Rocks in the way of tires Holes, berms, ditches, etc. Large stobbs or downed trees Chock blocks secured and in place Gear or equipment around or under vehicle
More Walk-Around Watch Outs Vehicles parked behind the engine Personnel relaxing or sleeping around engine Body damage while away from the engine Cabinets latched and equipment secured Side and overhead clearance in and near the path your vehicle will travel
“S” • Seat belts on? • Seat belts must be available and used in Bureau motor vehicles. • The driver is responsible for asking passengers if they are wearing their seat belts and ensuring they are worn at all times.
“T” • Tools and equipment stowed? • Ensure all tools and equipment are secured in cabinets or approved storage areas before moving the engine.
“O” • Operator (driver) and crew has situational awareness. • Determine if the engine is clear of hazards. • Never back up an engine without checking behind the vehicle. • Utilize spotters whenever possible.
“P” • Personnel accounted for? • Ensure all personnel are account for and their locations are known. • Communicate your intentions to all personnel before moving the vehicle.
Engine Danger Zones • When working in close proximity of a moving engine, there is an increased risk for an accident to occur. • Given the size of our engines and the environment we work in, operator “blind spots” or danger zones exist.
Engine Danger Zones • Whenever possible, operate in the green zones. • Offer visual contact with the operator. • Yellow zones are areas of limited visibility and mirror-use areas. • Notify the driver when you are in these areas.
Engine Danger Zones • Never work in red zones when vehicle is moving. • Notify operator prior to entering red zones. • Stay out of red zone where the operator has no visual.
Engine Danger Zones • The red area in front of the engine extends 10 feet out from the front bumper. • You must have visual contact with the driver when working in front of the vehicle beyond the 10-foot range.
Engine Spotter Usage There are always blind spots around the engine. Always use a spotter when another person is available. If alone, get out and do a visual yourself.
When to Use a Spotter Backing up Off-road pioneering Hazardous conditions exist Low vehicle clearances exist Narrow/confined driving spaces exist
Spotter Techniques • Spotters should have a clear line of sight to the driver. Spotter position should be: • Forward movement: Outside the forward red zone on the driver side windshield • Backing movement: Outside the rear red zone on the driver side mirror • Spotters and drivers should agree upon a common set of hand signals.
Spotter Techniques Spotters and drivers need to communicate on the planned action. Spotter distance from the engine will depend on various situations at the time of the maneuver; however, visual contact between the spotter and the driver shall not be compromised. If the driver loses sight of the spotter, the driver should stop immediately and determine the spotter’s location.
Driving Safety The crew depends on you!
Blown Tire Technique • The goal in any rapid loss of tire pressure or “blowout” is to keep the vehicle balanced and controllable. Do not panic. Any over-reaction by the driver—including slamming on the brakes or abruptly removing your foot from the accelerator—can result in a loss of vehicle control. • What you should notdo: • Do not step on the brake. • Do not abruptly release your foot from the brake pedal. • What you should do: • Accelerate slightly or keep steady pressure on the accelerator pedal. • Gently correct the steering as necessary to stabilize your vehicle and regain control. Look where you want the vehicle to go and steer in that direction. • Once your vehicle has stabilized, slowly remove your foot from the accelerator pedal allowing the vehicle to slow on its own.
Hazards Pay attention to your surroundings! What hazards do you see in this picture?
What was in the picture . . . Creek undercut the road bank Narrow passage way Various terrain and fuel types Rolled engine!