Using Climatic data in Diva GIS
Using Climatic data in Diva GIS. Franck Theeten, Royal Museum for central Africa Cabin training 2013. Source data. 1. Go on the ‘ downloads ’ part of the DIVA GIS website ( http://www.diva-gis.org ) 2. Select « Free Spatial data -> Global Climat data»

Using Climatic data in Diva GIS
E N D
Presentation Transcript
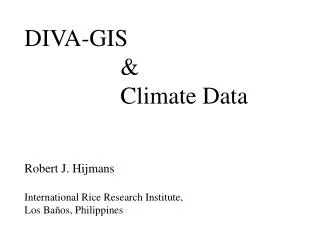
UsingClimatic data in Diva GIS Franck Theeten, Royal Museum for central Africa Cabin training 2013
Source data • 1. Go on the ‘downloads’ part of the DIVA GIS website (http://www.diva-gis.org ) • 2. Select « Free Spatial data -> Global Climat data» • 3. 3 versions of the Worldclimdatasets (Museum of vertebratezoology, University of Berkeley) are actuallyavailablethey do no cover the oceans • 3.1: a direct link to the Worldclimwebsite (http://www.worldclim.org) • 3.2: The current climat data (1950-2000) produced in 2004 • 3.3: a predictive model produced in 2003 by B. Govindsamy, P. B. Duffy, J. Coquard), correspondingto the CCM 3 model of the American National Center for AthmosphericResearch (NCAR)
Source data • For thisexercise, download and unzip • 3.2: The current climat data (1950-2000) produced in 2004
Data preparation • The climatic model must beused in combinationwith distribution data • Open a background layer with the world boundaries
Importation of delimitedtext distribution data • Open the ‘calipidae_exo_divagis_wgs84.csv’ file and import itintoDivaGIS 1->Data 2->Import point to Shapefile 3->’Fromtextfile (TXT)’ 4-> register the source file in ‘Input File’ 5-> Choose the appropriatedelimiter (here ‘tab’) 6-> Check that the X (latitude) and Y (longitude) columns correspond to the column and contain values fitting the samereference system as the project (here: decimaldegrees) 7-> a new shapefilewillbecreatedat the location defined in ‘Output File’ (by default, Diva GIS set it to the samefolder as the original input file)
Selection of the relevant points • 1: The calapiddaeshapefilescontaincoordinates in the wrongformat thatappearoutside of the world boundaries and disturb the processing of data (thisisactually a data quality issue) • 2: Wewillexcludethese data by creating a shapfiletakingonly the points withinbetween longitude -180 and 180 and latitude -90 and latitude 90
Selection of the relevant points • Ensurethat the layer with the distribution data is the active one • Go on « Layer -> Select Features» • Select the world boundaries by dragging the mouse on the screen to draw a bounding box (the points shouldbehighlighted in yellow)
Selection of the relevant points • Go on « Data-> Selection to new shapefile » to create a shapefilecontainingonly the slected points (the shapefileshouldappear in the project)
Importation of the climaticdatabase • 1: Go to the « tools » tab • 2: click on « Options » • 3: Select «the Climate » tab in the formthatappears
Importation of the Climaticdatabase • In the Folderwindows, give the location of the root of the directory containing the clumat files • Define an explicit namein the windowssituatedleft of the « Make default » button • Click « Make Default » • Click « Apply »
Getclimatic information bound to a specific location • Enable the button • Clic on a location in the map
Getclimatic information bound to a specific location • Enable the button • Clic on a location in the map
Getclimatic information bound to a specific location • NB: the resolution of the gridlinked to thesestatisticsisavailable in « Tools->Options->Cell size»
Applying a colorscheme to the climatic data • 1) Click on « Data -> Climate->Map»
Applying a colorscheme to the climatic data • 2) Select the criteriayouwant to map in the « Output » drop down menu • 5 available • minimum temperature • meantemperature • maximum temperature • Altitude • precipitation • ‘bioclim’ (combination of 19 variables) • 3) Give the location of the output shapefile in « File »
Viewingclimatic data • Select the distribution layer as active (calappidae_exo_divagis_wgs84only) • Go on ‘Modeling’ • Go on ‘BioClim/Domain’
Viewingclimatic data • Severalwindows are available, linked to the 19 BioCLIM variables • BIO1 = Annual Mean Temperature • BIO2 = Mean Diurnal Range (Mean of monthly (max temp - min temp)) • BIO3 = Isothermality (BIO2/BIO7) (* 100) • BIO4 = Temperature Seasonality (standard deviation *100) • BIO5 = Max Temperature of Warmest Month • BIO6 = Min Temperature of Coldest Month • BIO7 = Temperature Annual Range (BIO5-BIO6) • BIO8 = Mean Temperature of Wettest Quarter • BIO9 = Mean Temperature of Driest Quarter • BIO10 = Mean Temperature of Warmest Quarter • BIO11 = Mean Temperature of Coldest Quarter • BIO12 = Annual Precipitation • BIO13 = Precipitation of Wettest Month • BIO14 = Precipitation of Driest Month • BIO15 = Precipitation Seasonality (Coefficient of Variation) • BIO16 = Precipitation of Wettest Quarter • BIO17 = Precipitation of Driest Quarter • BIO18 = Precipitation of Warmest Quarter • BIO19 = Precipitation of Coldest Quarter
Viewingclimatic data • Visualisation windows • Frequency (synchronizedwith the map) • Outliers data (global view on the 19 variables + highligthing of outliers) • Histograms • Enveloppe (combination of 2 variables, containedwithin a certain percentile, tje points within the envoeloppe are highlighted in yellow) • Predict
Frequency • The mapis interactive (clicking on a point highlight on the map)
Outliers • The horizontal axe corresponds to the 19 BioCLIM variables
Envelope • This calculation use 2 variables and a percentile (applied on the 2 variables and thencombined) to define an envelope. Points within the envelopeappearyellow on the map (rememberthat marine observation do not fit BioCASe)