
一、串列埠與單晶片
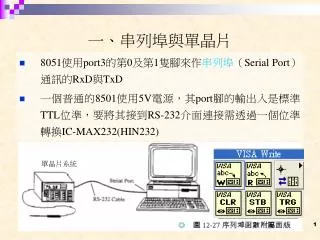
單晶片系統. 一、串列埠與單晶片 . 8051 使用 port3 的第 0 及第 1 隻腳來作 串列埠 ( Serial Port )通訊的 RxD 與 TxD 一個普通的 8501 使用 5V 電源,其 port 腳的輸出入是標準 TTL 位準,要將其接到 RS-232 介面連接需透過一個位準轉換 IC-MAX232(HIN232). 二、 8051 單晶片內部組成架構 . HIN232. 8051. RS-232 串列埠單元. 8051 接腳 . 特殊目的暫存器 . P0 、 P1 、 P2 、 P3 (埠 0 ~埠 3 )

一、串列埠與單晶片
E N D
Presentation Transcript
單晶片系統 一、串列埠與單晶片 • 8051使用port3的第0及第1隻腳來作串列埠(Serial Port)通訊的RxD與TxD • 一個普通的8501使用5V電源,其port腳的輸出入是標準TTL位準,要將其接到RS-232介面連接需透過一個位準轉換IC-MAX232(HIN232)
HIN232 8051 RS-232串列埠單元
特殊目的暫存器 • P0、P1、P2、P3(埠0~埠3) • 為8051 4個I/O埠的輸出栓鎖暫存器。 • TH0、TL0、TH1、TL1計時/計數暫存器 • 分別為計時器0及計時器1的工作暫存器,這二對暫存器可以做16位元的計時計數用。 • 串列埠緩衝器SBUF(Serial Buffer) • 用來存放串列傳輸時資料進出的工作暫存器,經由串列埠傳送資料出去是將資料寫入SBUF,而接收時則由SBUF內讀出對方傳送來的資料。 • 控制暫存器 • IP、IE暫存器是做8051的中斷控制用 • TMOD、TCON暫存器用來做計時計數器控制 • SCON則控制串列傳輸的工作模式設定
三、如何以 KEIL C 發展系統編譯程式及除錯並執行 1. 其主要步驟為設定工作環境、建立新專案、載入C語言程式、進行編譯、連結、產生執行檔、下載並執行。操作步驟如下: 2. 開啟一新的工作目錄,並假設目錄為 d:\t1,將C語言範例程式 led.c 拷貝到此目錄中。 3. 由程式集中執行主程式 uVision2。
8. 在檔案視窗中會出現 "Target 1" 9. 在 "Target 1" 上按下滑鼠右鍵,選擇工作環境選項
10.工作環境選項中選擇 "Output"輸出選項,並勾選"Debug information" 及"Create HEX file",表示在輸出的 hex 可執行檔過程中,產生除錯的相關檔案,可以方便我們除錯用
11.在 "Target 1" 前方"+" 標記處按一下滑鼠左鍵,會出現延伸設定項目"Source group1", 以滑鼠左鍵點選此一項目,並按下滑鼠右鍵,設定專案中使用那一C語言程式。選擇" Add Files" 加入檔案。
12.檔案類型設定為" *.c" C語言檔案格式,點選 led.c,並按下加入"Add"。
13.在 "Source group1" 前方"+" 標記處按一下滑鼠左鍵,會出現所設定的檔案為 led.c。
15.按下"F7" 鍵則會進行組譯、連結及產生可執行 hex 檔。
16.在"File" 功能項中,執行 "Save all",並以檔案總管來察看相關檔案,其中 led.hex 為最後的可執行檔。 16進位可執行檔
四、燒錄程式 • 燒錄程式 • J32 1-2, 3-4, 5-6 pin 短路 • 按RESET SW
五、執行程式 • 執行程式 • J32 1-2, 3-4pin 短路 • J32 5-6 pin 開路 • 按RESET SW
#include <reg51.h> sbit wled = P3^7; char *title="rpc IO51 rx data from PC.....\r\n"; delay(int d) { int i, j; for(i=0; i<d; i++) for(j=0; j<200; j++); } led_bl() { int i; for(i=0; i<2; i++) { wled=0; delay(50); wled=1; delay(50); } }
init_rs232() { SCON=0x50; TMOD=0x20; TH1 =0xFA; TR1=1; TI=1; } /*----------------------*/ tx_char(unsigned char c) { while(1) if(TI) break; TI=0; SBUF=c; }
tx_str(char *str) { do { tx_char(*str++); } while(*str!='\0'); } char rx_char() { while(1) if(RI) break; RI=0; return SBUF; }
main() { char c; led_bl(); init_rs232(); tx_str(title); while(1) { c=rx_char(); tx_char(c); } }
main() { char c; led_bl(); init_rs232(); while(1) { c=rx_char(); if (c == 0x3f) tx_char(0x01); else tx_char(0x00); } }