Download
1 / 30
300 likes | 385 Views
This chapter explores querying database options, connecting to SQL and Access databases, using ADO.NET and Data Sources window for interaction.

E N D
VB Chapter 24 Database Programming
You have 3 choices for querying with a database • Table adapters • Little slower • Easy to use with Access • LINQ • Benefits: faster than using the table adapters • Doesn’t work with Access • Execute Reader • Which ever you choose, connecting to the database is the same so we’ll start there.
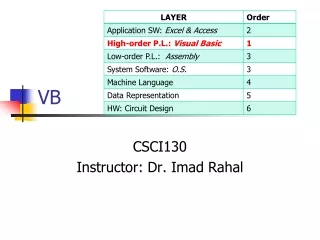
Access versus SQL Server • Chapter 24 will show you how to connect to an already created SQL Server database • In-class I’ll be showing you how to connect to an Access database that you create. Why? • So you get to create and understand both the middle and information tier of an application so you won’t have to rely on “canned” databases • We don’t have SQL Server Express 2008, last I checked.
Database Programming • We will use ADO.NET, part of .NET used to interact with databases • And the IDE’s Data Sources window to connect to a database • First create a new project
Connecting to a database • Adding a database: use the Data Source window: data->show data sources->add new data source • Select Database then Next-> New Connection->Change and select Access file
Browse for your file -> test connection -> okay-now you have two options: • > No – This hard-codes the directory info for your database into your app config file. This will allow your app to update your original database but the link to the database won’t work if you move the app to a new directory • >Yes – this will put a copy of your database in the bin file. When this happens, your can move the app between different computers and it still works but the app will update the bin file copy of your database rather than your original database
Connecting to the database • Saving the connection string – this specifies a path to a database file • Select the objects you want to include: in this case, “tables” -> Finish • When you Select Table the IDE will generate a class derived from System.data.dataSet • When you are done, you’ll see a new database file in your solution explorer window
Viewing the database’s data • There’s a tab at the bottom of the Solution Explorer Window that says “data sources” click that and you’ll see your database • Under your dataset you’ll see the available tables in your database. If you click the + sign next to the table, you’ll be given a list of all the fields in that table
Viewing the database’s data • There’s a drop-down box next to the table name, click that and select “details” • Right click on the table name and select “preview data” a new window will open. Click the preview button and you’ll see all the records stored in that table
Interacting with the database • Once you have connected to a db, the IDE provides tools to design the GUI interface • Go to the Data Sources window, click the drop down arrow next to addresses and choose the “Details” option. • Drag and drop the addresses table onto your form • The IDE then creates labels and textboxes based on the columns (fields) in your table
Interacting with the database • Dragging and dropping a table also creates a BindingNavigator that: • Lets you navigate through records • Add rows • Delete rows • Save changes to underlying data source
Recreating the in-chapter exercise • You can recreate the in-chapter SQL exercise • The order in which you rename the form file and form matter. • Also, don’t name them the same thing • In the solution explorer, rename the form1.vb file, AddressBook • In the form’s properties window, rename the form AddressBookForm
Searching for Data • Databases use Queries to find specific records based on criteria supplied by the user. • There are several ways to do this with VB Express • using SQL statements and the Query Builder • Using the new feature “LINQ” • Using Execute reader
Searching for Data with a VB form • In a VB form you’ll use the Query Builder tool within the TableAdapter to create queries using SQL • A TableAdapter object interacts with your database • When other components in your form need to retrieve, edit, or write data to a database they invoke TableAdapter methods
Searching for Data with a VB form • A TableAdapter object is created when you drag and drop a table’s fields onto your form • So the AddressesTableAdapter interacts with the Addresses Table. • To add queries to your Table Adapter Click Edit DataSet – the second button on the top of the Data Sources window then • Right click AddressesTableAdapter name and chose Add -> Query
Using the AddressesTableAdapter • Uses SQL statements • Select which fields to return • Click the Query Builder Button • The Query Builder will show you all of the columns in your table • Here is where you can specify filters that determine which records will be returned
Using the Query Builder and SQL • In order to return attributes (fields) of records that meet your search criteria you need a SELECT statement • The SELECT keyword is followed by the names of the fields you want your query to return. • SELECT LastName, FirstName, Address, etc.
Using the Query Builder and SQL • SQL statements are fairly straight forward to read • SELECT AddressID, FirstName, LastName, Email, PhoneNumber FROM Addresses WHERE (LastName = “Brown”) • This returns the fields AddressID, FirstName, LastName, Email, PhoneNumber from the addresses table for all records in which the LastName is Brown
Using the query builder • The in-book chapter asks you to add @lastName to the filter column for the LastName field • but we will use “?” because it works better with Access • Execute query and enter “brown” where it says “null” • You can see the results of your query down below. • Click “okay”
Using the query builder • This will create 2 methods “FillBy” and “GetDataBy” • You can rename these • FillByLastName • GetDataByLastName • You’ll notice that these methods take LastName, as provided by the user, as a parameter (FillByLastName(lastName))
Now add the interface • Need to add a textbox and label that allows the user to search out individual’s by last name and a Find button. • We’ll also add a BrowseAll button to undo the search results of this query • This has been done for you in the template I provided
Creating the events You’ll have to write 1 line of code to build the find button event AddressesTableAdapter.FillByLastName(AddressBookDBDataSet.Addresses, FindTextBox.Text)
Creating the events • Create a browseAll button and double click it to create its event • Add this code AddressesTableAdapter.Fill(AddressBookDBDataSet.Addresses) FindTextBox.Text = ""
Interacting with the Database • Now you can browse through the records or search records • You can also add records
Other Query Types: • In addition to Select Queries • Update query modifies an existing record • Delete query removes an existing record • Insert query adds a new record
If you are using SQL Server databases LINQ… • This is a very different approach in which you create LINQ to SQL classes to interact with your database • Unfortunately it doesn’t seem to work with Access 2003 or 2007… • You book discusses it but we’ll use the Adapter
Main drawback to the Adapter • Although it is easy to use there is one big drawback to using the adapter. • When you retrieve a field value it has to be stored somewhere on your form…like a textbox. • You can hide textboxes but this is still a security issue
I’ve provided some help on blackboard • I have provided a Word doc called “Connecting to and Querying An Access Database” that includes instructions for: • Attaching a database • Using the TableAdapter • Sample code for Execute Reader • Fixing the links to your project database
To use Execute reader you’ll need • Imports System.Data • Imports System.Data.OleDb • And will need to create an objects of type: OleDbDataAdapter() and New OleDbConnection • I’ve provided sample code to help you
For next class • Bring a working version of your project database and we’ll do a dry run of connecting and querying it • Be sure to import the rater and student data I provided to give us some records to play with • You’ll want to redo this process because of changes that occur as your modify your project design.