Download
1 / 13
130 likes | 466 Views
HENDERSON FIRE DEPT. ELITE XR THERMAL IMAGER. Objectives. Understand Operation and screen features of the thermal imager Provide awareness for the Care and maintenance of the thermal imager Understand the limitations of the thermal imager. Switching the Thermal Imager On and Off.

E N D
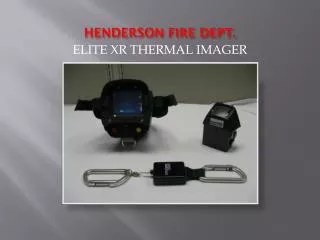
HENDERSON FIRE DEPT. ELITE XR THERMAL IMAGER
Objectives • Understand Operation and screen features of the thermal imager • Provide awareness for the Care and maintenance of the thermal imager • Understand the limitations of the thermal imager
Switching the Thermal Imager On and Off To switch the unit on, press and hold the POWER button until the ISG/INFRASYS logo appears on the thermal imager display. Immediately release the POWER button. To switch the unit OFF, press and hold the POWER button until “RELEASE TO TURN OFF” appears on the screen. Immediately release the POWER button.
THE YELLOW BUTTON The yellow button is for capturing video; however, HFD did not purchase that option. This button is inactive.
DIGITAL DIRECT TEMPERATURE (DDT) Temperature Display Crosshairs The DDT provides the average relative (or “observed”) temperature of an object, or objects within the crosshairs. The relative temperature is displayed in numerical form in the upper right hand corner of the viewing screen
BATTERY STATUS The charge state of the battery is indicated by the 10 moving bars located on the lower left hand side of the Display, as illustrated. As the batteries’ charge decreases, the indicator bars on the screen decrease. In addition to the Charge State indicator, a separate low battery warning “LOW” appears on the screen as illustrated. The “Battery Low” indicator will appear when three battery bars are remaining. When fully charged the battery should last approximately 3 hours.
COLOR REFERENCE BAR Relative temperature of object in the crosshairs Crosshairs The XR is equipped with a Color Reference Bar. The Color Reference Bar allows users to estimate the relative temperatures of objects in the camera’s field of view by observing the color of the object, and the intensity of the color of the object. The Color Reference Bar also has numbers associated with it that helps users approximate the temperature of an object, given its color and color intensity. The numbers (or scale) are different for each sense mode of the XR. (Illustrated in the next three slides) Color Reference Bar Sense Mode Indicator
COLOR REFERENCE BAR CONT. In this scene, object C is hotter than object B and object B is hotter than object A Object A Object B Object C The 200+ means that objects that are bright red are at least 200 degrees, and the 150 means objects that have less red are around 150 degrees Sense Mode Indicator H means camera is operating in High Sense Mode
COLOR REFERENCE BAR CONT. The 450+ means that objects that are bright red are at least 450 degrees and the 250 means objects that have less red are around 250 degrees. Sense Mode Indicator “M” means camera is operating in Mid Sense Mode.
COLOR REFERENCE BAR CONT. The 2000+ means that objects that are bright red are at least 2000 degrees and the 700 means objects that are in the middle of the yellow color band are around 700 degrees. Sense Mode Indicator “E1+” means camera is operating in Thousand Plus Mode IMPORTANT:In Thousand Plus mode only, the XR adds the colorYELLOW in addition to red.
CLEANING AND MAINTENANCE • Inspect all lenses for soot/dirt buildup. • Normal “intended use” scratches on the high efficiency aspheric lens do not degrade picture quality; however, chips may affect lens transmission. Inspect IR lenses for chips. • Inspect the unit for structural, heat and/or chemical damage; check all switches and contacts. • The thermal imager should be cleaned using warm soapy water and nonabrasive cleaners.
LIMITATIONS • Use retractable lanyard to prevent drops. • Do not use for crawling assist tool. • Protect the camera from falling debris as much as possible. • Protect lens area at all times.
THE END • This power point presentation is intended to be a brief introduction to the Elite XR Thermal Imager. For a better understanding of the camera, please refer to the Operating Manual provided with the thermal imager as well as a copy placed on the City Net Sharepoint site. • Be sure to document this training in Sunprounder BONUS Classes. The code is TIC2012.