Comprehensive Guide to Upload, Cache, Save & Share image in an Android App
80 likes | 114 Views
A hands on guide to upload, cache, save, share images in your android apps using ShepHertz App42 platform with features such as offline storage, LRU caching and etc.

Comprehensive Guide to Upload, Cache, Save & Share image in an Android App
E N D
Presentation Transcript
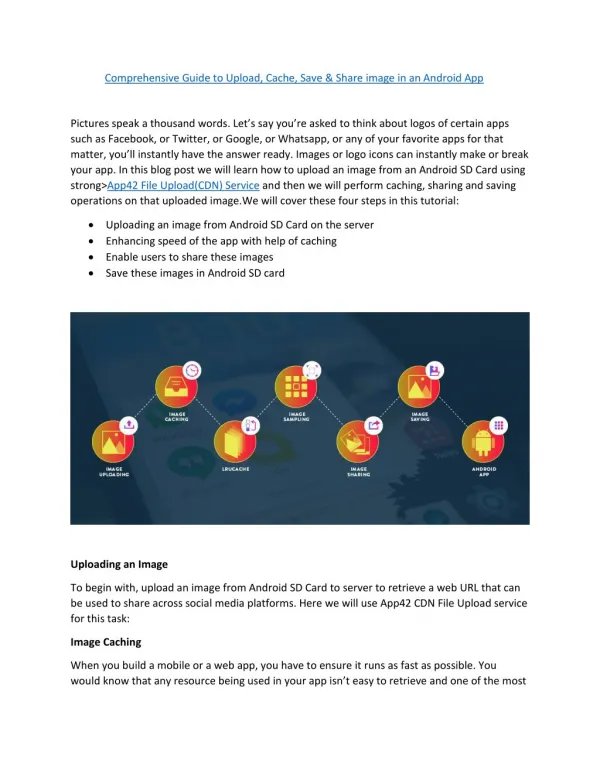
Comprehensive Guide to Upload, Cache, Save & Share image in an Android App Pictures speak a thousand words. Let’s say you’re asked to think about logos of certain apps such as Facebook, or Twitter, or Google, or Whatsapp, or any of your favorite apps for that matter, you’ll instantly have the answer ready. Images or logo icons can instantly make or break your app. In this blog post we will learn how to upload an image from an Android SD Card using strong>App42 File Upload(CDN) Service and then we will perform caching, sharing and saving operations on that uploaded image.We will cover these four steps in this tutorial: Uploading an image from Android SD Card on the server Enhancing speed of the app with help of caching Enable users to share these images Save these images in Android SD card Uploading an Image To begin with, upload an image from Android SD Card to server to retrieve a web URL that can be used to share across social media platforms. Here we will use App42 CDN File Upload service for this task: Image Caching When you build a mobile or a web app, you have to ensure it runs as fast as possible. You would know that any resource being used in your app isn’t easy to retrieve and one of the most
important features required to achieve it is caching. We shall use LRU Cache Algorithm here to implement this mechanism. LRUCache Least Recently Used or LRU itself clarifies the way cache works. It has a fixed cache size and works just like a regular queue, ie, if any new object is added to the cache then it automatically gets placed at the beginning of the queue. Later, when the app needs an object from the cache, it picks up from the queue for faster processing. Image Sampling While loading an image from the web, at times the resolution may be larger than the size device can manage. Sampling can provide a better way of loading and optimizing memory. Image Sharing Using images in the app from gallery and allowing the users to share them on social media and their contacts will enhance user engagement. Image Saving After loading an image from the web, if you need to save it, you can do so in SD Card for further usage. About Sample Application
1.Register with App42 Platform. 2.Create an app once you are on the getting started page after the registration 3.If you are already registered, login to AppHQ console and create an app from App Manager -> App Create link 4.Download the project from here and import it in your eclispe 5.Open MainActivity.java file and pass the required information in onCreate method as shown below (application keys for AppHQ console) App42API.initialize(this,"App42 API Key","App42 secret Key"); 1.Change the application name with your desired name in res/strings (useful to save images in SD card) 2.Build and run the application Get Started Design Details Get image from Android SD Card Gallery: Get an image for your app from Android SD Card with the code written in MainActivity.java file. /* * Call when user clicks on browse photo */ private void browsePhoto(String imageName) { if (this.imageName != null && !this.imageName.equals("")) this.imageName = imageName; Intent i = new Intent(Intent.ACTION_PICK, android.provider.MediaStore.Images.Media.EXTERN AL_CONTENT_URI); startActivityForResult(i, RESULT_LOAD_IMAGE); } /* * Callback when user select image from gallery for upload * get a callback * @see android.app.Activity#onActivityResult(int, int, * android.content.Intent) */
@Override protected void onActivityResult(int requestCode, int resultCode, Intent data) { super.onActivityResult(requestCode, resultCode, data); if (requestCode == RESULT_LOAD_IMAGE && resultCode == RESULT_OK && null != data) { Uri selectedImage = data.getData(); String[] filePathColumn = { MediaStore.Images.Media.DATA }; Cursor cursor = getContentResolver().query(selectedImage, filePathColumn, null, null, null); cursor.moveToFirst(); int columnIndex = cursor.getColumnIndex(filePathColumn[0]); String picturePath = cursor.getString(columnIndex); cursor.close(); progressDialog.setMessage("uploading image"); progressDialog.show(); uploadImage(picturePath); } } Upload Image Using App42 Uplaod Service: If you want to upload an image on the server from Android SD Card gallery, you can follow the code written in MainActivity.java file. private void uploadImage(String imagePath) { App42API.buildUploadService().uploadFile(imageName, imagePath, UploadFileType.IMAGE, Description, new App42CallBack() { public void onSuccess(Object uploadObj) { // TODO Auto-generated method stub onUploadResult(uploadObj); } public void onException(Exception ex) { // TODO Auto-generated method stub System.out.println(ex); onUploadError(ex); } }); }
Share Image to friends: If you want to share an image with your friends using several apps installed in your device, you can follow this code written in MainActivity.java file. Intent intent = new Intent(Intent.ACTION_SEND); intent.setType("text/plain"); intent.putExtra(Intent.EXTRA_TEXT, "Hey friends checkout this image"+"\n\n"+imageUrl); intent.putExtra(android.content.Intent.EXTRA_SUBJECT, "Check My Image "); startActivity(Intent.createChooser(intent, "Share")); Loading and Caching of Image: ImageCacher.java file contains all types of coding, which is required to share an image from the web or cache accordingly. If you want to load an image without sampling that you should use in our Android Activity class file, here is the code: ImageView imgLogo = (ImageView) findViewById(R.id.my_image); ImageCacher imageCacher=new ImageCacher(this, -1); imageCacher.loadImage(imageUrl, imgLogo); If you want to load an image with sampling that can be used in your Android Activity class, please follow the code below: ImageView imgLogo = (ImageView) findViewById(R.id.my_image); ImageCacher imageCacher=new ImageCacher(this, SamplingImageSize); imageCacher.loadImage(imageUrl, imgLogo); If you want to load an image from the web or cache, you should follow the code below: public Bitmap getBitmap(String url) { String filename = String.valueOf(url.hashCode()); File f = new File(cacheDir, filename); // from SD cache Bitmap b; if (isSamplingReq) { b = decodeWithoutSampling(f); } else { b = decodewithSampleing(f); }
if (b != null) return b; // from web try { Bitmap bitmap = null; InputStream is = new URL(url).openStream(); OutputStream os = new FileOutputStream(f); Utility.CopyStream(is, os); os.close(); if (isSamplingReq) { bitmap = decodeWithoutSampling(f); } else { bitmap = decodewithSampleing(f); } return bitmap; } catch (Throwable ex) { ex.printStackTrace(); if (ex instanceof OutOfMemoryError) clearCache(); return null; } } Code for Image Sampling: private Bitmap decodewithSampleing(File f) { try { // decode image size BitmapFactory.Options o = new BitmapFactory.Options(); o.inJustDecodeBounds = true; BitmapFactory.decodeStream(new FileInputStream(f), null, o); int width_tmp = o.outWidth, height_tmp = o.outHeight; int scale = 1; while (true) { if (width_tmp / 2 < requiredSize || height_tmp / 2 < requiredSize) break; width_tmp /= 2; height_tmp /= 2; scale *= 2; } BitmapFactory.Options o2 = new BitmapFactory.Options(); o2.inSampleSize = scale; return BitmapFactory.decodeStream(new FileInputStream(f), null, o2); } catch (FileNotFoundException e) { } return null; }
Code Without Sampling: private Bitmap decodeWithoutSampling(File f) { try { return BitmapFactory.decodeStream(new FileInputStream(f)); } catch (Exception e) { } return null; } Save Image in SD Card Gallery: If you want to save an Image in Android SD Card Gallery, you can follow the code written in MainActivity.java file. void saveMyImage() { Bitmap bmImg = imageCacher.getBitmap(imageUrl); File filename; try { String path1 = android.os.Environment.getExternalStorageDirectory() .toString(); Log.i("in save()", "after mkdir"); File file = new File(path1 + "/" + appName); if (!file.exists()) file.mkdirs(); filename = new File(file.getAbsolutePath() + "/" + imageName + ".jpg"); Log.i("in save()", "after file"); FileOutputStream out = new FileOutputStream(filename); Log.i("in save()", "after outputstream"); bmImg.compress(Bitmap.CompressFormat.JPEG, 90, out); out.flush(); out.close(); Log.i("in save()", "after outputstream closed"); //File parent = filename.getParentFile(); ContentValues image = getImageContent(filename); Uri result = getContentResolver().insert( MediaStore.Images.Media.EXTERNAL_CONTENT_URI, image); Toast.makeText(getApplicationContext(), "File is Saved in " + filename, Toast.LENGTH_SHORT).show(); } catch (Exception e) { e.printStackTrace(); } } public ContentValues getImageContent(File parent) {
ContentValues image = new ContentValues(); image.put(Images.Media.TITLE, appName); image.put(Images.Media.DISPLAY_NAME, imageName); image.put(Images.Media.DESCRIPTION, "App Image"); image.put(Images.Media.DATE_ADDED, System.currentTimeMillis()); image.put(Images.Media.MIME_TYPE, "image/jpg"); image.put(Images.Media.ORIENTATION, 0); image.put(Images.ImageColumns.BUCKET_ID, parent.toString() .toLowerCase().hashCode()); image.put(Images.ImageColumns.BUCKET_DISPLAY_NAME, parent.getName() .toLowerCase()); image.put(Images.Media.SIZE, parent.length()); image.put(Images.Media.DATA, parent.getAbsolutePath()); return image; } In this blog, we have covered uploading, caching, saving and sharing of images in an Android app. If you have any queries or need further assistance, please feel free to reach us at support@shephertz.com