Download
1 / 56
560 likes | 704 Views
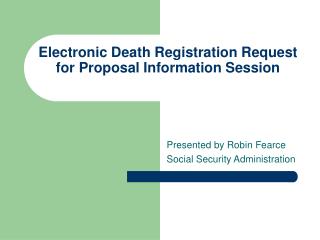
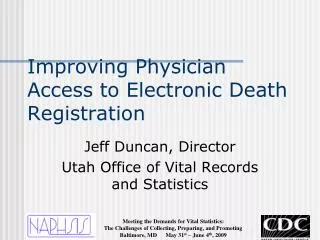
Electronic Death Registration In California. T R A I N I N G S E S S I O N L R D. 2 0 0 7_07.01. DP Disposition Permit. DC Death Certificate. VS-9e. VS-11e. PI Personal Info MI Medical Info CI Coroner Info. VS-11e. Icons. ?. Field Sensitive Help Select Date

E N D
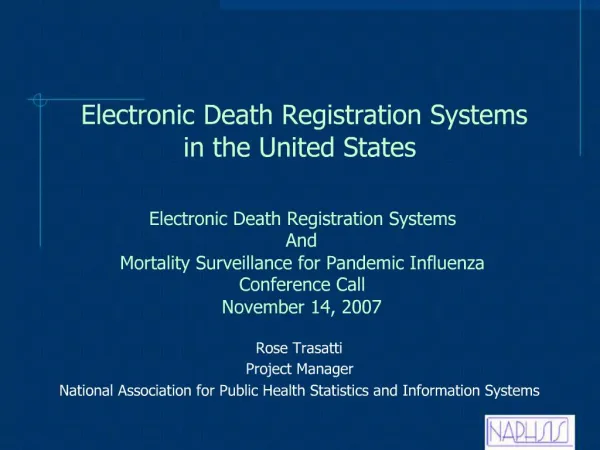
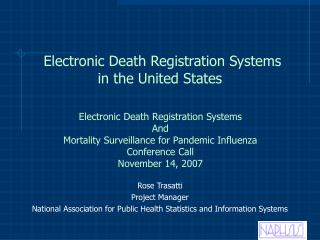
Electronic Death Registration In California T R A I N I N G S E S S I O N L R D 2 0 0 7_07.01
DP Disposition Permit DCDeath Certificate VS-9e VS-11e
Icons ? Field Sensitive Help Select Date Remote Attestation View PAC Fax image Listen to Voice • Search Lists • State/Foreign Country • Hispanic • Race • Occupation • Kind of Industry • Embalmers • Funeral Homes • Medical Facilities • Physicians (MDs & DOs)
TRAINING NOTE: • When using the Training Environment of EDRS, DO NOTcreate a Death Certificate of any live person • Please use Cartoon, TV, Movie or other fictional characters • Creating a DC of a living person is a violation of privacy
SORT BY COLUMN SEARCH BY - Last Name - First Name - Date of Death - Attest Status - MI Review Status - Coroner Status - Record Number - Record Status - # of Disp - Amendment Status - Last Name - First Name - LRN - SFN - Record Number - Date of Death - Date of Creation - Record Status - Amendment Status - Attestation Status - Coroner Status - MI Review Status
PERSONALIZE SEARCH FILTERS • Create a new custom search filter • Update an existing custom search filter • Select Filter Name from dropdown list • Select Manage Search Filters • Enter Filter Name • Check Set as Default, if appropriate • Enter Search Criteria • Save as New • Select Manage Search Filters • Select Filter Name • Change Search Criteria, Default status, name, etc. • Save
MI REVIEW • Search for records submitted for MI Review • MI Review = SUBM • Review Record • Perform manual review and edits of MI • Check Causes of Death • Record Options > Print Working Copy • MI Review • Record Options > MI Review • Select ACCEPT or NOT ACCEPT • If NOT ACCEPT • Enter reason for not accepting
DC STEP 1 REVIEW SUBMITTED DC • Search for Records Submitted for Local Registration • Review Decedent Folder • Validations • Record Status = SUBM LR • Record Options > Decedent Folder • Check MI review status & other statuses • Validate PI, MI, CI • Manual review & edits of DC • Review RA - Fax Image or Voice recordings • Record Options > View Working Copy
DC STEP 2 REVIEW PERMIT • View Permit • Register Death Certificate • Permit Option > Find Permit • View Permit(s) • Manual review & edits of DP • Permit Option > Print Working Copy • Permit Option > View Record DC • If accept, go to STEP 3A • If reject, go to STEP 3B
DC STEP 3A REGISTER DC • Register Death Certificate • Record Options > Register Local • Select Option Register • Issue Permit(s) • Permit Option > Find Permit • View Permit • Permit Option > Issue • Optional: Print color copy 4 for internal records • Permit Option > Print Official Copy • Issue Certified Copies • Permit Option > View Record DC • Record Options > Print Official Copy (official paper, 100%) • Using Official Copy, follow normal process to print Certified Copies on Bank Note Paper
DC STEP 3B REJECT DC • Reject Death Certificate • Unlock appropriate section • Record Options > Register Local • Select Option Reject • Enter reason for Rejection • Unlock appropriate section: PI, MI, CI as appropriate. If rejecting only for DP, unlock the PI.
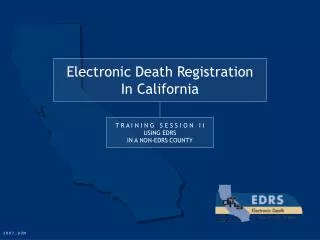
Death Certificate VS-11e DEMO REGISTRAR, MD MPH DEMO PHYSICIAN MD
NON 100% EDRS DOCUMENTS IMPORTANT • Paper or Paper Hybrid Death Certificates • Paper or Paper Hybrid Amendments • Additional Steps Required
CAUTIONS WHEN PRINTING! • For DCs, use only Official DC Paper supplied by the State (worksheet on back, blank on front) • For Amendments, use only Official Amendment Paper supplied by the State (blank on front & back) • Print correct orientation (top of DC is top of worksheet) • Print 100% size • Print Page Scaling = NONE • Black & White only
STATE WILL REJECT — DO NOT ACCEPT • DCs not printed on Official DC Paper (blank on front, worksheet on back) • DCs not printed in correct orientation (top of DC is top of worksheet) • DCs not printed 100% size • DCs not printed Page Scaling = NONE • DCs printed in color • Amendments not printed on Official Amendment Paper (blank front & back) • Amendments not printed 100% size • Amendments not printed Page Scaling = NONE • Amendments printed in color
DTP STEP 1 SUBMITTED DTP DC • Confirm Correct Printing • Confirm Printed Black & White only (no color) • Confirm Printed 100% size • Confirm Printed correct orientation • Confirm Printed on correct Official Paper • Search for Record • Record Number printed to right of barcode • Review Decedent Folder • Record Options > Decedent Folder • Paper status = DTP (Drop to Paper) • Validations • Record Options > Validate PI, MI, CI • Manual review & edits of DC • Confirm Paper = Electronic (Record Options > View Working Copy) • Enter SV in field 115 • Enter License # & date if written on DC in fields 116 & 117 respectively
DTP STEP 2 REVIEW PERMIT • View Permit • Permit Options > Find Permit • View Permit(s) • Manual review & edits of DP • Permit Option > Print Working Copy • Permit Option > View Record DC • Register Death Certificate • If accept, go to STEP 3A • If reject, go to STEP 3B
DTP STEP 3A REGISTER DTP DC • Register Death Certificate • Record Options > Register Paper DC • Select Option Register • Print Local Registrar Info • Confirm Printer Settings (Page Scaling = NONE, 100%) • Confirm correct orientation of DC in printer • Print • Issue Permit(s) • Permit Option > Find Permit • View Permit • Permit Option > Issue • Optional: Print color copy 4 for internal records • Permit Option > Print Official Copy • Issue Certified Copies • Using signed DTP, follow normal process to print Certified Copies on Bank Note Paper
DTP STEP 3B REJECT DTP DC • Reject Death Certificate • Record Options > Register Paper DC • Select Option Reject • Enter reason for Rejection • Abandon Death Certificate • Record Options > Abandon
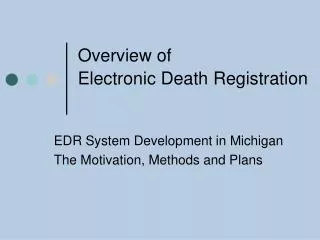
Drop to Paper Death Certificate VS-11e DEMO REGISTRAR, MD MPH Demo Physician MD 12345678
DUAL STEP 1 SUBMITTED DUAL DC • Confirm Correct Printing • Confirm 2 stacked numbers printed to right of barcode are exact match • Confirm Printed Black & White only (no color) • Confirm Printed 100% size • Confirm Printed correct orientation • Confirm Printed on correct official Paper • Search for Record • Record Number printed to right of barcode • Review Decedent Folder • Record Options > Decedent Folder • Paper status = DUAL (Dual Pass) • Validations • Record Options > Validate PI, MI, CI • Manual review & edits of DC • Confirm Paper = Electronic (Record Option > View Working Copy) • Enter SV in field 115 • Enter License # & date if written on DC in fields 116 & 117 respectively
DUAL STEP 2 REVIEW PERMIT • View Permit • Permit Option > Find Permit • View Permit(s) • Manual review & edits of DP • Permit Option > Print Working Copy • Permit Option > View Record DC • Register Death Certificate • If accept, go to STEP 3A • If reject, go to STEP 3B
DUAL STEP 3A REGISTER DUAL DC • Register Death Certificate • Record Options > Register Paper DC • Select Option Register • Print Local Registrar Info • Confirm Printer Settings (Page Scaling = NONE, 100%) • Confirm correct orientation of DC in printer • Print • Issue Permit(s) • Permit Option > Find Permit • View Permit • Permit Option > Issue • Optional: Print color copy 4 for internal records • Permit Option > Print Official Copy • Issue Certified Copies • Using signed DTP, follow normal process to print Certified Copies on Bank Note Paper
DUAL STEP 3B REJECT DUAL DC • Reject Death Certificate • Record Options > Register Paper DC • Select Option Reject • Enter reason for Rejection • Abandon Death Certificate • Record Options > Abandon
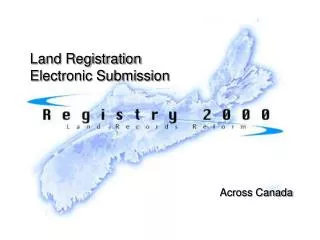
Dual Pass Death Certificate VS-11e DEMO REGISTRAR, MD MPH Demo Physician MD 12345678 12345678
PAPER STEP 1 ENTERING PAPER DC • Record Options > Create Record • Enter First Name, Last Name, DOD as it appears on the paper DC • Select Continue • Enter Information • Enter remaining information as it appears on the paper DC • If Embalmer’s ink signature, enter SV in field 43 • If Physician’s ink signature, enter SV in field 115 • If ME/Coroner’s ink signature, enter SV in field 126 • Validations • Validation Option > Validate PI, MI, CI • Validation Option > Spell Check M I • Record Options > Print Working Copy • Manual review & edits
PAPER STEP 2A REGISTER PAPER DC • Register DC • Record Options > Register Paper DC • Select Register option • Print Local Registrar Info • Record Options > Print Local Registrar Info • Confirm Printer Settings (Page Scaling = NONE, 100%) • Confirm correct orientation of DC in printer • Print • Issue Certified Copies • Using signed paper DC, follow normal process to print Certified Copies on Bank Note Paper
PAPER STEP 2B REJECT PAPER DC • Reject DC • Process as before (return DC for correction, replacement, etc) • If record entered in EDRS • Suggest, leave record as INCOMPLETE • When corrected DC is resubmitted, resume entry & registration process.
Paper Death Certificate VS-11 Demo Embalmer DEMO REGISTRAR, MD MPH Demo Physician MD
AMENDMENTS • Amendments that can be registered by LRD • DC Record Status is SUBM SR • Original DC is not yet registered at the state. • No SFN yet. • Amendments that must be registered by the State • DC Record Status is REG SR • Original DC is registered at the state. • SFN is assigned GENERAL AMENDMENT = VS-24Le CORONER AMENDMENT = VS-24Ae
24L e-SIG STEP 1 REVIEW 24Le ELECTRONIC SIGNATURES • Search for Submitted Amendments • Search for Amendment Status = SUBM & Record Status = SUBM SR • Review General Amendment • Amendment Options > Find Amendment • View Amendment • Validations • Manual review & edits • Validation > Validate • Amendment Options > Print Working Copy • OPTIONAL: If Disposition Permit Required, View Permit • Permit Option > Find Permit • View Permit • Manual review & edits of DP • Amendment Options > Find Amendment
24L e-SIG STEP 2A REGISTER 24Le ELECTRONIC SIGNATURES • Register Amendment • Amendment Options > Register • Select Option Register • Optional: Issue Permit • Permit Option > Find Permit • View Permit • Permit Option > Issue • Optional: Print color copy 4 for internal records • Permit Option > Print Official Copy • Issue Certified Copies • Amendment Options > Find Amendment • Amendment Options > Print Official Copy (official paper, 100%) • Using Official Copy, follow normal process to print Certified Copies on Bank Note Paper
24L e-SIG STEP 2B REJECT 24Le ELECTRONIC SIGNATURES (continued) • Reject Amendment • Amendment Option > Register • Select Option Reject • Enter Reason for Rejection • Abandon Amendment • Amendment Option > Abandon
General Amendment VS 24Le e-signatures FIRST SIGNATURE SECOND SIGNATURE DEMO REGISTRAR MD, PHD
24L ink-SIG STEP 1 REVIEW 24Le INK SIGNATURE(S) • Review General Amendment • Amendment Options > Find Amendment • View Amendment • Validations • Manual review & edits • Validation > Validate • Amendment Options > Print Working Copy • Enter Signatory’s Information • Amendment Options > Update Signatures • Enter SV for signatures • Enter Signatory’s Information from paper 24L • OPTIONAL: If Disposition Permit Required, View Permit • Permit Option > Find Permit • View Permit • Manual review & edits of DP • Amendment Options > Find Amendment
24L ink-SIG STEP 2 REGISTER 24Le INK SIGNATURE(S) • Register Amendment • Amendment Options > Register Paper Amendment • Select Option Register • Print Registrar Info • Amendment Options > Print Registrar Info • Confirm Printer Settings (Page Scaling = NONE, 100%) • Confirm correct orientation of Amendment in printer • Print • Issue Certified Copies • Using signed Amendment, follow normal process to print Certified Copies on Bank Note Paper
24L ink-SIG STEP 2 REGISTER 24Le INK SIGNATURE(S) (continued) • Optional: Issue Permit • Permit Option > Find Permit • View Permit • Permit Option > Issue • Optional: Print color copy 4 for internal records • Permit Option > Print Official Copy
24L ink-SIG STEP 2B REJECT 24Le INK SIGNATURE(S) • Reject Amendment • Amendment Options > Register Paper Amendment • Select Option Reject • Enter Reason for Rejection • Abandon Amendment • Amendment Options > Abandon
General Amendment VS 24Le 2 INK-signatures First Signature Second Signature DEMO REGISTRAR MD, PHD
General Amendment VS 24Le 1 e-signature & 1 INK-signature FIRST SIGNATURE Second Signature DEMO REGISTRAR MD, PHD
24Ae STEP 1 REVIEW SUBMITTED 24Ae • Search for Submitted Amendments • Search for Amendment Status = SUBM & Record Status = SUBM SR • Review ME/Coroner Amendment • Amendment Options > Find Amendment • View Amendment • Validations • Manual review & edits • Validation > Validate • Validation > Spell Check MI • Amendment Options > Print Working Copy • OPTIONAL: If Disposition Permit Required, View Permit • Permit Option > Find Permit • View Permit • Manual review & edits of DP • Amendment Options > Find Amendment
24Ae STEP 2 REGISTER 24Ae • Register Amendment • Amendment Options > Register • Select Option Register • Optional: Issue Permit • Permit Option > Find Permit • View Permit • Permit Option > Issue • Optional: Print color copy 4 for internal records • Permit Option > Print Official Copy • Issue Certified Copies • Amendment Options > Find Amendment • Amendment Options > Print Official Copy (official paper, 100%) • Using Official Copy, follow normal process to print Certified Copies on Bank Note Paper
24Ae STEP 2B REJECT 24Ae • Reject Amendment • Amendment Options > Register • Select Option Reject • Enter Reason for Rejection • Abandon Amendment • Amendment Options > Abandon
ME/Coroner Amendment VS-24Ae DEMO CORONER DEMO REGISTRAR MD, PHD
PAPER 24L STEP 1 ENTERING PAPER 24L • Amendment Options > Create General - Paper • LRD leaves DTN blank • Enter Reason & signatory’s info as it appears on the paper 24L • Enter SV for signatures • Select Continue • Enter Amended Information • Overwrite original value with the amended value as it appears on the paper 24L • Validations • Validation > Validate • Amendment Options > Print Working Copy • Manual review & edits
PAPER 24L STEP 2A REGISTER PAPER 24L • Register 24L • Amendment Options > Register Paper Amendment • Select Register option • Print Registrar Info • Amendment Options > Print Registrar Info • Confirm Printer Settings (Page Scaling = NONE, 100%) • Confirm correct orientation of Amendment in printer • Print • Issue Certified Copies • Using signed paper Amendment, follow normal process to print Certified Copies on Bank Note Paper
PAPER 24L STEP 2B REJECT PAPER 24L • Reject Amendment • Process as before (return Amendment for correction, replacement, etc) • If record entered in EDRS • Suggest, leave record as INCOMPLETE • When corrected Amendment is resubmitted, resume entry & registration process.
Affidavit to Amend A Record Paper VS 24L FIRST SIGNATURE SECOND SIGNATURE DEMO REGISTRAR, MD MPH
PAPER 24A STEP 1 ENTERING PAPER 24A Physician signing 24A (not ME/Coroner) • Amendment Options > Create Coroner - Paper • LRD leaves DTN blank • Enter signatory’s info as it appears on the paper 24A • Enter SV for signature • Select Continue • Enter Amended Information • Overwrite original value with the amended value as it appears on the paper 24A • Validations • Validation > Validate • Validation > SpellCheck MI • Amendment Options > Print Working Copy • Manual review & edits