Download
1 / 13
140 likes | 253 Views
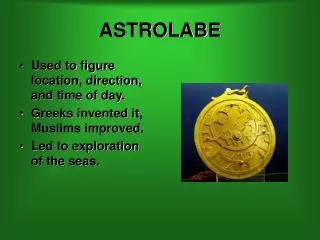
Make An Astrolabe. A Tool Used in Exploring The Night Sky SNC1D. Caution. Looking at the sun using this astrolabe may cause damage to your eyes. Never do it!. Materials Needed.

E N D
Make An Astrolabe A Tool Used in Exploring The Night Sky SNC1D
Caution Looking at the sun using this astrolabe may cause damage to your eyes. Never do it!
Materials Needed • Astrolabe template (either printed on cardstock, or printed on regular paper and then cut out and glued on cardstock or cardboard) • Straw • String (embroidery floss works well) • Washer • Tape
0 0 10 10 20 20 30 30 40 40 50 50 60 60 70 70 80 80 90 90 attach straw here attach straw here Note that this sheet makes two astrolabes.
Construction • Tape the drinking straw to the edge of the astrolabe marked "Attach straw here." Be careful to not tape the straw on the astrolabe, but just on the edge. • Make a tiny hole in the middle of the cross ( ). Pass the string through it, and knot the string at the back. • Tie the washer to the opposite end of the string. That’s it! You’ve got yourself an astrolabe!
Practice Using Your Astrolabe Pick out something in a tree, like a nest, or a branch. Look through the straw from the end nearest the “90” degree mark until you spy the object. Without moving your astrolabe, read the number nearest the string, or have a friend do it.
Using Your Astrolabe for Lunar Observations You can use your astrolabe to measure the relative location of the moon. Observe the moon on clear nights. Note the phase of the moon and the date. Use your astrolabe to determine the altitude of the moon. See how the lunar altitude varies according to the phase of the moon and the time of year.
Basic Trigonometry If we start with a square that’s 30’ on each side, and draw a diagonal line, we split the 90 degree angle into two 45 degree angles. If we throw the top away, we have a triangle with a 45 degree angle and its base is equal to its height.
Using Basic Trigonometry If we look up at something at a 45 degree angle, we know that its height is equal to its distance away from us. So we can determine the height of something without having to climb up to measure it! 45
More Advanced Trigonometry In a right triangle (that is, one with a 90 degree angle), the ratio of the short side that’s opposite a corner to the short side that’s adjacent to the corner is called the tangent. In this picture the tangent of angle A is b / c. Or as an equation: tan (A) = b/c Or better yet: b = c * tan (A) b A c
More Advanced Trigonometry b = c * tan (A) There’s a button on most calculators that says “tan”. If you put in a value, and hit “tan”, it will give you the ratio. So in our last example, the angle was 45 degrees. If you ask your calculator for the tangent of 45 degrees, what do you think you’d get? b A c
Using More Advanced Trigonometry Now we can measure our tree again. If our angle is 70 degrees, and we are 10’ from the tree, we know that the tree is 27’ tall, since 10 * tan (70) = 27. 70
Using More Advanced Trigonometry One final note: the preceding calculations were made assuming that the astrolabe was on the ground. Since you’re probably holding it at eye level, you need to add the height of your eyes to the value of b to get the true height of the tree. 70