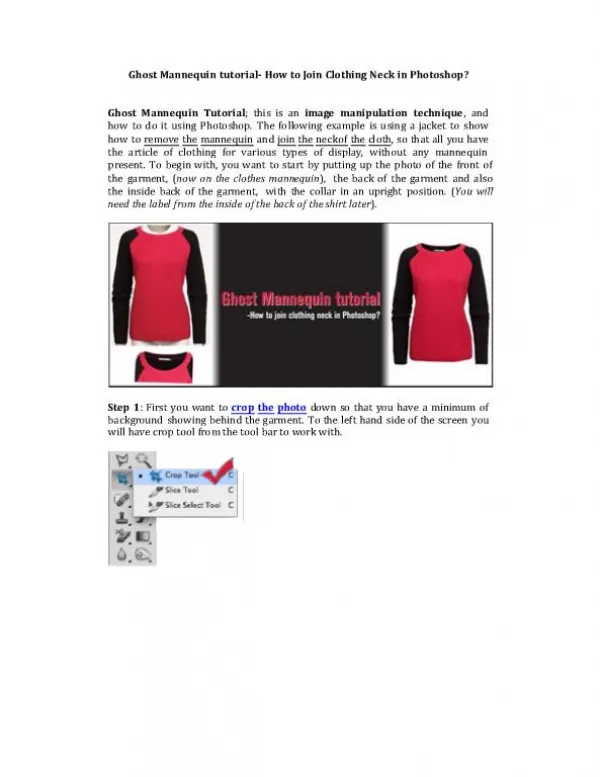
Ghost Mannequin Effect
This kind of shot could initially seem challenging to recreate, especially for amateur photographers. When you approach each step individually, like with most obstacles, it becomes manageable.<br>We will use a straightforward procedure that involves fusing two photos of the object together in order to achieve the desired impression. It's crucial to understand how you need to photograph your products in order to make the post-production process more successful.<br>

Ghost Mannequin Effect
E N D
Presentation Transcript
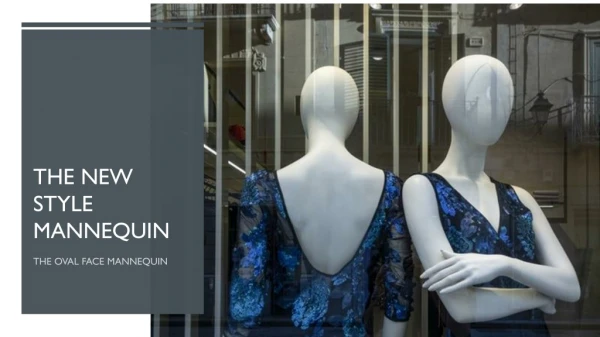
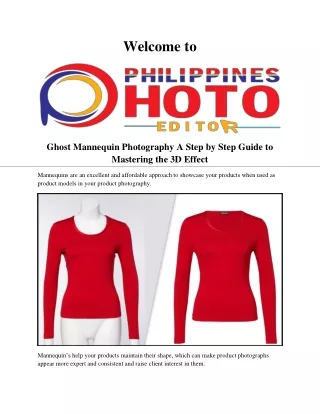
Welcome to Ghost Mannequin Photography A Step by Step Guide to Mastering the 3D Effect Mannequins are an excellent and affordable approach to showcase your products when used as product models in your product photography. Mannequin’s help your products maintain their shape, which can make product photographs appear more expert and consistent and raise client interest in them.
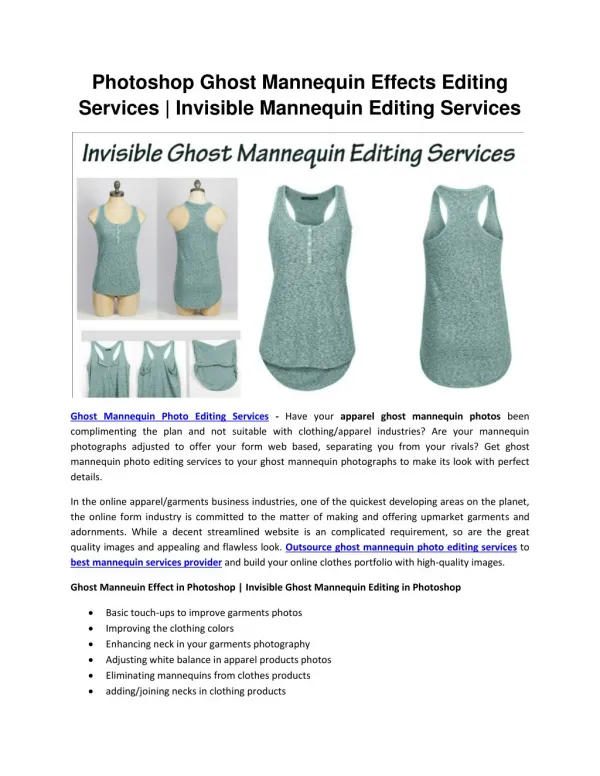
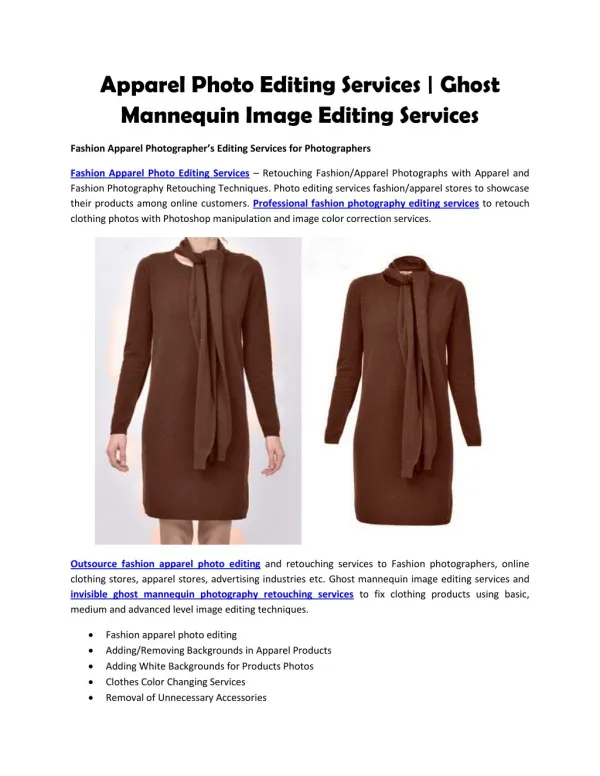
Using a ghost mannequin effect for your product photographs, like the ones below, is a perfect substitute for mannequins because they can be obtrusive. This kind of shot could initially seem challenging to recreate, especially for amateur photographers. When you approach each step individually, like with most obstacles, it becomes manageable. We will use a straightforward procedure that involves fusing two photos of the object together in order to achieve the desired impression. It's crucial to understand how you need to photograph your products in order to make the post-production process more successful. Learn how to utilize post-production image editing to add a "ghost mannequin effect" to your product photos for e-commerce by following this straightforward, step-by-step tutorial. How to Create the Ghost Mannequin Effect Selecting and Posing a Model or Mannequin Using models or mannequins to highlight the distinctive shape and fit of each product is one of the most widely used techniques in fashion photography.
Unfortunately, showing the model or mannequin in every picture isn't always beneficial. Retailers occasionally chose to shoot their products being modeled and delete the models and make the mannequins seem invisible later in Photoshop. Model and mannequin removal can be a tricky skill to acquire for smaller merchants who conduct the majority of their image editing themselves. You must first take several pictures of your product being worn by a model or mannequin while being photographed from Ghost Mannequin Effect various angles in order to achieve the "ghost mannequin" illusion, also referred to as the "invisible mannequin." The benefit of this is that you can use these pictures together with any "ghost" pictures you make in your product galleries. Use a static position, as demonstrated above, if you choose to employ a real model. In order to ensure that the product can be seen, your model should also have minimum makeup and long hair held back. These specifics will make altering images much simpler. There is a huge selection of mannequins available. You can opt to buy a mannequin with or without arms, hands, legs, or a neckline depending on your demands. If your mannequin does have arms and hands, then make sure that the limbs may be positioned out of the frame.
Pro Tip Mannequins made of white matte are frequently non-reflective and may be made to blend into white backdrops, making the process of removing the mannequin from an image considerably simpler. Make sure that your product fits your mannequin or model by using the right size or arranging the clothing to fit correctly. Moreover, if your product has sleeves, be sure to place them so the spectator cannot see down them. 80 Shopping on Instagram Examples For examples of shopping on Instagram, you don't need to search the web. So we did it for you. You'll get to: No more stalking to see who is doing what by looking at more than 80 actual examples of Instagram shopping in the wild. Use inspiration to inform your own content and approach. Some people have reported a 1,416% increase in traffic and sales!
2. Setup and Equipment In order to use the ghost mannequin technique, you must be able to take excellent studio shots. The ghost mannequin effect will be less appealing to add to your photos as their quality declines. Depending on the specific product you're photographing, camera and lighting techniques, tools, and positioning all come into play. Set up your DSLR settings Here's a step-by-step guide on how to use the settings on your DSLR camera to take stunning product photos. Check out this expert demonstration of a ghost mannequin photoshoot by ecommerce picture studio Fotoempresas if you need some ideas. 3. Photographing the Product
While photographing shirts, it's crucial to place the camera directly level with the chest region; nevertheless, when photographing bottoms, the camera should be placed across from the hip region. When a product is photographed from a height that is either too high or too low, the garment may appear inaccurately "tapered." Here are two illustrations of a mannequin wearing a tank top: The front and back images on the right were taken at chest height, giving the product a flattering appearance. The photograph on the left was taken below chest height, giving the product an unpleasant appearance. While taking pictures, using a telephoto zoom lens can reduce distortion and give you the freedom to go closer to smaller objects and farther away from larger ones. For invisible mannequin shoots, make sure your studio shooting area is big enough to fit your camera, tripod, two studio lights and umbrellas evenly spaced on either side of the product, and a backdrop.In order to use the ghost mannequin technique to produce a 3D image: First, photograph your mannequin or model wearing your product from the front and back. Post-Processing Images: A Step-by-Step Guide
If you have the right post-production tools (like Adobe Photoshop) and your merchandise have been photographed properly, producing a ghost mannequin effect is actually pretty easy once you have taken the relevant views. Moreover, you can contract out this editing task to qualified editors, who will return your ghost mannequin photographs in 24 hours, ready for sale. If financial restrictions force you to make the modifications yourself, use these seven easy steps to build your own ghost mannequin effect in Photoshop. Outsourcing this labor may ultimately save your business a lot of time and headache. Open Your Files in Photoshop and Create Layers You must first open the images of the foam board and the mannequin in Photoshop. Create a new background layer and choose your mannequin image. When you're completed, use that layer as your main backdrop by filling it in with white. Labeling your layers will also help you distinguish between them and maintain organization. 2. Use a Selection Tool to Select the Product in the Mannequin Image It's time to choose the item for your mannequin image now. Choose your preferred selection tool, such as a fast selection, lasso, or magic wand, and zoom in closely. All three of them can assist you in making the right choice. Remember that, in the majority of situations, shooting against a white background makes it background. 3. Refine and Place Your Mask Refine your mask to be excellent and tight after selecting the full product and removing all of the background and mannequin. The "Refine Edge" tool under the "Choose" menu can be used for this.
In the "Refine Edge" dialogue box, click "OK," then add a mask to the layer representing your shirt. You ought should now be able to see your product floating freely on the white background you initially made. For a neat, polished appearance, you may need to slightly more refine the mask and/or further refine the product's edges. 4. Rinse and Repeat Previous Steps with the Foam Board Image Repetition of Steps 1, 2, and 3 on your foam board product image is now required. This kind of product image might initially seem strange, but having one to work with is crucial; by photographing the object from the inside out, you can reveal the product's interior back, completing the mannequin illusion. We guarantee that the final result will be fantastic! Make a new layer, choose the product, then design and fine-tune your mask. 5. Combine the Images Drag the mask from your foam board picture to the image of your ghost mannequin product image once both photos have neat, tight masks on them. Layers should be arranged so that the mannequin image is higher and the foam board image is lower. Finally, modify the foam board layer's positioning and dimensions such that they exactly fit behind the mannequin layer, in a rounded curve immediately behind the shoulder. 6. Remove Unnecessary Parts of the Foam Board Layer At this point, it's a good idea to conceal your mannequin layer and remove any extra foam board. Really, all you need to do is maintain that triangle at the neckline between the shoulders. Watch the video below to see how the string running across the back is also visible. Because that item is present in the mannequin shot already, it's crucial to remember to remove it for the foam board image. Once you've finished, make sure your layers are clear and that nothing is out of place, especially around your neck and shoulders. 7. Add Shadows and Save
In order to give the final product depth, apply a shadow between the two layers. To be safe, save a backup of the Photoshop file that still has all of the layers in place. After saving the layer file, combine or flatten all of the layers and save the image once more as a separate file. Your image will look professional and lifelike after this last phase. If the editing process is done well, you'll get a stunning 3D effect like the ones below, which will enhance your product picture and aid in growing your online store's sales. Want to see examples of all seven steps? A step-by-step explanation of the procedure is provided in the tutorial below. As you can see, by following the procedures, you may make your own ghost mannequin-effect professional clothes product photos. You can download this comprehensive guide on ghost mannequin product photography to view examples of product photography using various types of clothing. Always keep in mind that this effect on your product photographs will not only make your products look more unique and interesting, but it will also give your online business a very professional appearance. Your brand will become more desirable to customers, which will increase sales. Want more insights like this? To receive the most recent thought leadership content, including blogs, resource articles, podcast episodes, webinars, and more, sign up for our biweekly newsletter.
Contact Us Website: https://www.photoeditorph.com/ Phone: +8801723283638 Whatsapp: +8801723283638 Email: info@photoeditorph.com Address: Blk 34 Lot 5 Easthomes 3 Subd., Estefania, Bacolod City, Philippines,6100