Download
1 / 3
0 likes | 3 Views
Anti Sway Bar Installation for Superior Cornering and StabilityAnti Sway Bar Installation for Superior Cornering and StabilityAnti Sway Bar Installation for Superior Cornering and Stability

E N D
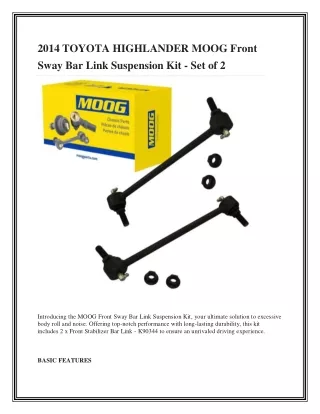
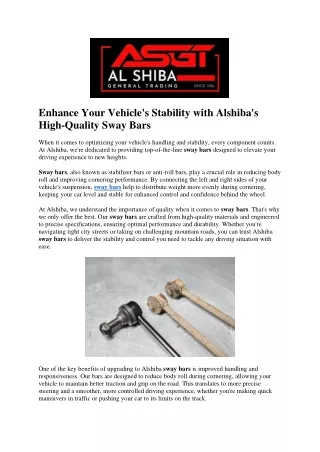
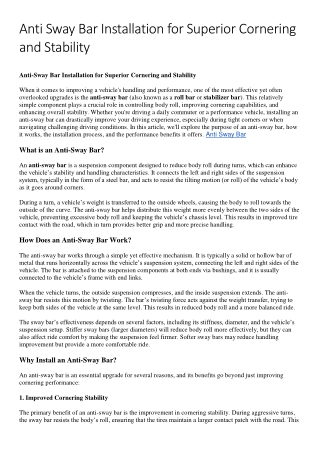
Anti Sway Bar Installation for Superior Cornering and Stability Anti-Sway Bar Installation for Superior Cornering and Stability When it comes to improving a vehicle's handling and performance, one of the most effective yet often overlooked upgrades is the anti-sway bar (also known as a roll bar or stabilizer bar). This relatively simple component plays a crucial role in controlling body roll, improving cornering capabilities, and enhancing overall stability. Whether you're driving a daily commuter or a performance vehicle, installing an anti-sway bar can drastically improve your driving experience, especially during tight corners or when navigating challenging driving conditions. In this article, we'll explore the purpose of an anti-sway bar, how it works, the installation process, and the performance benefits it offers. Anti Sway Bar What is an Anti-Sway Bar? An anti-sway bar is a suspension component designed to reduce body roll during turns, which can enhance the vehicle’s stability and handling characteristics. It connects the left and right sides of the suspension system, typically in the form of a steel bar, and acts to resist the tilting motion (or roll) of the vehicle’s body as it goes around corners. During a turn, a vehicle’s weight is transferred to the outside wheels, causing the body to roll towards the outside of the curve. The anti-sway bar helps distribute this weight more evenly between the two sides of the vehicle, preventing excessive body roll and keeping the vehicle’s chassis level. This results in improved tire contact with the road, which in turn provides better grip and more precise handling. How Does an Anti-Sway Bar Work? The anti-sway bar works through a simple yet effective mechanism. It is typically a solid or hollow bar of metal that runs horizontally across the vehicle’s suspension system, connecting the left and right sides of the vehicle. The bar is attached to the suspension components at both ends via bushings, and it is usually connected to the vehicle’s frame with end links. When the vehicle turns, the outside suspension compresses, and the inside suspension extends. The anti- sway bar resists this motion by twisting. The bar’s twisting force acts against the weight transfer, trying to keep both sides of the vehicle at the same level. This results in reduced body roll and a more balanced ride. The sway bar’s effectiveness depends on several factors, including its stiffness, diameter, and the vehicle’s suspension setup. Stiffer sway bars (larger diameters) will reduce body roll more effectively, but they can also affect ride comfort by making the suspension feel firmer. Softer sway bars may reduce handling improvement but provide a more comfortable ride. Why Install an Anti-Sway Bar? An anti-sway bar is an essential upgrade for several reasons, and its benefits go beyond just improving cornering performance: 1. Improved Cornering Stability The primary benefit of an anti-sway bar is the improvement in cornering stability. During aggressive turns, the sway bar resists the body’s roll, ensuring that the tires maintain a larger contact patch with the road. This
increases grip and traction, especially when cornering at higher speeds. With reduced body roll, your vehicle feels more stable and predictable, providing more confidence while navigating corners. 2. Enhanced Handling Precision When body roll is minimized, the suspension can work more effectively. This means the vehicle’s tires remain more evenly loaded, and the suspension can react more quickly and precisely to road irregularities. With improved handling precision, the car feels more responsive, allowing for sharper turns, better feedback, and greater control when navigating challenging roads or tracks. 3. Reduced Understeer and Oversteer An anti-sway bar can help address issues related to understeer (when the vehicle turns less sharply than intended) and oversteer (when the vehicle turns too sharply or loses traction). By reducing body roll and keeping the vehicle balanced, an anti-sway bar helps the vehicle maintain its desired line through corners, leading to more predictable handling. 4. Increased Vehicle Safety Reduced body roll and improved handling translate to enhanced safety, especially in emergency maneuvers or sharp turns. When the body rolls excessively, the vehicle’s weight distribution becomes uneven, increasing the likelihood of tipping or losing control. A properly installed anti-sway bar helps keep the vehicle stable and minimizes this risk. 5. Better Tire Performance A car that rolls too much on turns can cause uneven tire wear because the tires aren't always in optimal contact with the road. By reducing body roll, the anti-sway bar ensures that the tires remain more evenly loaded, leading to better tire longevity and improved performance. Installing an Anti-Sway Bar: A Step-by-Step Guide Installing an anti-sway bar can be a straightforward process, but it requires some mechanical know-how and tools. Here’s a general step-by-step guide for installing an anti-sway bar on your vehicle. Tools and Materials Needed: Anti-sway bar kit (specific to your vehicle model) Jack and jack stands Socket wrench set Torque wrench Lubricant (for the bushings) New bushings (optional, depending on your kit) End links (included in some kits or purchased separately) Vehicle lift (optional, for easier access) Step 1: Raise the Vehicle Before starting the installation process, ensure the car is parked on a flat surface. Use a jack to raise the vehicle and place it on jack stands to ensure safety. You may need to lift both the front and rear of the car, depending on which sway bar you’re installing. Step 2: Remove the Old Sway Bar (if applicable)
If your vehicle already has an existing sway bar, the first step is to remove it. Use a socket wrench to disconnect the end links from the sway bar and remove any fasteners securing the sway bar to the frame of the vehicle. Take note of the orientation and positioning of the sway bar for easier reinstallation. Step 3: Install New Bushings (if included) Most sway bar kits come with new bushings. These bushings are essential as they allow the sway bar to twist without causing excessive wear to the suspension components. Apply some lubricant to the new bushings to ensure they fit smoothly around the sway bar. Step 4: Attach the New Anti-Sway Bar Place the new anti-sway bar in position and secure it to the vehicle’s frame using the provided brackets and bolts. Make sure the sway bar is oriented correctly and that it is mounted securely to the frame of the vehicle. Torque all the bolts to the manufacturer’s specified torque setting. Step 5: Install the End Links End links connect the sway bar to the suspension components. Attach the end links to the sway bar and the suspension arms or control arms, depending on your vehicle’s setup. Make sure the end links are positioned correctly and that all bolts are tightened securely. Step 6: Double-Check All Connections Before lowering the vehicle, double-check all connections and fasteners to ensure everything is tightened to the appropriate torque specifications. This will help prevent any loose components while driving. Step 7: Lower the Vehicle and Test Once everything is installed and tightened, lower the vehicle from the jack stands and perform a test drive. Pay attention to any unusual noises or handling issues, and make sure the sway bar is functioning as intended. If necessary, fine-tune the settings or consult a professional mechanic. Final Thoughts Installing an anti-sway bar is one of the most effective ways to improve your vehicle’s handling, especially when it comes to cornering and stability. By minimizing body roll and ensuring better tire contact, an anti- sway bar provides more precise control, reduced tire wear, and increased safety. Whether you're looking for better performance on the track or simply seeking a more enjoyable driving experience, an anti-sway bar installation can significantly enhance your vehicle’s handling dynamics. If you're considering this upgrade, following the installation guide carefully or consulting with a professional mechanic will help you achieve superior cornering and stability on the road.