Download
1 / 20
200 likes | 226 Views
This handbook focuses on back safety practices for UW Madison custodians, aiming to reduce injuries and accidents. Covers procedures, equipment, stretching, lifting, and injury reporting. Developed by EH&S and OHR departments.

E N D
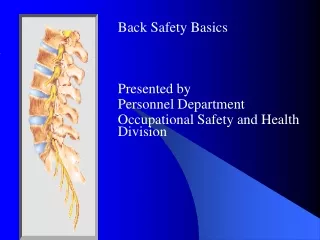
UW Madison Custodial Back Safety Handbook Presented by Environment, Health and Safety Department and Office of Human Resources
Introduction This custodial back safety handbook was developed by the Office of Human Resources and the Environment, Health and Safety Department. This handbook was specifically designed for UW Madison Custodians and targets specific work practices and related back safety issues. Back injuries are one of the most common injuries for UW Madison custodians. This handbook is designed to serve as a reference for back safety practices and procedures, and also complements the back safety signage and training videos developed by OHR and EH&S as part of an Injury Reduction Grant funded by the Department of Administration, Division of Risk Management. Adhering to these guidelines for back safety practices and procedures may help reduce accidents and injuries and keep you healthier, safer, and more productive. Please send any suggestions for changes or corrections to OccHealth@fpm.wisc.edu Disclaimer: EH&S and OHR are providing this handbook for educational purposes only. Any therapy or exercise should be prescribed, supervised, and instructed by a trained healthcare professional. EH&S and OHR are not liable for any injury or pain resulting from recommendations found in this handbook. Please seek medical advice if your symptoms or pain increase, and allow your medical or therapy professional to prescribe the exact exercise progression that is based on medical necessity and specific condition to which you are being treated.
Table of Contents Page 4….. ………………………...Services Page 5…………………………......Back Basics Page 6…………………………......Back Basics Page 7…………………………......Back Basics Page 8…………………………......Safety Equipment Page 9……………………………..Safety Equipment Page 10………………………........Stretching Page 11……………………………Stretching Page 12……………………………Lifting Page 13……………………………Lifting Page 14……………………………Push/Pull/Get Help Page 15……………………………Snow Removal Page 16……………………………Injury Reporting Page 17……………………………Injury Reporting Page 18……………………………Summary Page 19…………………………....Emergency Contacts Page 20……………………………Emergency Response
Services • Environment, Health and Safety (EH&S) • 608-265-5000 • Office of Biological Safety • Chemical and Environmental Safety • General Safety Program • Occupational Health Program • Radiation Protection Program • Office of Human Resources (OHR-WC) • Benefit Services—Worker’s Compensation • 608-265-9475 or 608-262-0073 • Job-related injuries and illnesses management and consultation • Injured workers rights and responsibilities consultation • Referral Services for Rehabilitation Nursing and the State Injured Worker Program • Coordination with Other Employee Benefits Cultural Linguistic Services (CLS) • 608-265-2257 • Oral and written interpretation and translation • Community outreach • Training development • Technology courses and technical support coordination • Cultural Competency Interventions • Third Party Translation Service for all staff
Back Basics Foundation • The “foundation” of your back, the spine, is rigid enough to support more than half of your body weight. But the spine also has enough flexibility for you to bend down and touch your toes. • To accomplish these “dual functions” the spine is made up of 33 individual bones known as “vertebrae;” 24 are moveable. They are: • The seven “cervical” (neck) vertebrae which support the skull and allow you to move your head; • The twelve “thoracic” (middle back) vertebrae which hold your rib cage in place; and • The five vertebrae in the “lumbar” (lower back) region of your back which enable you to bend at the waist. • In a healthy spine, 33 vertebrae form a natural “S” curve. The spine’s “S” curve helps distribute your weight equally. Natural “S” curve
Back Basics Injury • Strained muscles and sprained ligaments are the most common causes of back pain. • This type of back pain, which lasts less than three months, is considered to be “acute”. • With proper treatment these injuries usually heal within a few weeks • When back pain persists or frequently reoccurs, it is considered to be “chronic”. • Chronic back pain may indicate that something is wrong with the spine itself. • Several factors may increase the onset of acute or chronic back pain including: • Lifting incorrectly • Carrying objects incorrectly • Pushing or pulling heavy objects • Frequent back bending • Poor posture • Being overweight • Lack of physical fitness • Inadequate tools • Environmental barriers • Talk with your doctor if you are experiencing • either acute or chronic back pain.
Back Basics The Zone Defense • Your Safe Lifting Zone is • between your hips and shoulders. • Lifting and carrying objects in this • area is considered proper body • mechanics and provides the best • chance for minimizing injury. • Your At-Risk Zoneis below • the knees or above your head. • When you try to lift in this area, • your back muscles have to work • harder, which may result in an • injury. To protect your back when • you must lift in your At-Risk Zone: • Maintain a solid base of support with your feet • Bend with your legs, not your back • Lift weight using your arm and leg muscles • Your Danger Zone is below your knees and 12 inches and greater in front of your feet. This is where your back is most vulnerable to injury because it necessitates bending and reaching. To protect your back when you must lift in the Danger Zone: • Lighten your load • Move feet as close to load as possible • Bend with your legs, not your back • If you must reach: Bend at the hips • Make smooth, consistent movements Safe Lifting Zone At-Risk Zone
Safety Equipment Personal Protective Equipment Always consider wearing appropriate personal protective equipment for any task you perform Ask your doctor if a supportive back belt is right for you Disposable gloves for trash collections Closed-toed shoes with good support and traction are essential Leather or cloth gloves can protect your hands and provide grip Strap-on cleats and spikes can provide additional traction
Safety Equipment Tools Use of proper tools may make your job safer and easier Recycling cart Rolling barrel Flat-bed cart Dolly Extension reacher Ergonomic Shovel Pallet jack
Stretching Many back injuries result from weak, tight muscles. A few pre-shift stretches may help you be more flexible on the job and prevent a back injury. Shoulder Shrugs (helps reduce upper back and neck discomfort) STEP 1) Stand or sit straight up; arms relaxed by your side STEP 2) Slowly roll shoulders straight up towards your ears STEP 3) Then squeeze shoulders together, and let them roll down and back; movement should be smooth and circular, and should take 5 seconds; a mild, comfortable stretch should be felt through your shoulders and lower neck STEP 4) Repeat 5 times The Mid-Back Stretch (helps reduce fatigue between the shoulder blades) STEP 1) Start standing or sitting straight up and reach both arms straight out in front of you; STEP 2) Grab your left wrist lightly and pull left arm an inch further out; STEP 3) Inhale deeply and hold for 5 seconds; STEP 4) Exhale and release slowly, switch sides and repeat
Stretching Remember to take deep breaths and hold stretches for the recommended amount of time. Release stretches slowly and consistently, and repeat as necessary. Standing Back Bend (helps reduce lower back discomfort) STEP 1) Place your hands on your hips and your feet shoulder width apart; slowly lean backwards STEP 2) Look up towards the roof, hold for 10 seconds; a mild, comfortable stretch should be felt through your low and mid-back STEP 3) Hold stretch for 10 seconds, release slowly, repeat 5 times Hamstring Stretch(helps reduce lower back discomfort) STEP 1) Standing, put your left leg straight out in front of you (can be performed with heel on step or ground) STEP 2) Lift your left toes up so only your heel touches the ground or step STEP 3) Keeping your back as straight as possible, bend forward from your hip; a mild, comfortable stretch should be felt at the back of your thigh STEP 4) Hold stretch for 10 seconds, release slowly STEP 5) Switch sides and repeat
Lifting • Preparing for the lift: • Size up the load. Test the weight before you try to lift. If it’s too heavy, divide it up, get help from a co-worker, or use a machine, dolly, or cart to assist you • Survey your route. Look for hazards such as spills, uneven surfaces, corners, and flooring changes • Performing the lift: • Make sure your mind is on the job, your spine is in its • neutral “S” curve posture and you are in your Safe Lifting • Zone • Get as close to the load as you can • With feet shoulder-width apart, either squat down with • both feet equally squared or put one foot in front of the • other using a diagonal squat (see pictures below) • When performing the diagonal squat, bend at the hip not • with your back, to lean over your forward leg • Keep your spine in its natural “S” curve and let your legs • do the lifting Diagonal Power Lift Square Power Lift
Lifting • Lowering down lifts: • Lower down to one knee • Hold the load close to your body as you squat • Balance the load on your other knee • Pause to adjust your grip, and set down • Carrying and Lowering: • If you have to turn, aim one foot toward your destination • Use your feet to pivot; don’t twist with your back • Set the load down in one slow movement • Carrying heavy loads in your Safe-Lifting Zone • Store heavy items at waist level • If the load is heavy or bulky, use a cart or dolly instead of carrying Carry and store items at waist level Two Person Carry
Push, Pull, Get Help • Pushing and Pulling • Pushing is easier on your back than pulling • When pushing, keep your back in a neutral position (head in-line with your shoulders and hips); use both arms; and keep stomach muscles tight • Survey the area for potential obstacles • If you must pull, stay close to the load; keep your back straight; bend your knees slightly; and pull with one smooth motion • Ask for assistance if you can’t see around a tall cart. A co- worker can help guide you Top: Pushing is easier on the back than pulling Left: When pushing tall carts ask a co-worker to lead the way
Snow Removal • Shoveling • Make sure you have a good grip - • Grip the shovel with your hands about 12 inches or more apart for greater stability and leverage. • Maintain your balance - • Face the task directly. Stand with your feet shoulder-width apart to maintain balance. • Use proper lifting techniques - • Lift with your legs. Bend with your knees - not your back. • Do not twist your body - • Dump the snow in front of you. If you need to move the snow to the side, move with your feet. Walk to where you want to dump the snow rather than reaching, tossing, or throwing the load. • Pace yourself during snow removal - • Shovel an inch or two; then take another inch off. Rest and repeat as necessary.
Accident & Injury Reporting • Even with the best practices and precautions, accidents and injuries can still occur. In the event that you are injured while performing your job duties follow these steps: • 1. Obtain first aid or medical attention if necessary. • 2. Report your injury to your supervisor immediately. • 3. If you see a medical practitioner, be sure to indicate that the injury was job related. Always mention this when getting medical treatment related to a Worker’s Compensation claim. • 4. Complete the “Employee’s Work Injury and Illness Report” (OSLP-1) as soon as possible (see next page). • 5. Forward copies of any medical releases/restrictions to your Human Resources Manageror to your supervisor. • You will receive an acknowledgement of your claim from the Office of Human Resources Workers Compensation (OHR-WC) staff, along with additional information about Workers Compensation, its background, mutual responsibilities and benefits. • You should hear about the disposition of your claim within 10 days of when OHR-WC receives the Work Injury and Illness Report. • Office of Human Resources Workers Compensation • 608-265-9475 or 608-262-0073
Accident & Injury Reporting
Summary • As we have discussed so far in this handbook, back safety requires proper preparation, tools, and techniques. Let’s review some important highlights: • Always conduct a risk assessment to determine hazards before you start a task • Use appropriate Personal Protective Equipment and proper tools to make your task safer and easier • Stretch often and ask your doctor about other exercises that can help prevent back injuries • Avoid lifting objects that are too heavy or bulky. Get help, or use a dolly or cart • When you do lift, bend at the knees and lift with your legs. Avoid bending at the waist, even when lifting light objects • Use carts and dolly’s to help move supplies and materials rather than trying to carry them • Push cart’s, dolly's, and other movable devices rather than pulling them • Adapt your working environment to accommodate your back. Rearrange shelves and store items within easy reach • Always report accidents and injuries to your supervisor as soon as possible
Emergency Contacts Occupational and Environmental Emergencies ENVIRONMENT, HEALTH AND SAFETY www.fpm.wisc.edu/safety General EH&S Line—608-265-5000 Chemical and Radiation Help Line— 608-265-5518 Facility and Mechanical Emergencies FACILITIES PLANNING & MANAGEMENT www2.fpm.wisc.edu/ppnew/cars/ Central Answering & Response Service CARS—608-263-3333 Personal Safety/Security & Fire Emergencies POLICE DEPARTMENT www.uwpd.wisc.edu Non-Emergency–608-262-2957 Emergency-911
Emergency Response Guide EMERGENCY PHONE NUMBERS Police ……. 911 Or Non-Emergency – 262-2957 Poison Control 1-800-222-1222 Fire - 911 CRIMINAL ACTS Call UW Police Non-Emergency 262-2957 Acts in Progress Call 911 Acts Not in Progress MEDICAL EMERGENCIES Send someone to guide Police & Rescue to victim If trained, begin First Aid Call 911 FIRE ALARM OR ACTUAL FIRE Evacuate Area & Pull Fire Alarm Use Nearest Exit or Alternate Safe Route Do Not Use Elevators Call 911 from outside building – Stay back 500 feet from building NATURAL DISASTER / SEVERE WEATHER Warning: Severe weather sighted Seek Appropriate Shelter Stay away from windows Avoid large rooms Do Not use Elevators Watch: Conditions favorable for severe weather Monitor Weather Broadcasts For more Emergency Action information, contact UW EH&S at 265-5000