Download
1 / 43
430 likes | 455 Views
This PowerPoint guide helps you set up your class website to share assignments, quizzes, and tests with parents and students. Follow the steps to create, update pages, and customize graphics using Library options. Email sjordan@dadeschools.net to link to the school site.

E N D
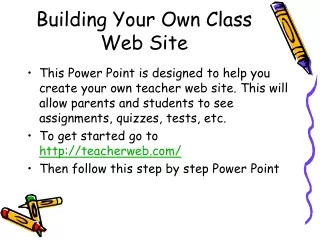
Building Your Own Class Web Site • This Power Point is designed to help you create your own teacher web site. This will allow parents and students to see assignments, quizzes, tests, etc. • To get started go to http://teacherweb.com/ • Then follow this step by step Power Point
Step 1: Scroll over Teachers Step 2: Click on Create a Teacher Web Site
1.a- Select MiamiCarolCity SeniorHighSchool 2 – Type in Your Name
Select all that apply. Once completed select Create Your TeacherWeb.
Congratulations your page is set up and ready to go! Make sure to print this page for future reference.
Here is where you Will update and create all of your pages. Step 1 – Select Update for Teacher.
On this page you will be able to post information about yourself and post your mission for the class in the boxes Provided. Once completed type in your password and click Submit Teacher Page.
Complete the same process for each page. Once you are finished email sjordan@dadeschools.net so your site can be linked to the faculty and staff page on the schools web site. I hope you had fun making you class web page and have a great year!
Changing the Name of a Page or Adding New Pages • Some of you may have more than one prep therefore you need to have more than one syllabus for each class and more than one homework page. • The following slides will walk you through step by step to allow you to change the names of pages and add new pages as necessary. Also you will be shown how to change the graphics for each page to meet your needs.
The Newsflash page is a great page to change and make this your syllabus page for your class. You can change the name of this page and call it Syllabus if you are teaching the same course all day long or you can be real specific and name it English I Syllabus if you have more than one prep. Simply follow the next few slides. To get started click on the bottom bar
We are going to change the Newsflash Page to become your Syllabus Page. On this page scroll down to the bottom (go to the next slide)
Select Add/Delete/Rename Pages form the OTHER CHANGES Menu
You will come to a screen like this. Click in the Newsflash box and highlight the text by holding the left button down on the mouse and scrolling over the word Newsflash.
Type in your password at the bottom of the page and select Submit Page Changes
To change graphics go back to the Update Index Page and scroll down to the Other Changes Menu and select Change Graphics – Select From Library Button
You can change all of the graphics on every page by selecting Library next to each page. For now we are just going to change the Newsflash graphic. Click on Library.
A new window will open with graphics. Click on the graphic you want and then click select.
Now that we have renamed the Newsflash page to Syllabus and we have learned how to change the graphics it is now time to upload your syllabus. Select Update for the Syllabus page.
You will come to your Syllubus page. You are going to copy and paste you syllabus from Word to the body of the web page.
Open your syllabus in Word or the word processing software you typed it in. Go To the EDIT Menu and Click SELECT ALL
Your document should be selected and look like this. Go back to the EDIT Menu and Click COPY. Go back to the web site by using the tabs at the bottom of the page. All of the screens you have open will show down here so you can go back and forth with ease.
Click in the box and use the keyboard commands to paste the syllabus into your web page. The command is the Ctrl and V at the same time.
Your Syllabus should appear in the box. Now change the Name of the Email Subject to Syllabus or whatever you named it. Go down to the bottom and type in your password and click submit changes.
You should come to a screen like this. Select View the Updated Page
Congratulations you should be viewing your syllabus! On your web site!
To add a new page scroll down to the OTHER CHANGES Menu. Click on Add/Delete/Rename Pages
Click on the + button for Newsflash. A drop down menus will appear. Click in the empty boxes to make as many additional pages as needed. (The Newsflash Page and Homework Pages are where you can add additional pages and place information for all of your classes if you have more than one prep) The box will change to a check mark. Also you can change the name Newsflash2, etc. at this time to reflect what you need. Scroll down and………..
Type in your password at the bottom and click Submit Page Changes
Congratulations you should come to a screen like this! Click on Return to Update Index Page.
You should be viewing all of the pages you added. If you forgot to change the names or want to rename the pages scroll down and select………
Change the name where needed. For example Homework I added more homework pages and renamed them to match the class being taught. Scroll down once finished and………..
Type in your password at the bottom and click Submit Page Changes
Congratulations you should come to a screen like this! Click on Return to Update Index Page.
Type in the information or copy and paste it from word. Scroll down when finished, type in your password and Click Submit Page Changes.
Your new home page will show all of the new pages you added. Remember you can change the graphics for each page and change the name for each page. Just go back to slides 19-20 for the graphics and slides 30-33 for adding pages.
Problems or Questions? • I hope your having fun! • Remember if you have any questions or get in a rut please contact Ms. Shelly Jordan in room 124 or email me at sjordan@dadeschools.net