Download

1 / 20
200 likes | 404 Views
Advanced Microcontrollers A practical approach lesson 2 serial communication. Microcontrollers A practical approach. Topics Some about architecture Serial communication. Microcontrollers serial communication A practical approach. Morse code telegraphy

E N D
Advanced MicrocontrollersA practical approachlesson 2 serial communication
MicrocontrollersA practical approach Topics • Some about architecture • Serial communication
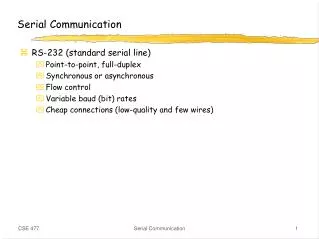
Microcontrollers serial communicationA practical approach • Morse codetelegraphy • RS-232 (low-speed, implemented by Serial Ports) • RS485 • Universal Serial Bus (moderate-speed, for connecting computers to peripherals) • FireWire • Fibre Channel (high-speed, for connecting computers to mass storage devices) • InfiniBand (very high speed, broadly comparable in scope to PCI) • Serial Attached SCSI • Serial ATA • PCI Express • CAN
Microcontrollers serial communicationA practical approach • Half duplex • Full duplex • 5,6,7,8 databits • ASCII (0-127) • Stop bit(s) • Parity • DCE (Data communicationequipment) • DTE(Data terminal Equipment (PC))
9 Pin Connector on a DTE device (PC connection) Male RS232 DB9 Pin Number Direction of signal: 1 Carrier Detect (CD) (from DCE) Incoming signal from a modem 2 Received Data (RD) Incoming Data from a DCE 3 Transmitted Data (TD) Outgoing Data to a DCE 4 Data Terminal Ready (DTR) Outgoing handshaking signal 5 Signal Ground Common reference voltage 6 Data Set Ready (DSR) Incoming handshaking signal 7 Request To Send (RTS) Outgoing flow control signal 8 Clear To Send (CTS) Incoming flow control signal 9 Ring Indicator (RI) (from DCE) Incoming signal from a modem RS232 connectorA practical approach • (PC))
Level Transmitter (V) Receiver (V) Space status (0) +5 ... +15 +3 ... +25 Mark status (1) -5 ... -15 -3 ... -25 Not defined - -3 .. -3 …+3 . +3 RS232 voltagesA practical approach
Baud rate Maximum cabellength(m) 19200 15 9600 150 4800 300 2400 900 RS232 cablelenghtA practical approach
Serial communiactionA practical approach Topics • PIC family • Architecture PIC18F2580 • Interrupts • Serial communication • LCD • Assembly • A very little microcontroller
PIC18 UARTpracticalapproach • Asynchronous - Auto-wake-up - Auto baud calibration - 13-bit Break character • Synchronous – selectable clock • Synchronous – clock polarity
Programming • Header • Functions • Initialisation … • Main program • Initialisation (function call) • Program with function calls in infinite loop
Program header /*********************** pic18f2580 **********************************\ | Testprogram_1 MPlab C18-compiler | | 11 sept 2012/21 juli 2013 J.S.D. Stokkink| +-----------------------------------------------------------------------------------+ | Gebruit van INT0 , TIMER0 , UART , High-iterrupt priority | +-----------------------------------------------------------------------------------+ | WERKING: | | RB0 via schakelaar naar GND geeft INT0 interrupttext to ser| | ial port TX pin | | TIMER0 is ingesteld op ca 1sec | | De Xtal frequentie is 20MHz | | After InitUART() ,putc(c,stdout) and puts("string") | | De op RB2 aangesloten LED zal knipperen met ca 1Hz | \**************************************************************************/
Main Program send serial #include <p18F2580.h> #include <stdio.h> // t.b.v. puts() en putc() functies #pragmaconfig OSC = HS // HS oscillator 20 Mhz #pragmaconfig WDT = OFF // Watchdog Timer disabled #pragmaconfig LVP = OFF // Low Voltage ICSP disabled #pragmaconfig PBADEN = OFF // PortB<4:0> configured as digital I/O // Function-declarations: voidInterruptHandlerHigh(void); void InitINT0(void); voidInitUART(void); void InitTimer0(void); voidEnableHighInterrupts(void); // Globale variabelen: char ch = '0'; //start with character '0' #pragma code voidmain (void) { TRISC=0; //led's output tx output InitINT0(); InitUART(); InitTimer0(); EnableHighInterrupts(); // run forever: while(1) { //do nothing} }
Iniatalisation RB0 #pragma code void InitINT0(void) { PORTB = 0; // clear PORT B TRISB = 0x01; // RB0=input; RB1-7: output INTCON2bits.RBPU=0; // pull-upsportBenabled INTCON2bits.INTEDG0 =1; // interrupt on rising edge INTCONbits.PEIE = 1; // enable high priority interrupt INTCONbits.INT0IE = 1; // enable INT0 }
Initialisation UART voidInitUART(void) { // setup UART: SPBRGH=0; SPBRG=31; // interne clock Fosc=20MHz ->9600 // Baud p error 0,16% TXSTAbits.SYNC = 0; // Enableasynchronousserial port RCSTAbits.SPEN = 1; // Enableasynchronous serial port TXSTAbits.TXEN = 1; // Enable transmission; als puts("\rUARTinitialised\r"); // To Pc OR BLUETOOTH } For initialisation timer seelesson 1
Initialisation interrupt voidEnableHighInterrupts(void) { RCONbits.IPEN = 1; // enable interrupt priority levels INTCONbits.GIEH = 1; // enable all high priority iterrupts } // High priorityinterruptvextor: #pragma code high_vector = 0x08 void high_interrupt(void) { _asmgotoInterruptHandlerHigh _endasm }
Interrupt Service Routine #pragmainterruptInterruptHandlerHigh voidInterruptHandlerHigh(void) { if(INTCONbits.TMR0IF) // check for TMR0 overflow { INTCONbits.TMR0IF = 0; // clear interrupt flag TMR0H = 72; // reload timer TMR0L = 229; // reload timer PORTCbits.RC2 = !PORTCbits.RC2; // toggle LED on RC2 PORTBbits.RB3 = !PORTBbits.RB3; // toggle LED on RC2 ch++; //next character (see ASCII table) putc(ch,stdout); // ASCII-karakter naar PC } if(INTCONbits.INT0IF) // check for INT0 flag { INTCONbits.INT0IF =0; // clear interrupt INT0 (RB0) flag puts("\n"); puts("\rRB0 pressed\r"); // to PC } }
Extra part ISR for recieve if (PIR1bits.RCIF == 1) //check for recieve interrupt { TXSTAbits.TXEN=0; // transmitteroff if (RCREG=='a') {PORTCbits.RC0=1; puts(" end \r ");} //LED on if (RCREG=='b') PORTCbits.RC0=0; //read receiverif character = ‘b' LED of TXSTAbits.TXEN=1; // transmitteron PIR1bits.RCIF=0; // interruptflagoff }
Assignmentslesson 2 • Make the sendserialexample • working : • a. check the output on a scoop. • (explain) RS232 output and 5v output • b.Checkthe output on a terminal(via USB orBluetooth) • (install terminal program onyourphone(BT) or PC • Make the recieving program working: • Connecttwo boards let themcommunicate