Download
1 / 14
150 likes | 382 Views
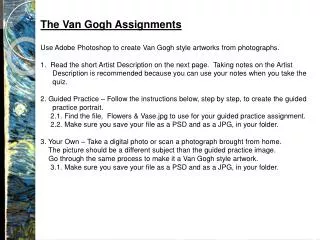
The Turner Assignments Use Adobe Photoshop to create Turner style, artworks from photographs. Read the short Artist Description on the next page. Taking notes on the Artist Description is recommended because you can use your notes when you take the quiz.

E N D
The Turner Assignments • Use Adobe Photoshop to create Turner style, artworks from photographs. • Read the short Artist Description on the next page. Taking notes on the Artist Description is recommended because you can use your notes when you take the quiz. • 2. Guided Practice – Follow the instructions below, step by step, to create the guided practice portrait. • 2.1. Find the files, Sailboat.jpg & Sky.jpg, to use for your guided practice assignment. • 2.2. Make sure you save your file as a PSD and as a JPG, in your folder. • 3. Your Own – Take a digital photo or scan a photograph brought from home. • Go through the same process to make it a Turner style artwork. • 3.1. Print and keep your final result to turn-in with your assignment package, later. • 3.2. Make sure you save your file as a PSD and as a JPG, in your folder.
Artist Description Joseph Mallord William Turner (1775-1851) was a exceptional English landscape painter who was accepted into the Royal Academy of Art at the age of just 14. Although he started conventionally enough, painting landscapes and the rare portrait, he soon became obsessed with natural events - sunlight, storms, rain, and especially the sea, whose raw power intrigued him. He was particularly interested in disasters, rushing to witness the burning of the Houses of Parliament in 1834 so he could record the event on canvas. Turner is best known for his seascapes, which explore light and shade in a way no painter had before; his work, far in advance of its time, prepared the way for the French impressionists who followed. We’ll explore his techniques through a homage to The Fighting Temeraire,Tuggedto her Last Berth to be Broken Up, which Turner painted in 1839.
Turner – Guided Practice Before After
Step 1 - Run PhotoShop • Start > All Programs > Adobe Master Collection CS3 > Adobe PhotoShop CS3. • Step 2 - Open the first image file you are going to use. • File > Open... Sailboat.jpg • View > Fit on Screen button
Step 3 - Crop (trim) the image. • Click the Crop Tool. • Click corner to corner on the image and adjust the size of the crop window. • In this case, crop only the sailboat with the people in it, centered. • Everything else around the outside of that will be removed. • Double-click the image.
Fit Screen • Step 4:Check image size. • Image > Image Size… • The shortest side (in this case, height) should be 600 pixels, minimum. .
Step 5:Remove the background, using the Magic Eraser Tool and Eraser Tool. • View > Zoom in. • Adjust brush size. • Erase the background. Eraser tools
Step 6:Open the second image file you are going to use for your background. • File > Open… Sky.jpg
Marquee Tool • Step 7: Place first image on background. • Click back onto the window with the first image. Window > sailboat.jpg. • Image > Image Size > Width > 300 > OK. • Using the Magic Wand click in the transparent area. Then, Select > Inverse. • Copy selection. Edit > Copy OR Ctrl+C • Click on the background image window. Window > Sky.jpg. Edit > Paste OR Ctrl+V. • Using the Move Tool and move the image to the left.
Step 8: Create a Reflection for the Image • Add a new layer. Layer > New >Layer • Return to sailboat. Window > sailboat.jpg • The sailboat should still be selected • Edit > transform > flip vertical • Edit > copy
Move Tool • Return to background. Window > sky.jpg • Edit > paste • Using the Move tool, place the sailboat below but slightly overlapping the original sailboat • Adjust the opacity to 60% • Drag Layer 2 below Layer 1 in the layers palette
Step 9: Create a Reflection for the Background • Click the Background Layer in the Layers Palette • Then, Layer > Duplicate Layer • Using the Move Tool, place reflected image below so that the edges align • Adjust the Opacity to 80%
Step 10:Merge visible layers. • Layer > Merge Visible OR Shift+Ctrl+E • Step 11: Make it look like a painting. • Filter > Artistic > Watercolor… • Brush Detail: 14 Shadow Intensity: 0 Texture: 1 OK • Filter > Brush Strokes > Spatter… • Spray Radius: 10 Smoothness: 10 OK
Step 12: Save finished image twice. Save as a PSD and as a JPG. • You will use this image for your assignment package and then again in your portfolio. • File > Save As… > Save in your folder. • File Name: Turner(your 1stname) • Format: PSD • File > Save As… > Save in your folder. • File Name: Turner(your 1stname) • Format: JPG Quality: 12