Introduction to Electric Circuits
620 likes | 854 Views
Introduction to Electric Circuits. Dr. William A. Stapleton Ingram School Of Engineering Texas State University – San Marcos. Electrical Circuits (Over)simplified.

Introduction to Electric Circuits
E N D
Presentation Transcript
Introduction to Electric Circuits Dr. William A. Stapleton Ingram School Of Engineering Texas State University – San Marcos
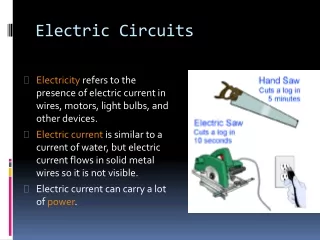
Electrical Circuits (Over)simplified • The simple model of matter is that it is made up of atoms which have positively-charged nuclei orbited by negatively-charged electrons. Given sufficient energy, an electron can be dislodged from its atom. • Think of electricity as the flow of energy carried by the movement of electrons dislodged from atoms. • An electrical circuit is formed when there is a closed path around which the electrons flow.
Circuits Primer part 2 • In electrical circuits, we are interested in the movement of energy from one location to another. • Some elements in a circuit supply energy. These are called sources. • Some elements in a circuit expend energy. These are called loads or sinks. • The total energy supplied must equal the total energy expended. • We typically measure energy somewhat indirectly. Energy is measured in Joules (J). Power is energy per unit time. Power is measured in Watts (W). A Watt is one Joule per second. • 1W = 1J/s • A 100W light bulb expends 100 Joules each second.
Circuits Primer part 3 • We said a 100W light bulb expends 100 Joules each second. • We also said to think of electricity as the flow of energy carried by the movement of electrons dislodged from atoms. • To get energy to the light bulb, we make a circuit from the power producing plant to the light bulb. • In that circuit each moving electron is charged with energy at the source. When an electron passes through the sink (light) that energy is expended. • The amount of power that can be supplied depends on two factors: • The number of electrons that can move through the wires • The amount of energy carried with each electron
Circuits Primer part 4 • The number of electrons flowing in a circuit is called current. Current is measured in Amperes (A). An Ampere is one Coulomb of electrons per second. A Coulomb is 6,241,507,648,655,549,400 (6.24… x 1018) electrons. • The amount of energy per electron is called voltage. Voltage is measured in Volts (V). One Volt is one Joule per Coulomb. • So to determine power we take the product of the number of electrons flowing (current) and the energy per electron (voltage) and we should get a measure of power (wattage) • Voltage * Current = Power • In units V*A=W or (J/C)*(C/s) = (J/s)
Figuring the numbers • Consider the electrical power equation: • Voltage * Current = Power • For a 100W light bulb attached to a 110V wall outlet, we concluded: • 110V * Current = 100W, so that • Current = 100W / 110V = (10/11)A • We need a more convenient way to represent a circuit than a verbal description.
Introducing Circuit Elements • Since we need a more convenient way to represent a circuit than a verbal description, we will introduce simple models for a few common circuit elements. • Please keep in mind that the actual devices we are modeling are considerably more complex than these models. However, much of the time, we don’t need to worry about the full complexity and a simple model gives us results that are “close enough.” • One of the challenges in becoming an engineer is gaining enough experience to be able to say what constitutes “close enough” for a given situation.
Voltage Supply • A common voltage source is a chemical battery. These are examples of direct current (dc) power supplies. • A dc voltage supply operates by giving each electron which flows through it a fixed amount of energy. (e.g. fixed voltage = fixed energy per electron) dc Voltage Source Energy per electron is increased by a fixed amount as current passes from the “-” to “+” end. Current may flow either direction (source or sink)
Batteries • A common example of a dc voltage supply is a battery. They have a different symbol than general-purpose supplies. • Batteries use a chemical reaction to provide energy to electrons passing through the battery. • A common symbol for a battery appears below:
Current Supply • A dc current supply operates by forcing a fixed current (a fixed number of electrons per second) through the source in the indicated direction. • Current supplies are somewhat less common than voltage supplies. dc Current Source Current magnitude leaving source is fixed. Voltage across source is adjusted to allow this to happen.
Resistance • Resistance is the property which describes how easy (or difficult) it is to cause electrons to move (current) in a material when electrical energy (voltage) is applied. Resistance is measured in units called Ohms with symbol “”. • 1 Ohm = 1 Volt/Ampere or 1 = 1V/A • In some materials, such as most metals, it is relatively easy to cause electrons to move. These materials have low resistance and are commonly called conductors. • In other materials, such as rubber or plastic, it is relatively difficult to cause electrons to move. These materials have high resistance and are commonly called insulators. • A few materials, such as silicon, are conductors under some circumstances and insulators under other circumstances. These are called semiconductors.
Impedance and Ohm’s Law • Impedance is the electrical property for a device which describes how voltage and current interact in that device. • Ohm’s Law states that the ratio of voltage (V) to current (I) for any device is its impedance (Z) so: • Ohm’s Law: V/I = Z • Also written as V=IZ or V/Z=I • From the V/I=Z form, it should be obvious that impedance is in units of Volts/Ampere or Ohms so resistance must be a form of impedance.
Resistor • The simplest electrical device model is the resistor. This is a device whose impedance is simply its resistance to electrical flow. • In this case resistance (R) is equivalent to impedance (Z). • The circuit symbol for a resistor is: IR + In general V=IZ For a resistor Z=R So VR=IRR R VR -
Back to the light bulb … • Electrically, an incandescent light bulb can often be modeled as a simple resistance. • The 100W light bulb is rated to draw that much power at the standard 110V of a wall outlet. It would draw different amounts of power with different voltages applied. We want to know how it would react. • We said at 110V, a 100W bulb, modeled as a resistor, draws (10/11)A of current • Ohm’s Law says V/I=R so R=110V/((10/11)A) = 121 • So, if we were to plug the light into a 220V outlet (like a clothes dryer uses), how much current would it draw (before it dies)? • V=IR or I=V/R so I = 220V/121 = 1.8181818…A • How much power does the 100W@110V bulb draw at 220V? • P=V*I so P=220V * 1.81818…A = 400W so double the voltage means quadruple the power!?!
Another note on Power • We said P=V*I for simple resistances • Ohm’s law says V=IR which also means I=V/R • So, by substitution: • P = V*I = (IR) * I = I2*R • P = V*I = V * (V/R) = V2/R • So, yes, Power at 2V is (2V) 2/R = 4V2/R • Power at (1/2)V is ((1/2)V) 2/R = (1/4)(V2/R) • Remember, P = V*I = I2*R = V2/R
“Standard” Resistor Values • For resistors accurate to 10% (or more) of their rated value (common, inexpensive resistors) the rated values begin with the following two significant digit prefixes: • 10, 12, 15, 18, 22, 27, 33, 39, 47, 56, 68, 82 • These prefixes are available in decade increments • e.g. available “33” sizes are 33, 330, 3300, 33000, etc. • For 5% accuracy the prefixes are: • 10, 11, 12, 13, 15, 16, 18, 20, 22, 24, 27, 30, 33, 36, 39, 43, 47, 51, 56, 62, 68, 75, 82, 91 • For 1% (or better) accuracy the prefixes are 3 digits: • 100, 102, 105, 107, 110, 113, 115, 118, 121, 124, 127, 130, 133, 137, 140, 143, 147, 150, 154, 158, 162, 165, 169, 174, 178, 182, 187, 191, 196, 200, 205, 210, 215, 221, 226, 232, 237, 243, 249, 255, 261, 267, 274, 280, 287, 294, 301, 309, 316, 324, 332, 340, 348, 357, 365, 374, 383, 392, 402, 412, 422, 432, 442, 453, 464, 475, 487, 499, 511, 523, 536, 549, 562, 576, 590, 604, 619, 634, 649, 665, 681, 698, 715, 732, 750, 768, 787, 806, 825, 845, 866, 887, 909, 931, 953, 976
Resistor Color Codes • Many resistors are physically small so writing the value on the package becomes impractical. A standard package marking for resistors includes a set of colored bands on the package. • The order and color of the bands corresponds to the resistance value, in ohms, of the resistor. • The colors used in the resistor markings are as follows: • Black, brown, red, orange, yellow, green, blue, violet, gray, white, gold, silver • The order of the bands is important to properly reading the value. The final band is normally separated from the other bands by a space or gap. • Alternatively, the first band may be extended to “cap” one end of the resistor. • Depending on the intended application, resistors may be marked with 3-6 bands
Color Code Values • Depending on context, the color bands can represent digits, multipliers, accuracy tolerance, or temperature coefficients
Reading the Resistor Color Bands All resistor values are in units of ohms (Ω) • 3 bands (less common, ±20% tolerance implied): • 1st digit, 2nd digit, gap, multiplier • 4 bands (typical): • 1st digit, 2nd digit, multiplier, gap, tolerance • 5 bands (common for high-precision): • 1st digit, 2nd digit, 3rd digit, multiplier, gap, tolerance • 6 bands (rare): • 1st digit, 2nd digit, 3rd digit, multiplier, tolerance, gap, temperature coefficient
Example Resistor Color Codes • For R1: • Yellow=4, violet=7, black= 100, silver = 10% so • R1 = 47x 100 = 47 ± 10% • For R2: • Yellow=4, violet=7, orange= 103, gold = 5% so • R2 = 47x 103 = 47000 = 47k ± 5% • For R3: • Orange=3, white=9, red=2, blue=106, brown = 1% • R3 = 392x 106 = 392000000 = 392M ± 1% R1 R2 R3
A Simple Circuit • In the circuit below a 12V source is connected to a 120 resistor. We assume that the wires have such low resistance that we can treat them as perfect conductors that add 0 to the equation. • Since V=IZ then 12V = I(120) or I=12V/120 =0.1A I 12V 120
Sign Convention • A resistor is always a sink. It can only expend energy, never supply it. • Our sign convention is such that for devices that sink energy, positive current flows from the end of the device with more positive voltage to the end with more negative voltage. • Devices that supply energy have opposite polarity. IS IR + + R VR VS Sink Expends energy Source Supplies energy - -
A Simple Circuit - Power • Remember, Power is the product of voltage and current so P=VI • In the Source: Psupplied=(12V)(0.1A) = 1.2W • In the Resistor: Pexpended=(12V)(0.1A) = 1.2W • Overall: Psupplied= Pexpended so the Laws of Thermodynamics are satisfied 0.1A 12V 120
Power and Components • In the last example, the resistor was dissipating 1.2W of power. This power is expended as heat. • All resistors have a finite limit on how much power they can safely dissipate before the heat generated damages them. • This is the rated power of the resistor. • Most of the commonly available resistors will either be ¼W or ½W resistors. • You will need to be certain that your circuit designs do not exceed these power ratings for your components. • Resistors with higher power ratings exist, if needed for specialized designs.
Kirchoff’s Laws • Kirchoff’s Voltage Law (KVL): The sum of all voltages around any closed path must equal 0 • Kirchoff’s Current Law (KCL): The sum of all currents at a node (point connecting elements) must equal 0 • Stated another way: • If you go around a loop, the total voltage rise from going “-” to “+” on elements equals the fall going “+” to “-” across other elements. • Similarly, wherever elements meet, the currents entering the junction equal the currents leaving the junction.
Kirchoff’s Voltage Law in action • Consider the following circuit and determine the voltages across each resistor. 80 I 30V 300 120
KVL Example • We can see on the last diagram that there is only one path for current: from the 300V source, through the 80Ω, 300Ω, and 120Ω respectively, and back to the 300V source. • Since the current, labeled “I,” goes through the 80Ω resistor, the voltage across the 80Ω, which we will call V80, must be: V80 =I* 80Ω • Similarly for the 300Ω and 120Ω resistors, V300 =I* 300Ω and V120 =I* 120Ω • We need to be careful to make certain that we choose the correct polarity for V80, V300, and V120 • The next slide shows the correct voltage polarities based on the assumed direction of “I”
Kirchoff’s Voltage Law example • Label the voltages with the correct polarity for the given current • Pick a starting point 80 I V80 30V V300 300 120 V120
KVL example • Beginning at the specified starting point, to write a KVL equation we can either traverse the loop clockwise or counter-clockwise. • Clockwise: • +300V – V80 – V300 – V120 = 0 • Counter-clockwise: • V120 + V300 + V80 – 300V = 0 • It should be clear that these two equations are functionally equivalent and may also be written as: • V120 + V300 + V80 = 300V
KVL example • V120 + V300 + V80 = 300V • We know all of the resistor voltages in terms of “I” • I*120Ω + I*300Ω + I*80Ω = 300V • I*(120Ω + 300Ω + 80Ω) = 300V • I = 300V/(120Ω + 300Ω + 80Ω) = 300V/500Ω = 0.6A • V120 = I*120Ω = 0.6A * 120Ω = 72V • V300 = I*300Ω = 0.6A * 300Ω = 180V • V80 = I*80Ω = 0.6A * 80Ω = 48V • Confirmation: 72V + 180V + 48V = 300V
KVL example • We found that I = 0.6A and • V120 = 72V, V300 = 180V, V80 = 48V • So to find power dissipated in the resistors: • P120 = I* V120 = 0.6A*72V = 43.2W • P300 = I* V300 = 0.6A*180V = 108W • P80 = I* V80 = 0.6A*48V = 28.8W • The power generated by the source is: • Psource = I* 300 = 0.6A*300V = 180W • For confirmation: • 43.2W +108W + 28.8W = 180W dissipated • 180W generated = 180W dissipated
Kirchoff’s Current Law in action • Consider the following circuit and determine the current through each resistor. IS I80 I120 I300 120V 80Ω 120Ω 300Ω V300 V120 V80
Kirchoff’s Current Law Example • We can see on the last diagram that the 120V voltage source is effectively directly connected across each of the 80Ω, 300Ω, and 120Ω resistors respectively. • Unlike the KVL example, the currents in the resistors are not shared. • The last slide shows the correct current polarities based on the given direction of the voltage source.
KCL Example • Since we know that • V120 = V300 = V80 = 120V, • we can find the resistor currents easily. • I120 = V120/120Ω = 120V/120Ω = 1A • I80 = V80/80Ω = 120V/80Ω = 1.5A • I300 = V300/300Ω = 120V/300Ω = 0.4A • Now, we use KCL to find the source current IS
Kirchoff’s Current Law in action • Determine all of the points where elements connect. These are called nodes. IS I1 I2 I3 120V 80Ω 120Ω 300Ω V300 V120 V80
KCL example • At any node, KCL states that the current entering the node is equal to the current leaving the node. • Consider the top node of the circuit. • IS is entering the top node. • I120, I80, and I300 are exiting the top node. • Therefore • IS = I120 + I80 + I300 = 1A + 1.5A + 0.4A = 2.9A
KCL example • So to find power dissipated in the resistors: • P120 = I120* V120 = 1A * 120V = 120W • P300 = I300* V300 = 0.4A*120V = 48W • P80 = I80* V80 = 1.5A*120V = 180W • The power generated by the source is: • Psource = IS* 120V = 2.9A*120V = 348W • For confirmation: • 120W +48W + 180W = 348W dissipated • 348W generated = 348W dissipated
Meters • Picured on the next slide is an inexpensive multimeter from Harbor Freight Tools (approx $5-$7) • This meter can measure voltage, current, and impedance.
V + - V Voltmeter • A voltmeter is used to measure voltage which is potential energy difference between two points. • This means that voltage is always measured as the difference between two points. • Two common voltmeter symbols appear below
V + - Using a Voltmeter • Because a voltmeter measures the voltage difference across an element (or multiple elements), it is easy to use with an existing circuit. For example, to measure V300: 80 I V80 30V V300 300 120 V120
A A Ammeter • An ammeter is used to measure current flowing through a branch of a circuit. • The current to be measured must flow through the ammeter. • Two common ammeter symbols appear below
Using an Ammeter • Because an ammeter measures the current flowing through it, circuits must be altered to include the ammeter. This makes using an ammeter less convenient than using a voltmeter for most applications. 80 I V80 30V V300 300 A 120 V120
Ω Ohmmeter • An ohmmeter is used to measure resistance in an element. • The element whose resistance is to be measured must be unconnected to any other elements, especially power sources. • A common ohmmeter symbol appears below
Ω Using an Ohmmeter • An ohmmeter is used to measure resistance in an unconnected element. • The only appropriate ohmmeter circuit appears below
Simplifying Circuits • In complex circuits, we are often only looking of a small number of parameters (voltages or currents). • While we are looking for these parameters, we need only be concerned with the net effect of all of the other components rather than their individual effects. • We have already seen the two most common cases where we can combine.
Example Circuit 1 - Series • In the circuit below, all of the resistors share exactly the same current flowing through them. • Components that share the exact same current are said to be in series IS R1 R2 VS R3 R5 R4
Example Circuit 1 - Series • Since the resistors share the same current, we can say: • VS=IS*R1+IS*R2+IS*R3+IS*R4+IS*R5 • So, VS=IS*(R1+R2+R3+R4+R5) • The source sees VS=IS*REQ so … • REQ=R1+R2+R3+R4+R5 IS R1 R2 VS R3 R5 R4
Series Resistance • Remember, for resistances to be in series, they must share the exact same current. • In general, for N resistances in series …
Example Circuit 2 - Parallel • In the circuit below, all of the resistors share exactly the same voltage across them. • Components that share the exact same voltage (i.e. endpoints) are said to be in parallel IS VS R1 R2 R3 R4 R5