Download

1 / 73
730 likes | 748 Views
Learn about the layout, hardware, LCD display, and advanced features of Allworx VoIP phones. Understand voicemail, call handling, transfers, conferences, and more.

E N D
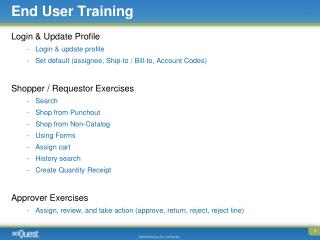
Agenda • Overview of Phone Layout, Hardware and LCD Display. • Phone Diagram, Stand & Hook Adjust, LCD Display, Directory • Using Your Allworx Phone: Commonly Used Feature Keys • Messages, Intercom, Conference, Transfer, Park, Speaker, Hold • Soft Keys • Config, Calls, Redial, Presence • Voice Mail • Accessing VM, Recording Greetings, Shortcuts
Adjusting the Position of the phone Base stands adjust to 3 different positions
Adjusting the “Hook” of the phone Rotate with a key or a coin to adjust
Idle Phone LCD Display Idle Phone • Softkeys on an Idle phone include: CONFIG, CALLS, REDIAL and PRESENCE. • Idle softkeys will be covered in more detail in section III of this presentation.
Off-Hook Phone LCD Display When Off-Hook • Softkeys CONFIG changes to SPDIAL and the PRESENCE changes to PHONEBK (extension directory). • Other examples of how softkeys change will be noted throughout this presentation.
Phone Directory Your company list of user extensions, alphabetically by last name. • Press Up/Down Arrows to display the company directory • Use keypad to dial the first letter of the person’s last name or scroll using down arrow to the desired entry. • Press Select (✔) to place a call to that user. • To access directory when the phone is off-hook, press the PHONEBK softkey.
Outgoing calls To place a call • External – Lift the handset or press the “Speaker” key, dial “8” plus the outside number. *For long distance, you must dial a “1” • Internal – Dial the person’s extension number, (or press assigned BLF key). The phone will ring until answered or forward to voicemail.
Incoming Calls • Caller ID • Visual Ring Indicator • SILENT • IGNORE • To answer a call - Pick up the handset. Or press the Speakerphone for hands free, or the blinking Line or Call Appearance button.
Messages • Press the MESSAGES key accesses Voice Mail. • The MESSAGES key will be lit red when you have a voice mail message.
Intercom • Press the INTERCOM key and dial the extension of the party you wish to call. • The receiving party’s speakerphone will open, giving a warning tone beforehand. Press INTERCOM or Speaker button to end call. • The call is connected when the LCD screen displays active call. • At any time, pick up handset to cancel speakerphone *Intercom will not break through an active call. If the receiving party is on a call, they will have the option to IGNORE or ACCEPT. If IGNORE - the call will go to voicemail.
3-Way Conference • While on an active call, press the CONF key. • Press another line key and dial the next extension or external number you wish to add to the conference. • Press CONF again to connect all parties. **Note: If the originator of the call hangs up, all parties will be disconnected.
Transfer • With the caller on the line, press the TRANSFER button located above the keypad. • Dial the extension number where you wish to transfer the call (or the BLF key of the extension). • Press TRANSFER again. (Commonly referred to as a “blind” or unannounced transfer.) • OR wait until answered, announce you are transferring a call, then press TRANSFER. (Referred to as a “warm” or announced transfer).
Transfer Cont’d *If you are using the “announced transfer” process, and the party to whom you are sending the transfer cannot accept the call or the party does not answer, DO NOT HANG UP. • Press the flashing line key where the caller is on hold. • Once you have resumed the call, you are able to perform another transfer or transfer to voicemail.
Transferring Directly to Voicemail • Press the TRANSFER button. • Press VMAILsoftkey on the LCD screen. • Dial the extension number where you wish to send the call or press the BLF (Busy Lamp Field) key for the user’s voicemail where you wish to transfer the caller. • Hang up. The call goes immediately to the voice mail of the extension you have dialed.
Release • Press the RELEASE button to end your current call and start a new call. (You will hear new dialtone immediately for the new call.) • Or press RELEASE if you misdial when making a call. Release cancels your current attempt and gives new dial tone to let you start over.
Park PARK is way to place a call on hold, when it needs to be retrieved from another handset. • With a call on the line, press the PARK key. • Display will show PARK ORBIT code where the call can be retrieved (i.e. *701). • The call can now be picked up from any phone by picking up a handset and dialing the park orbit code.
Park Log To see a list of parked calls, press the PARK key.
Info • Press INFO and then press any feature key or BLF key, and the screen will tell you what is behind that key. *Example using the PARK key.
Speaker Phone • Full duplex speaker phone, allowing both parties to speak simultaneously, resulting in a more normal conversation.
Mute/DND For DND (Do Not Disturb) • Press the MUTE/DND to place your handset in “Do Not Disturb” status. The MUTE/DND lamp will turn amber gold in color. • When set is in DND, all calls will be sent directly to your voicemail. • Press the key again to cancel DND.
Mute/DND cont’d For Mute • While on an active call, press the MUTE/DND button to turn off your handset, speakerphone or headset. • The lamp on the MUTE/DND button will be REDwhen the phone is muted. • Press the key again to UN-MUTE your line.
Hold • Press the HOLD button located below the number pad (button will blink red once). • Place the handset on the hook. • To take the call off HOLD, pick up the handset or press the speaker button for hands free and press the flashing key on hold. • Caller ID of call picked up will reappear on the display.
Call Forwarding (no button) Call Forward (forward your incoming calls to another extension) • Dial *45 + the extension number where you want to send your calls. • Dial *450 to Cancel Forwarding . *For forwarding to an outside line, such as cell phone, see your Company Administrator.
Call Pickup (no button) Call Pickup – (If you hear a ringing phone and want to answer it at your set.) • Dial *7 plus the extension number of the ringing phone. • Caller ID follows the call to the set that performed the call pickup.
Paging • Paging only through Allworx phone sets. • Dial *460, speakers will open, make your announcement
Softkeys Soft keys appear at the bottom of the LCD screen & change depending on what feature is available. Press the corresponding black button below the screen for the soft key you wish to access. • CONFIG – Set preferences, Personal Speed Dials, etc • CALLS – In and Outbound Calls • REDIAL – Last number redial • PRESNCE – Changes presence settings and call routings
CONFIG CONFIG contains setting options such as: • Speed dials • LCD Settings and Ringtones (in Preferences)
Personal Speed Dials Personal Speed Dials – (Stores up to 10 numbers) • Press the “Config” soft key. Locate Personal Speed Dial option (will be the first menu item.) Press Select (✔).
Personal Speed Dial Cont’d • Use up and down arrow keys to choose desired number to store on speed dial choices of 0-9.
Personal Speed Dial Cont’d • Use the keypad to enter the phone number or extension number you want to store. Press Select (✔).
Personal Speed Dial Cont’d • Use the keypad to enter a name for the speed dial. Press Select (✔). *Note • To backspace, press the down arrow. • To place a space between characters, press the #.
Personal Speed Dial Cont’d Using a Stored Personal Speed Dial – • Pick up handset or press Speaker. Press the SPDIAL soft key. • Choose the desired speed dial number on the keypad (0-9). The number you stored in that selection will be dialed.
Preferences Contrast, Brightness, Ringtones To adjust contrast or brightness of your LCD screen, press “CONFIG” softkey.
Preferences Use the Down arrow key to highlight “Preferences”, then press Select (✔)
LCD Settings Highlight LCD settings, press Select (✔)