Download

1 / 2
20 likes | 31 Views
Are you looking the steps for configuration settings of 192.168.1.1 IP address? Router Login assists you with simple and easy configuration instructions for your router. For more information https://mynet-page.info/

E N D
Steps for Configuration Settings For 192.168.1.1 Login IP Address Nowadays, both the internet and intranet have become the lifeline of the home and offices based on networks. Also, computers or laptops and smart devices are connected with one another with the internet using a network. 192.168.1.1 admin router is the IP address used for networking. Routers are mainly used to connect different devices to the internet within a network. These routers have their unique IP address i.e., 192.168.1.1 login. With 192.168.1.1 admin, it becomes so difficult to connect and share the data between various devices even if they are located next to each other. It is also important to have knowledge about the router and networking settings. This IP address is mainly used for broadband home connections. Simple Steps for Configuration Settings of Router Using 192.168.1.1 Login IP Address Configuration of the router is a simple task in which most of the users will fail eventually to do so. The router will only work well and smoothly if setup and configuration settings are done in a proper manner. Look at the below steps to know the instructions for configuration of the router using 192.168.1.1 admin router login. This IP address helps in the network settings of the router according to the requirements. Step 1: Unbox the router and check other facilitated items Newly purchased routers come in packaging material boxes with cables and a user manual. It is essential to check all the items in the box and note down some important details associated with the modem at the backside.
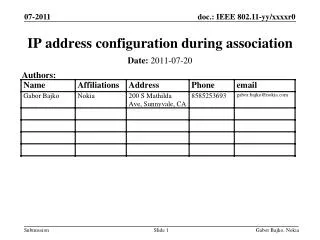
Step 2: Establish all the connections properly The next important step is to identify all the ports which are given in the router device. There are 4 LAN ports and one internet port is present in a router device. You need to connect the router to the broadband modem using an Ethernet cable. Also, connect the modem to the internet port of the router. Every router device is assigned with a private IP address for an area such as home or office. Step 3: Connect Router to Computer Connect the LAN port of the router to the computer using an Ethernet cable. It enables the network for computer devices. You can also connect the router to the laptop as the wireless network name and enter the default password given on the router’s label. Step 4: Launch a web browser and enter 192.168.1.1 login Log in to the default router’s web page to change and customize the settings of the router. Open an updated web browser and enter 192.168.1.1 login. After this, you will be navigated to the login page of the router. Step 5: Enter Username and Password Once you reach the login page of the router after entering the 192.168.1.1 login in the web browser, enter the default username and password set by the router’s manufacturer. Once you logged in to your router successfully, you can make the customized settings based on your needs and change the settings. Make sure to log out from the 192.168.1.1 login admin after making all the configuration changes. Step 6: Connect Other Devices with Computer After configuration of your route using 192.168.1.1 login, you can create the wireless network for other devices such as WiFi. Connect to the wireless network by using the password given by the internet service provider. Once you connect other devices to the router, you can enjoy a high-speed internet connection on it. It also helps you to set up your router settings. At last, save all the settings and reboot your device. With these above-written steps, you are able to configure your router through the 192.168.1.1 admin router without any hassle. In case you are facing difficulty in configuration settings for the 192.168.1.1 login IP Address then you can take technical expert advice for better results.

![[IP address configuration BCP]](https://cdn1.slideserve.com/2707721/ip-address-configuration-bcp-dt.jpg)