https://www.letsnurture.com/blog/how-to-setup-yajra-data-table-in-laravel.html
70 likes | 71 Views
How to Setup yajra data table in Laravel

https://www.letsnurture.com/blog/how-to-setup-yajra-data-table-in-laravel.html
E N D
Presentation Transcript
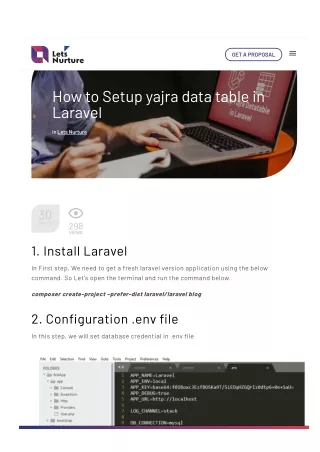
GET A PROPOSAL How to Setup yajra data table in Laravel In Lets Nurture 298 VIEWS 30 Dec. 20 1. Install Laravel In First step, We need to get a fresh laravel version application using the below command. So Let’s open the terminal and run the command below. composer create-project –prefer-dist laravel/laravel blog 2. Con몭guration .env 몭le In this step, we will set database credential in .env 몭le
We use cookies to give you tailored experiences on our website.We use cookies to give you tailored experiences on our website. Okay 3. Run Migration We need to do the migration of tables using below command: php artisan migrate This command will create tables in our database. 4. Install Yajra Datatable Package in Laravel composer require yajra/laravel-datatables-oracle After successfully Install Yajra Datatable Packages, open con몭g/app.php 몭le and add service provider and alias. con몭g/app.php 'providers' => [ Yajra\Datatables\DatatablesServiceProvider::class, Yajra\DataTables\HtmlServiceProvider::class ], 'aliases' => [ 'Datatables' => Yajra\Datatables\Facades\Datatables::class, ] After set providers and aliases then publish vendor run by the following command. php artisan vendor:publish 5. Add Fake Records We need to add some records in the database. Use the below command for adding fake records in your database. php artisan tinker After running the php artisan tinker. Use the below command. This command will add 150 fake records in your database factory(App\User::class, 150)‐>create();
6. Create Route, Controller & Blade View Add Route Now we will add routes in web.php 몭le as like below. Open routes/web.php 몭le Route::get('users', 'UsersController@index'); Route::get('users‐list', 'UsersController@usersList'); Create Controller We need to create a new controller UsersController that will manage two methods. lets use this below command and create a Controller. php artisan make:controller UsersController Now open the controller let’s go to the => app/Http/Controllers/UsersController.php. Put the below Code <?php namespace App\Http\Controllers; use Illuminate\Http\Request; use Redirect,Response,DB,Config; use Datatables; class UsersController extends Controller { public function index() { return view('users'); } public function usersList() { $users = DB::table('users')‐>select('*'); return datatables()‐>of($users) ‐>make(true); } } Create Blade View Next, create users.blade.php 몭le in resources/views/ folder and copy paste the following code. <!DOCTYPE html> <html lang="en">
<head> <title>Laravel DataTable ‐ Tuts Make</title> <link href="https://maxcdn.bootstrapcdn.com/bootstrap/3.3.6/css/bootstrap.min.css" rel="s tylesheet"> <link href="https://cdn.datatables.net/1.10.16/css/jquery.dataTables.min.css" rel="style sheet"> <script src="http://ajax.googleapis.com/ajax/libs/jquery/1.9.1/jquery.js"></script> <script src="https://maxcdn.bootstrapcdn.com/bootstrap/3.3.6/js/bootstrap.min.js"></scrip t> <script src="https://cdn.datatables.net/1.10.16/js/jquery.dataTables.min.js"></script> </head> <body> <div class="container"> <h2>Laravel DataTable ‐ Tuts Make</h2> <table class="table table‐bordered" id="laravel_datatable"> <thead> <tr> <th>Id</th> <th>Name</th> <th>Email</th> <th>Created at</th> </tr> </thead> </table> </div> <script> $(document).ready( function () { $('#laravel_datatable').DataTable({ processing: true, serverSide: true, ajax: "{{ url('users‐list') }}", columns: [ { data: 'id', name: 'id' }, { data: 'name', name: 'name' }, { data: 'email', name: 'email' }, { data: 'created_at', name: 'created_at' } ] }); }); </script> </body> </html> Start Development Server In this step, we will use the php artisan serve command. It will start your server locally php artisan serve If you want to run the project different port so use this below command php artisan serve –port=8080 Now we are ready to run our example so run below command to quick run.
http://localhost:8000/users If you are not run php artisan server command, direct go to your browser and type the URL http://localhost/blog/public/users « Create API Rest with Laravel Passport Authentication Laundry On-Demand services: A Successful App Service You Should Consider » Sign up our Newsletter! SUBMIT Author
Author Posted by Lets Nurture C O N TACT U S Have an !dea or need help with your current business? 60 Min Free Consulting Call. Detailed Feature List. Strict NDA Policy Multiple business models supported Free Mockup & Wireframe Free MNP Access to Exclusive Digital Assets $500 Digital Gifts Name* Email* Mobile No.* (201) 555-0123 Select Project Budget* Not Sure Tell us about your requirement*
What's 20 - 5 = SUBMIT Let’s Nurture Infotech Pvt Ltd is operational in New York, Seattle, Chicago & Washington in US, Ottawa & Charlottetown, Canada ( Nurturing Technologies Pvt ltd ), London & Glasgow in UK, Singapore, Melbourne in Australia, Ahmedabad in India. © 2021 All rights reserved