Download
1 / 27
270 likes | 422 Views
Learn about density and how to calculate it. Discover the difference between high and low density and how it affects objects. Includes examples and practice problems.

E N D
Section 3.3—Density Objectives: Define and calculate density Do you want high or low density in your airbag?
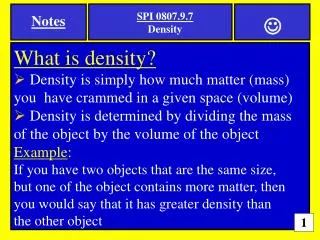
Density • Density is an indication of how heavy something is for its size. • Two grocery bags are the same size. However, a bag filled with ping pong balls feels very different from a bag filled with cans of soup.
Definition Density= the ratio of mass to volume of a sample, or D = m V Lead = high density Air = low density If you have the same size sample of both, they will feel very different!!!
m D = V Units for Density Mass In grams (g) Density In g/L , g/mL, or g/cm3 Volume In liters (L), milliliters (mL), or cubic centimeters (cm3) Density has “2 units” – a mass unit over a volume unit!
A Note About Volume • The mass of an object is easy to determine – just put it on a balance and record its mass!! • There a several ways to determine volume, however. • If the object is regular in shape, the length, width, and height of the object can be measured. Then the following formula is used to find volume: V = L x W x H • The units for volume determined this way are usually cm3.
Volume (continued) If an object does not have a regular shape, volume is generally determined by the water displacement method. The units for volume determined this way will be mL or Liter. Since 1 L = 1000 mL, you can use dimensional analysis to convert from one to the other.
Example 1—Solving for Density Example: What is the density of a sample with a mass of 2.50 g and a volume of 1.7 mL?
Example 1—Solving for Density D = ? m = 2.50 g V = 1.7 mL Example: What is the density of a sample with a mass of 2.50 g and a volume of 1.7 mL?
Example 2—Solving for Mass Example: What is the mass of a 2.34 mL sample with a density of 2.78 g/mL?
Example 2—Solving for Mass m = ? V = 2.34 mL D = 2.78 g/mL Example: What is the mass of a 2.34 mL sample with a density of 2.78 g/mL? × 2.34 mL 2.34 mL ×
Example 3—Solving for Volume Example: A sample is 45.4 g and has a density of 0.87 g/mL. What is the volume?
Example 3—Solving for Volume m = 45.4 g D = 0.87 g/mL V = ? Example: A sample is 45.4 g and has a density of 0.87 g/mL. What is the volume? V × × V 0.87 g/mL 0.87 g/mL
Practice Problems A rock has a mass of 5.47 g. What is the density if the volume is 7.85 mL? A sample of a liquid has a density of 1.75 g/cm3. What is the mass of the sample if it has a volume of 35.5 cm3? What is the volume of a piece of metal with a mass of 45.25 g and a density of 3.50 g/mL?
Floating Objects float when they are less dense than the substance they are in! Fewer particles in the same space = less dense More particles in the same space = More dense
Let’s Practice 1 Example: If a 22.7 g sample has a volume of 47.8 mL, will it float in water?
Let’s Practice 1 m = 22.7 g V = 47.8 mL D = ? Example: If a 22.7 g sample has a volume of 47.8 mL, will it float in water? The density of water is 1 g/mL. This sample’s density is lower. It will float.
Density Mass (g) Volume (mL) Graphing Density If we make the y-axis mass and the x-axis volume then… Then the slope equals Density!
Graphs • A line graph represents the points of intersection of data for 2 variables. • The independent variable is plotted on the x-axis and the dependent variable is on the y-axis.
Line Graphs • Because data points can be very scattered, usually a line connecting all of them cannot be drawn. • We NEVER EVER “connect the dots” on a graph in Chemistry. Example of a BAD GRAPH!!
What we do instead is draw something called a BEST-FIT line. • A line is drawn so that the same number of points fall above & below the line. The line represents an average of the points. Example of a GOOD GRAPH!!
Creating a Line Graph • Two (straight) axes are drawn on graph paper and labeled. • The x-axis represents the variable that is manipulated (changed) while the y-axis represents the variable that responds to the changes in the manipulated variable. • Each label must include the name of the variable AND the unit attached to that variable.
Creating a Line Graph • A separate scale for each axis must be selected and assigned. Do this one axis at a time. • Determine the highest value of the data. This is called the RANGE of your data. • Count the number of boxes along the axis. • Divide the range value by the number of boxes.This number represents the value that will be represented by each box. Round this number up (NEVER DOWN) if you need to, to make it a number that is easy to work with.
Then starting at 0, assign the determined scale to the axis. Make a “tic” line at the end of each box with a clear label for the appropriate value. • It may not be necessary to label every box but label enough boxes so that the scale is evident. • Repeat this process for the other axis.
Creating a Line Graph • Important Points to Note: • A “break in the scale” symbol can NEVER be used on a line graph in Chemistry. • The scale and labels must be consistent along the axis – the value of each “box” must remain the same. The scale cannot be changed as the axis is labeled. • A properly scaled axis will not have any data points that fall “off-scale”. If you find this happens, you must re-scale your axis.
Creating a Line Graph • Data points are plotted on the graph. • The values of the independent & dependent variables form ordered pairs (x,y). • The ordered pairs can be plotted on the graph from their corresponding x-axis or y-axis. Dependent Variable Y-axis (x, y) y x Independent variable X-axis
Creating a Line Graph • A “best-fit” line is drawn. • “Dot-to-dot” lines are NEVER drawn. • Remember, the data points do not need to be on the line drawn. In fact, sometimes none of the data points will actually be on the line drawn.
Interpreting a Line Graph • Calculating Slope • A straight line always has a constant slope. • 2 points ON THE LINE (NOTDATA POINTS) must be chosen: Label them as (x1, y1) & (x2, y2) • Using your scaled axes, determine the numerical values for the points as write them below the (x1, y1) & (x2, y2) • These points can be used with this formula to calculate slope: y2- y1 or Δy x2-x1Δx Note: when reporting the slope, include the units (y/x)!