1 / 6

5 Tips for Using Adhesive to Securely Install Your Tiles

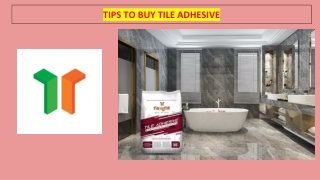
When it comes to tiling your walls, choosing the right wall tile adhesive is just the first step. Maintaining it properly is key to ensuring your tiles stay securely in place for years to come. The adhesive is what binds your tiles to the wall, and improper care can lead to cracks, peeling, or even tiles falling off. Letu2019s explore how to care for wall tile adhesive to ensure longevity and stability.<br>

Download Presentation

5 Tips for Using Adhesive to Securely Install Your Tiles

An Image/Link below is provided (as is) to download presentation Download Policy: Content on the Website is provided to you AS IS for your information and personal use and may not be sold / licensed / shared on other websites without getting consent from its author. Content is provided to you AS IS for your information and personal use only. Download presentation by click this link. While downloading, if for some reason you are not able to download a presentation, the publisher may have deleted the file from their server. During download, if you can't get a presentation, the file might be deleted by the publisher.

E N D

Presentation Transcript


  1. 5 Tips for Using Adhesive to Securely Install Your Tiles ReynoArch Construction Chemical

  2. Installing tiles can be a rewarding project, especially when you use the right materials. Tile adhesive is a crucial component in ensuring a strong and long-lasting bond between your tiles and the surface. Here’s a step-by-step guide on how to use tile adhesive for a smooth installation process.

  3. Preparing the Surface Mixing the Adhesive Before applying the tile adhesive, ensure that the surface is clean, dry, and free of dust, grease, or any other contaminants. Whether you're tiling a floor or a wall, a smooth surface will allow the adhesive to bond more effectively, ensuring better tile adhesion. Follow the manufacturer's instructions for mixing the adhesive. Typically, you’ll need to add the adhesive powder to water and stir until you achieve a smooth, lump-free consistency. Let it sit for a few minutes before using it to activate the bonding properties.

  4. Applying the Adhesive Setting the Tiles Using a notched trowel, spread the tile adhesive evenly over the surface, working in small sections. Hold the trowel at a 45-degree angle to create grooves in the adhesive, which will help the tiles stick securely. Press each tile firmly into place, slightly twisting it to ensure proper adhesion. Be sure to leave consistent grout lines between the tiles by using tile spacers.

  5. Cleaning Up After your tiles are set, wipe away any excess adhesive that may have squeezed out between the tiles using a damp sponge. Using the right tile adhesive will give you a professional finish and ensure that your tiles stay securely in place for years to come.

  6. Thank You Plot No. 420, Village Keshwana, Ricco Road, Tehsil Kotputli, Distt.Jaipur, Rajasthan (INDIA) +91 9810846953 info@reynobondindia.com https://reynoconstructionchemicals.com/

More Related