
FUN WITH COOL KIT
FUN WITH COOL KIT. Kit Purpose. Have fun assembling and programming a simple robot Includes chassis, wheels, motors, motor driver, IR sensor and arduino micro controller Batteries and breadboard not included.

FUN WITH COOL KIT
E N D
Presentation Transcript
Kit Purpose • Have fun assembling and programming a simple robot • Includes • chassis, wheels, motors, motor driver, IR sensor and arduino micro controller • Batteries and breadboard not included. • Will Program the robot to use two motors to move, and use an IR sensor to detect the environment and adjust accordingly. • You are limited only by your own imagination and tools.
STEPS READ and follow these INSTRUCTIONS. OPEN THE KIT. ASSIDE FROM THE ROBO BATTERIES AND BREADBOARD NOT INCLUDED YOU WILL NEED TO BUY AT LEAST 4xAA BATTERIES
ASSEMBLE THE ROBO, USING THE INSTRUCTIONS PROVIDED IN THE KIT. (Fairly easy 5-10min) WILL LOOK LIKE THIS
TEST THE MOTORS USING BATTERIES • DON’T WORRY POLARITY DOES NOT MATTER, YOU SHOULD SEE THE MOTOR SPIN.
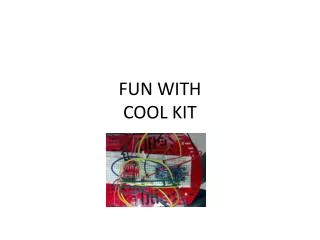
5) Electrical Connections • Connect Arduino, motor driver and motors to the breadboard. .
Program Arduino 1. Install Arduino environment at arduino.cc Downloads Tab, download Arduino 1.0.5 for your OS. 2. Connect the Arduino Board to the cpu, let it install the hardware. 3. Select the tools tab Board, Select your board 4. Tool tab Serial Port, Select your Port. 5. Upload the example program provided next pg.
Example program(will only work if you connected everything exactly as stated in the slides)after you upload, robo will go forward, then spin right, spin left, reverse, then repeats. intpwA = 5; intpwB = 6; intmotoroneAR = 7; //Right Motor //Ain1 intmotoroneAL = 4; intmotortwoBR = 8; intmotortwoBL = 9; //Left Motor intstby = 11; void setup() { pinMode(pwA, OUTPUT); pinMode(pwB, OUTPUT); pinMode(motoroneAR, OUTPUT); pinMode(motoroneAL, OUTPUT); pinMode(motortwoBR, OUTPUT); pinMode(motortwoBL, OUTPUT); pinMode(stby, OUTPUT); Serial.begin(9600); } void loop() { digitalWrite(stby, HIGH); for(inti = 0; i < 4; i++) { Serial.println(i); delay(10); • //Forward • if(i<1) • { • analogWrite(pwA,150); • analogWrite(pwB,150); • digitalWrite(motoroneAR, LOW); //If AR is high, make sure AL is Low. = Clockwise • digitalWrite(motoroneAL, HIGH); //If AL High, AR Low = CCW. • digitalWrite(motortwoBR, LOW); //If BR is high, make sure BL is Low. = Clockwise • digitalWrite(motortwoBL, HIGH); • delay(500); • } • //right • if(i>=1 & i <2) • { • analogWrite(pwA,150); • analogWrite(pwB,150); • digitalWrite(motoroneAR, HIGH); • digitalWrite(motoroneAL, LOW); • digitalWrite(motortwoBR, LOW); • digitalWrite(motortwoBL, HIGH); • delay(500); • } • //left • if(i>=2 & i <3) • { • analogWrite(pwA,150); • analogWrite(pwB,150); • digitalWrite(motoroneAR, LOW); • digitalWrite(motoroneAL, HIGH); • digitalWrite(motortwoBR, HIGH); • digitalWrite(motortwoBL, LOW); • delay(500); • } • //reverse • if(i>=3) • { • analogWrite(pwA,150); • analogWrite(pwB,150); • digitalWrite(motoroneAR, HIGH); • digitalWrite(motoroneAL, LOW); • digitalWrite(motortwoBR, HIGH); • digitalWrite(motortwoBL, LOW); • delay(500); • } • delay(1500); • } • }